

Hey everybody! Welcome to another Inspire Me Monday! Today I have a fun little project for you that is a little non-standard but fits in a standard size envelope. Recently, I was surfing and someone created a card somewhat like this and it stuck in my head. Go figure, when I tried to get back to where that idea was, I couldn't find it, so these dimensions and how I created my card are probably a wee bit of my own making! ;-) When I find things like this, I love sharing with a Power Poppy spin on them!
Here's a peek at the card we'll be making....

You will start with a strip of paper that measures 5-1/2" by 12". This will be your card base, so be sure to use a kind of paper with enough bulk. You'll want to score this piece along the shortest width at the 6" line.

From here, fold your piece, setting the fold along the 0" edge of your scoring device and score 4-1/4" to the right side of the fold.

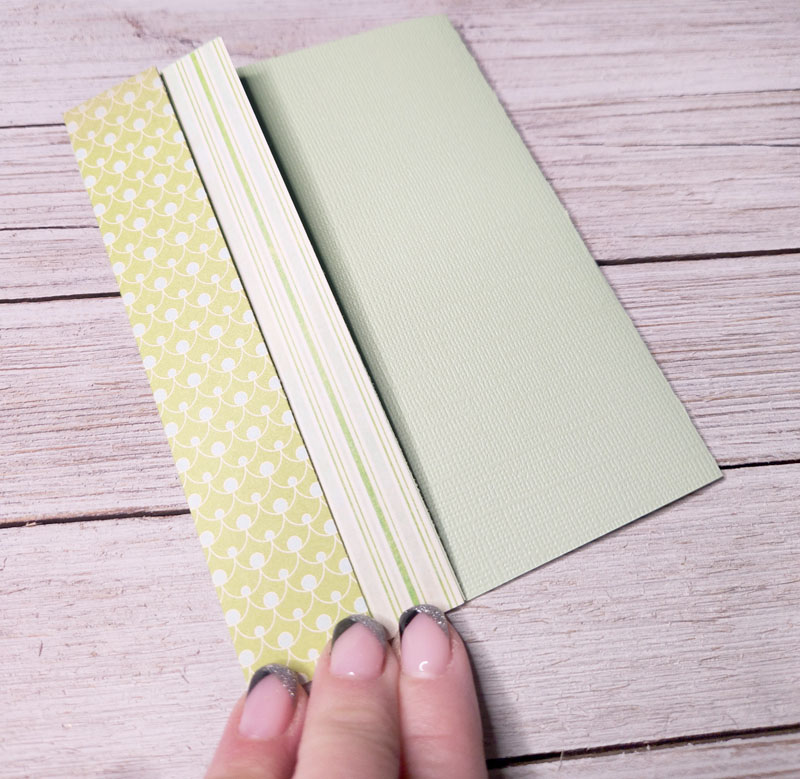
Now, flip your card 180 degrees so that the piece you just scored is now on your left-hand side. Now, again, to the right side of the fold, score at the 3-1/2" line. Once you've folded these pieces toward the middle of your card front, you'll have something that looks like this below. The inner fold is a valley fold and the outer fold is a mountain fold.

I didn't want these flaps to protrude so much into my card, so I trimmed both flaps so that they were an inch in width. Now they lay nicely and don't take up too much of my card front. You'll see why this is important in a minute!

From here, I cut two pieces of coordinating card stock to measure 1" by 5-1/2".

Before I finished the front, I wanted to make two pieces to serve as the inside of my card. I opened the digital stamp set Forget-Me-Not Heart in my Photoshop Elements and then changed the color of it to match my green paper. These pieces measure 3-3/4" by 5" and then 3" by 5". I wanted to have a nice amount of border around these pieces. The sentiment is from the polymer set called Chrysanthemum XL, which is retired.

Now, with any folds like this, you know it's hard to close your card, so, that's why we create those fun belly bands on cards -- to keep everything in its place! :-)
And... that's what I did. I took a piece of paper that was 12" by 1-1/2" and folded it around my card, trimming off the excess and securing it in the back with double-sided tape. Some people choose to score this piece but I have never had any luck doing this with the proper measurements. My band is either too big or too small forcing bad words to come out of my mouth. So, instead, I lightly fold the strip around my card and follow up with a bone folder to make that edge crisp!

From there, I printed off another Forget-Me-Not Heart, making it a wee bit smaller than the ones I used on the inside. Since I was using the blank heart portion of this set, I wanted a different sentiment and chose the one from the Camellias digital set "Life is Better with Friends." I colored it up with Copic markers and chose shades that would match my cardstock. My blue is a little bolder than the colors on my paper but I love how "cheery" it is!

And, here's a little close-up for you! I did add a wee bit of glitter to the insides of my flowers. I can't resist. I just can't resist glitter!

And that, my friends, is it! A fun little fold that keeps the person you give your card to guessing a wee bit! Not to mention, it's super fun and extra easy to make! If you end up making a version of this, please include a link in the comments! I'd love to see how yours turned out!
Have a fun and creative week!

Thanks for the tutorial Julie. I have not seen this lovely fold design before. Great finished design!
ReplyDeleteFirst I want to wish Marcella and The Bloom Brigade a Very Happy, Healthy and Creative New Year. Thank you all so much for past years stunning inspiration, posts and tutorials on this blog and Marcella for her stunning designed stamps.
ReplyDeleteAlthough I have missed a lot due to health problems, I always enjoy the posts.
What an awesome card design Julie, I have never seen this before, totally love it. I love the look of a belly band but often it's just to much on a card, this design is great for it. Thank you so much for the tutorial and inspiration.
Have a wonderful day.
Henriette, I sure hope you're on the mend and are in better health. 😊💕
DeleteThank you so much Anonymous for your lovely message unfortunately I'm still not on the mend.
ReplyDelete