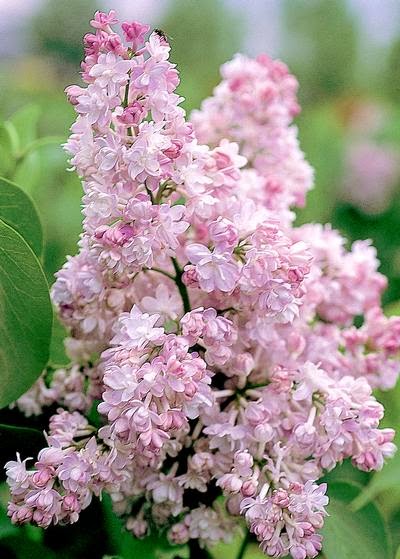
Showing posts with label French Lilac. Show all posts

Tuesday

Creative Confetti: Quick Color!


Hello all! Are you ready for a fun and speedy challenge this week? I will give you a clue, if you checked in yesterday to my Inspire Me Monday, you might already have an idea what this week's challenge entails!


HOW TO PLAY: Choose a design, technique or layout that adds a bit of quick color to your creation. This is not the week to spend hours upon hours coloring. Show us the ways you add a quick splash of color!

Need a little inspiration? Of course, my tutorial HERE yesterday is a great place to start, but that's not the only way you can take part in this challenge! Here are some other ideas below to spark a little creativity!


On to my creations! 


If you click over HERE, you'll see a step-by-step on how I did this but I will give you a hint! I used stencil brushes and then, just dabbing them in the ink, and then dabbing on the paper to give my images a quick splash of color! For both cards, I used Memento Bamboo leaves to stamp my image for a softer than black base. I used the stamp sets Simply Camellias and then the clear set (retired) Lilac Time. This image is available in digital form though in the set French Lilac.

So, now it's your turn! Use a fun technique to add quick color to your card, then when you're done, enter your creation using the linky below. Every link is one more shot at a $25 gift code to the Power Poppy Shop! 

Before we go, with a new month comes a brand new winner! After all the names were thrown into the virtual hat from our April Creative Confetti Challenge, Random.org drew the number...


And that means the winner is.....

* * * * ESSIE of ES Cards! * * * *

Woot Woot! Essie, all you need to to do claim your prize is to email us at bloom@powerpoppy.com and Marcy will get your gift code right to you! With the sale still underway, your winnings have a little extra buying power! ;-) 

Before we go, you have to see Essie's beautiful creation! 


Essie used Power Poppy's digital stamp called Pansies and in her Instagram post she said, "Power Poppy helps me love flowers even when I am (stuck) indoors!" We agree Essie! But with spring here, that shouldn't be the case for long! As you can see by scrolling through Marcella's IG feed, it's good medicine to be out in the midst of all those spring flowers! Click HERE and you'll see what I mean!  

Well folks, thanks so much for stopping by! I hope the sun is shining in your neck of the woods or, at the very least, in your hearts! 

Happy creating!


You are invited to the Inlinkz link party!
Click here to enter

Monday

Inspire Me Monday: Just a touch of color

Hi all! Happy Monday! I have a quick little tutorial for you today that is super fun and super quick with, I think, dreamy results! Working full time, I don't often have hours to color. While I love, love, love it and enjoy every time I can spend in my crafting space coloring, it's not something I can do often. I have made a huge promise to myself to send every card I make and make a point to create for those special occasions. So, how can you create a card in a jiffy that's special with a burst of color? Why not try stippling color! You're about to see what I mean!

WHAT YOU WILL NEED:

  • Two shades of dye-based ink for each area you would like to color
  • Small stipple brushes for each color family
  • Water Brush
  • Stamp set of choice


I started by stamping the image from the set Simply Camelias in Bamboo Leaves Memento ink. It's a nice crisp color but not overwhelming like the color black might be with this technique.


To start, I grabbed one of my small stipple brushes and the Bamboo Leaves ink pad and started to tamp down color. I dabbed on the color, refreshing my brush with ink after every 4th or 5th touch. I knew when the color started to really fade, it was time to add more ink! You can see below that I loaded color at the center veins of each leaf. After I was done with the Bamboo Leaves color, I added more green using New Sprout Memento ink.


I then went to the center of the flowers using Angel Pink Memento Ink...


From there, I knew the stems would remain colorless unless I decided to color them another way. So, I grabbed my water brush and, using the ink on the lid, picked up the color with a water brush.


... and painted up the stems! I love how doing this gives it a soft look in the end.


Once I was done with this step, I really thought the centers of my flowers could be a little bolder, so I added Memento Rose Bud ink to the centers...


I think the result is a little dreamy color! Before I layered up my creation, I did load up my water brush with a really wet brush, picked up more of the Bamboo Leaves ink from my ink pad lid, and then flicked on additional color around my image for a fun effect. I accented with some sequins and added a sentiment, also from the Simpy Camellias stamp set. 


Just to show how fun this technique can be with different stamp sets, I used Power Poppy's lilac branch from the retired Lilac Time stamp set. Now, this clear set may be retired but you can get this same effect using the digital stamp set. I would just convert the image to a light grey or light green like I used. The digital version of this set is called French Lilac and... it's on sale right now!


For the flowers, you can see that I used Lulu Lavender, Sweet Plum and then the same greens -- Bamboo Leaves and New Sprout -- for the leaves. That little ladybug was super easy. I just dabbed on some color from my Rose Bud ink pad. For the ink splotches added to the background, I used Lulu Lavender.


And, if you look real close, you can see the little dabs of glitter glue that I added to the centers of the flowers just for a little extra pizazz!


And that, my friends, is it -- a quick and easy way to add color in a jiffy! I think Marcella's illustrations are so beautiful, this soft use just shows them off all the more!

Thanks so much for stopping by! I'll be back again tomorrow to usher in another edition of our Creative Confetti Challenge! So, swing by and see what I have in store!


Friday

Bloomie Friday and..... A WEEKEND STAMP STEAL!


Well hello there Power Poppy fans, this time of year is my absolute favorite because in a wee bit, the flowers that I see above will be sprouting in my back yard and I truly feel there is nothing like the smell of lilacs! It's glorious! That's why today's post is a super special treat! Why? Because lilacs are taking center stage for our latest Weekend Stamp Steal! All you need to do is take a trip over to the Power Poppy Shop to check it all out!


Shop now through Monday at midnight central, you can nab these sweet-smelling blossoms and use them to create with reckless abandon!


Lilac Time clear stamp set

An old fashioned flower gets a fun and fabulous update in our Lilac Time clear polymer stamp set! You’ll find yourself turning to this set to give any project an air of relaxation and joy. The Lilac vignette has a vintage pitcher, a good book overflowing with lilac flowers, and citrus fruits on a handkerchief, and it colors up to be a very sweet scene indeed.


If it’s a digi you prefer, we love these lush buds that you can handpick — and download in an instant.


French Lilac digital download

Inspired by one of spring’s most memorable scents, this plume of French Lilacs is ready to be brought into vivid color! French Lilacs is a digital stamp set, illustrated with love by Marcella Hawley. This lilting lilac image is simply lovely whether it’s positioned upright, sideways, OR rotated completely upsidedown, as if dangling from the tree. Accompanied by a sweet lil ladybug, just for fun, and includes the versatile “Thinking of You” sentiment.


Lilac & Lemons digital download

This digital set takes the lilac vignette with a vintage pitcher and bits of lemon and makes it one you can instantly enjoy in this digital download. Pair it with this beautifully scripted sentiment and you have a great combo to send the warmest wishes to someone who is facing a new and exciting change in life.

. . . . . . . . . . . . . . . . . . . . . . . . . . . . . . 

For inspiration, here are a few of our Bloom Brigade favorites using these images (and others too!) for beautiful, soothing cards...


Loved seeing you here today for our Stamp Steal and Bloom Brigade Parade! Be sure to come back and see us soon!

~Julie 


Sunday

A glimpse of April’s release - today!

Well, hello there! First of all, I want to say thank you to everyone for the wonderful notes you’ve sent and comments you’ve left wishing Power Poppy a Happy Birthday, and for participating in the treasure hunt-surprise party thrown by the Bloom Brigade. (It’s not too late to get in on it, and you might win $100 gift certificate in our store - click here!) I continue to marvel at the number of folks we are touching with our message and our stamp designs, and who in turn touch more folks with the cards they make!

It’s a really good feeling, and I do so appreciate you all sharing your happy vibes with us!!

OK - I have the suspicious many of you are awaiting what we have in store for you with our April release. I let you in on a little sneaky peek in the e-newsletter a few weeks ago...


Can you see the frothy blooms blasting out of that pitcher (see, tucked under my camouflage of markers, papers, and ribbon)? Folks went gaga for our French Lilac digi, and that made me very happy because you know, I just wasn’t finished with Lilacs yet. In fact, I actually drew a few other images for this set and couldn’t fit them all onto a 4 x 6" stamp set canvas! They will just live in my sketchbook for a while. But really, who can get enough lilacs?

Not this lady!

As a matter of fact, I’ve tried to grow lilacs on more than one occasion, and unfortunately, I didn’t have the ample daylight sun and space that Lilacs need to thrive (most space filled up by peonies!). But, I am entranced by the inspired lilac hybrids of Father Fiala, and I would reallllly love to have that lush scent in my yard come spring. And, not to get started on too big of a tangent, but let me show you a few of the Lilacs introduced to the world by this renowned and beloved hybridizer. The lilacs shown below can be ordered by mailorder from my favorite, favorite, favorite source for unique perennials and very special trees and shrubs, the lovely family-owned Klehm’s Song Sparrow Farm and Nursery in Wisconsin.

'Little Boy Blue' by Father John Fiala, Available by mailorder from Klehm’s Song Sparrow Farm and Nursery

'Fiala’s Remembrance' by Father John Fiala, Available by mailorder from Klehm’s Song Sparrow Farm and Nursery

http://www.songsparrow.com/catalog/plantdetails.cfm?ID=547&type=WOODY,&pagetype=plantdetails
'Atheline Wilbur' by Father John Fiala. Available by mailorder from Klehm’s Song Sparrow Farm and Nursery

Here’s a quick bio of the hybridizer Father Fiala, written by Roy G. Klehm. I designed and illustrated Klehm’s catalogs for many years, and Roy told me lovely stories about the man behind these plants, so I appreciate you indulging me in sharing this part of the plant world with you! Klehm’s has more than 20 varieties of hybrid lilacs — go find more inspiration for your coloring, or even better, plant one outside your window — CLICK HERE! :)

Now I think I might have to go pick up a bouquet of these from the flower market, they are going to be all I can think about today, and they’re aren’t even close to blooming yet!

Doh! I did go on a lilac tangent. Because today’s post is about peeking at my new stamp set, isn’t it... SO! Presenting a preview of our newest clear stamp offering, one that I think you will turn to again and again to usher in spring, and share a sense of “enjoying the moment” by slowing down and breathing in the goodness of life: It’s Lilac Time!

http://powerpoppy.com/products/lilac-time

Come and see the lilac-y loveliness that our Bloom Brigade has created for today. You may find yourself needing to feel surrounded by the calming spring scent of lilacs, or maybe you’ll order up this set so you can color these up ANY TIME! Even after they finish blooming in the garden...

GO BLOOMIES, GO!

Allison Cope
Christine Okken
Cindy Lawrence
Julie Koerber
Kathy Jones
Katie Sims
Leslie Miller
Stacy Morgan


We’ll see you back here tomorrow... we have more to share and I’m going to tell you now, I’m trying to make it really hard for you to resist any of these sets. I put my heart into each of them! (It’s my way.) Have a spectacular day!

Monday

Inspire Me Monday: Fading Lilacs with simple digital effects


Hello Friends!  It’s Christine here bringing you another Inspire Me Monday tutorial. Today I’m going to show you that you can do great creative effects with digital images even with simple programs like Microsoft Word.  

I don’t have Photoshop on my Mac computer, but I still enjoy working with digital images.  I thought I’d play around with making foreground and background effects in Word so that you can try them too. They are quite basic effects, but it might help you if you’re a beginning in the digital image playground.  

First you’ll begin with your digital image. Here I’ve chosen our new French Lilacs digital stamp set.
  
I know these next pictures are a little small, but I wanted to also show the dropdown menus that I’ll be using so you can read the words and see the picture and then have something to refer back to when you try it on your computer.  


I’ve opened my Word program and added one of French Lilac images on the left, resizing it by left-clicking on the image and then making it smaller by dragging one of those corner points in. I’ve added a second lilac image to the right of the other lilac, making it even smaller.  I’ve also tipped my images slightly left, do you see that green dot just above the corner points of the image?  If you drag that point right or left it will rotate your image.  


Next I want to change the colour of my image on the right.  You can’t see it because of the way the screen captures the shot but, I make sure my image has those click points around it and then select Format from the top toolbar on my computer screen, and then select Picture from the smaller menu that pops up.   (please ignore the Grab toolbar on my images shown here- it’s the program I use for taking pictures of my screen - you won’t have that in Word).  In format this smaller screen you see above will pop up.  I want this image on the right to become blue.  

From here I can select Recolor from the center of the menu and then scroll down in the menu that pops up and select Accent Color Light, it will have a light blue picture beside it.  Then I can adjust the little slides below the Accent Colour Light to adjust the brightness, contrast and transparency of that lilac image.  When I get it where I like it, I move on to the next step.  


Now I want to show you that you can also soften the edges of the lilac to make it look like it’s fading into the background.  Make sure you can see those “click points” again.  From the same menu where you could change the colour you can also pick the selection on the menu that says Glow and Soft Edges.  A new menu will pop up and it you’ll see a slider that you can move to soften the edges of the blue lilac.  Pick the amount of softness that you like.  I chose 15 pt on mine.  


Now I want to drag my smaller lilac image over to the other lilac image, putting them close together, so it looks like the black and white lilac is in the foreground and the blue lilac fades into the background.  Just make sure you have those click points around your blue image, click on it from the center and move it over.  If it doesn’t want to move, you likely don’t have enough room in your margins.  You either have to Format your Document to have larger margins, or make your images smaller.  

Now your image may look just perfect the way you want it to right now, you can test print it on copy paper to see if it gives you the look you would like.  


If you’re having trouble getting you images to bleed through each other, here’s a couple of things you can try, get your click points around your image and select the Format Picture Tab in the Menu and then select Layout from the menu, you can click on these different pictures to get your image to appear like you want it to.  Remember you always have the Edit button from your top toolbar if something goes wrong, you can just “undo” the last step.   I’m by no means an expert in this, but it’s fun to play around and see what effects you can get, even in a simple program like Word.  


Here’s what the images look like once I printed them out.  I coloured up the black and white lilacs in the colours listed above, giving lots of depth and definition.  I wanted to give the blue lilacs a really soft touch, so they would sort of receed into the background, so I only coloured them with the B60 and B63 markers.  


Next I added in the colour for my leaves.  Again I used all the colours above for the black printed lilac, but then only used the G40 and YG61 for the blue lilac. 


Here’s what the finished colouring looks like.  And now I’ll make it into a card.  


I used the Grand Circles Nestabilities from Spellbinders to cut the lilacs in a large circle, cut a card base in a soft periwinkle cardstock colour, and then made a “frame” as you can see on the left with 2 circle dies to frame up my card.  


To make the frame stand out from the design  I embossed the circle.  Some of the edge of the circle didn’t fit in the embossing folder, but that was no big deal as I knew I would add my ribbon in that spot on the design.  


I popped up the frame with foam tape on the design, then added the ribbon.  


And here is the finished design!  I added the sentiment from this digi set, also printed in blue, some pearls and the polka-dot ribbon in a bow.  You can see how the blue lilac receeds into the background because it’s done with a softer effect.  I also added some pointillism dots to give it that soft ethereal feel as well.  


My encouragement to you is to go and “play” with your software and see what cool things you can do with your digital images!  The beautiful thing is, if it doesn’t work out, you can always re-start and “no paper has been harmed” until you print it!  

Have a great Monday!  

Sunday

Freshly picked NEW digital stamp set today!

Happy Sunday and Happy New Instant Garden Release Day!

We’ve teased you along with a snippet of our new digital release, and now it’s time to show it all to you, along with wonderful cards created with this set by our all-star Instant Gardeners design team. Presenting: French Lilac!

http://powerpoppy.com/products/french-lilac

Just a little background on our new monthly digital releases. We call our new program the Instant Garden. Those of you who have been following Power Poppy for a while know that every so often I would introduce digital sets, and really, ya’ll wanted a more predictable schedule for finding them in the shop, and you wanted MORE OF ’EM. Then, our clear stamp fans wanted to know that they, too, would still get their polymer fix. Ohhhh girls, we have you ALL COVERED, we’re doing the whole kit and kaboodle. Digis, clear stamps, and lots and lots of beauty, creativity, and all-around positivity from your Power Poppy HQ, the Bloom Brigade, and now joining us for the ride....


Our rockstar digital release Design Team, the Instant Gardeners, will be sharing the digital sets for the first time every 15th of the month. Come check out their blogs and enjoy the lush new French Lilac cards and creations, won’t you?

Jennifer Dove
Rhea Weigand

French Lilac is available at Power Poppy right now to purchase and start coloring, hop right into spring with this must-have digi!

ONE LAST THING before we go — the winner of this digital stamp release! Thank you soooo very much for all of the wonderful comments (well over a hundred!) and guesses as to what the new digi would be. To everyone who guessed Lilacs - GOOD JOB!!  To anyone who guessed something else, you were pretty close! hehe!! :) OK... I’ve used Random.org to randomly drawn from the comments in this blog post, and the winner of the French Lilacs set is:

CHARMAINE 


Chamaine, please drop an email to me at bloom@powerpoppy.com, and I will get you the French Lilac digital stamp set lickity split!

Au revoir, and mwwwwwwah! Sealed with a kiss (still stuck on Valentine’s Day over here.)