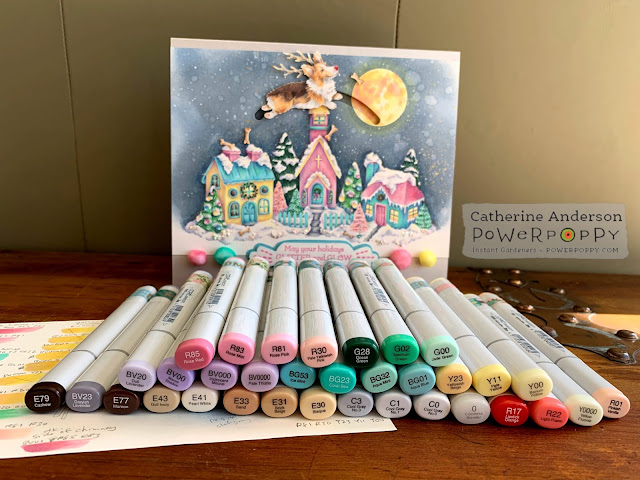
Are you all stocked up on Power Poppy stamps after our fabulous Christmas Remix? Wow, what a flurry of artistic designs that was! Sales, giveaways and surprises galore highlighted the release of spectacular new images, holiday favorites in digital format, and a glorious clear stamp set!
But there is one thing that is even more thrilling for colorers than buying new stamps...we love using them! So grab your Copic markers, colored pencils and Distress Inks. Today I am going to show you how to make your very own version of my Glittery Village slider card!
• Glittery Village digital stamp (printed at 165%)
• Christmas Corgi digital stamp (printed at 100%)
• Grandma's Snowflakes clear stamp set (for the sentiment and embroidery motif)
Hint, hint! These stamps are so adorable that you've probably already bought them, but if not, here's a little secret...Marcella currently has 20% off all holiday designs.
WOOHOO!
Two of the images for this card are digital, so if you shop fast, you can be merrily coloring within the next five minutes!
WOOHOO!
Two of the images for this card are digital, so if you shop fast, you can be merrily coloring within the next five minutes!
My finished card is 7 1/4" x 8 1/2"...a bit larger than A7, but with so much detail, you will be very glad to have a little extra room to move.
I used Cryogen Curious Metallic 89# cardstock in white. It is perfect for multimedia projects and has a subtle sparkle that makes holiday cards extra special!
I used Cryogen Curious Metallic 89# cardstock in white. It is perfect for multimedia projects and has a subtle sparkle that makes holiday cards extra special!
With a 1 5/8" circle die, cut a moon shape from "X-Press It Mask It" or some other masking film. Then mask the entire village area before applying regular Distress Ink in "Stormy Sky" and "Weathered Wood." Lightly spritz the background with water and pat dry after 20 seconds.
Before removing the mask, spatter the sky with thinned white and metallic gold acrylic paint for a shimmery mix of stars and snow!
Remove the masks.
Would you like to take your artistic coloring to new heights? Combine Copic markers with colored pencils! I learned this from Amy Shulke at Vanilla Arts and it is a match made in Heaven!
Compare the difference for yourself...the first photo is marker only:
The second photo shows the village enhanced with Prismacolor pencils:
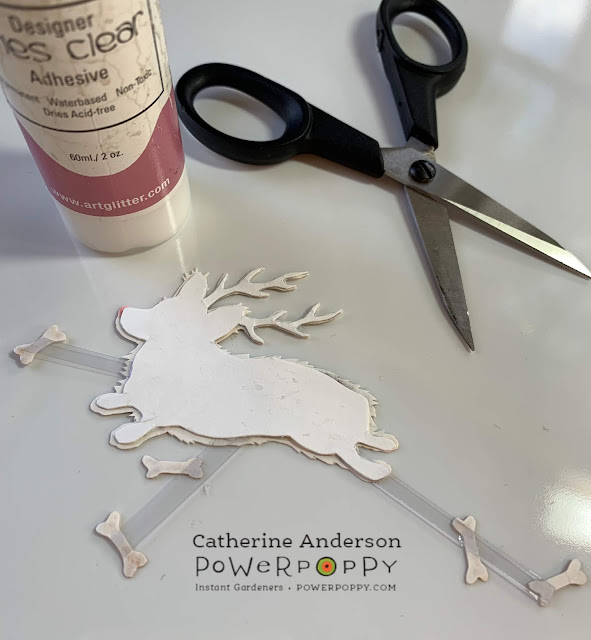
Cut three strips of clear cardstock (1/8" x 2 1/2") to act as invisible supports for the dog treats. Arrange them at various lengths, shortening strips as necessary. Once satisfied with their positioning, glue these strips to the back of your colored corgi.
Give your dog image extra stability by gluing the slightly smaller cardstock template to the back. This is especially important for those delicate antlers!
A clear quilting ruler is your new best friend for getting metal dies lined up perfectly! Attach the die with low-tack washi or painter's tape.
TIP: Always stick the tape on your jeans or sweater a few times to make it less tacky. The last thing you want is for the tape to accidentally tear your beautiful coloring!
Putz houses, the inspiration for Power Poppy's Glittery Village stamp, were little cardboard buildings purchased in dime stores during the 1940s. They were covered in glitter, so to keep mine authentic, I added a coat of clear "Wink of Stella."
By the way, this border cardstock is Cryogen Curious Metallic in "Lustre." Isn't it GORGEOUS? All the colors in that line are off the charts for beauty.
Measurements for the top and bottom borders:
Top: 1 1/4" x 8 1/2"
Bottom: 4 1/2" x 8 1/2"
Glue these to the back of the card front, making sure that you leave 3/4" of the border cardstock showing above the front of the image at the top, and 1" showing below the bottom.
NOTE: Leave space around the die-cut area in order for the slider to move effortlessly.
Measurement for the back cover of card and front cover liner:
Cut three pieces of Neenah Solar White cardstock (#110): 7 1/4" x 8 1/2"
Glue two pieces together as the card front is heavy and will bow the back cover if not reinforced.
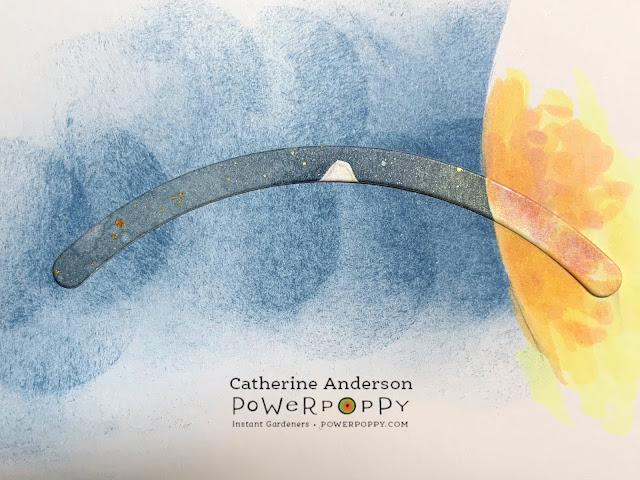
The third piece of Neenah cardstock will be a liner for the front cover. Place the Glittery Village cover on top of this liner, then trace the opening for the slider. Mark where the moon will be.
Quickly add some Distress Ink for the sky and the same colors you used for the moon. Don't fuss...this is simply to prevent white paper from peeping through the slider hole.
 |
| (Front Cover Liner) |
Then, glue the strip leftover from die-cutting your village scene to the traced lines on the liner.
Glue a 3-layered strip to the back of a penny.
NOTE: Leave enough room for the penny to be able to pass through this slider area without getting stuck.
You could use more foam tape as filler for where you see the black areas below, but it was cheaper to just glue together layers of fun foam instead. That foam may be a different height than three layers of the 3M tape. Make the heights as similar as possible. I used two layers of fun foam glued onto two layers of 110# cardstock.
Remove backing from the foam tape strips and add glue to the fun foam. Carefully line up the bottom of the card with the cover liner. Press the two together. Make sure that the penny stays in place.
Note: I didn't add extra glue to the foam strips in this step, but doing so would have given me some wiggle room in case I had gotten the cardstock liner a little skewed. Tape alone will grip immediately and then tear the liner if you try to shift it.
Score two lines down the length of the top piece of Lustre cardstock at 1/4" and at 1/2". This card is extra thick because of the foam tape, so this "hinge" will allow it to fold perfectly. Glue your doubled piece of white Neenah cardstock to the back part of the hinge, as shown below.
Trace a mat from turquoise glitter paper that is slightly larger than the sentiment. Then add a piece of fun foam between the two layers to give your greeting extra POP!
Glue the corgi onto the penny. The foam strips already have an adhesive backing, but since this area will take the most stress, an extra dab of glue is a wise precaution.
Glue small patches of white Prills and iridescent glitter onto the ground. Don't glue any Prills to the snow on the rooftop as this will prevent the slider from moving smoothly.
I added four pom-poms to the front of my card. They add such a cheery candy store vibe to the little Putz village, so I couldn't resist. However, pom-poms make mailing the card a wee bit more problematic.
If you must send your card by post, be sure to secure the corgi. Move him to one end of the slider, then place a 1" x 16" paper band beneath his paws and tape it together on the back of the card . This will prevent damage from your little dog sliding unnecessarily during transit.
 |
| Without Pom-Poms |
Ta-da! The finished card!
 |
| With Pom-Poms |
Thank you so much for joining me on this creative adventure! If you'd like to see more of my artwork, please visit my Carde Diem Studio blog or Instagram.
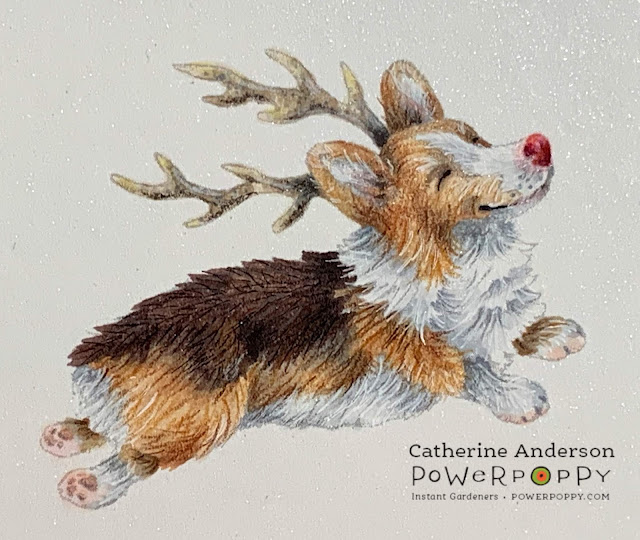
In the meantime, keep a watchful eye on the sky this Christmas Eve. I heard rumors that Rudolph the red-nosed reindeer has been reassigned to candy cane production and Marcella's corgi, Tibbs is taking over delivering treats. So listen carefully! If you hear, "Meowy Christmas and Yappy New Year" just smile and know that it's Tibbs.
May the Lord bless and keep you!
Catherine
Supplies For This Project:
 |
| Copic markers in the above colors. |
PC901 Indigo PC1008 Parma Violet PC1026 Grayed Lavender
PC1076 90% French Gray PC928 Blush Pink PC912 Apple Green
PC1088 Muted Turquoise PC936 Slate Gray PC938 White
PC1011 Deco Yellow PC905 Aquamarine PC995 Mulberry
PC1072 50% French Gray PC931 Dark Purple PC122 Permanent Red
Staedtler Triplus Fineliner Pens:
Dark Emerald Green (for stippling bottle brush trees)
Light Pink (for stippling bottle brush trees)
Black (outline for stained glass windows on church)
Distress Inks (regular, not Oxide):
Stormy Sky
Weathered Wood
Acrylic Paints (I used Golden Fluid Acrylics):
Titanium White
Iridescent Bright Gold (Fine)
Cardstock and Masking Film:
Cryogen Curious Metallic 89# cover in White
Cryogen Curious Metallic 92# cover in Lustre
Neenah Classic Crest cover 110# in Solar White (doubled and used as a card base for strength)
X-Press It Mask It...low tack, matte masking film
Clear Cardstock from Heartfelt Creations (invisible braces to hold the dog treats)
Other Miscellaneous Supplies:
"Wink of Stella" brush pen in clear
"Prills" in "Mini Pearl"
Iridescent glitter (I used "Jones Tones Lazer Gems" in "Crystal Ice")
Clear drying glue
Scotch 3M 1/2" foam mounting tape (2 packages)
Sheet of Fun Foam
Craft Knife and Scissors
"Life Changing Blending Brushes" by Picket Fence
1 5/8" circle die (moon shape for mask)
Die cutting machine
4 Pom-poms in colors of choice (mine were approximately 1/2" and 5/8")
A penny
"Slide-On-Over Semi-Circles" die by Lawn Fawn
White water-based paint pen, extra fine point (I used Sharpie, but Posco is a good substitute)


7 comments:
YOu did an outstanding job on this post, not to mention the card. I wondered how it was done when I saw it. My hat is off to you Catherine, this is way out of my league. Great pictures of how you did it.
This is just TOO CUTE!!! Love the clear attachments for the illusive bones!
This is such a fantastic card! Not only is it designed beautifully, but your coloring and color choices are exceptional!!! Thank you for sharing such a detailed blog post. Wonderful, wonderful, wonderful!!!
I thought this card was so stunning when I saw it during the Christmas Remix and that you now made a tutorial of it, is so great.
Thank you so much Catherine for the time and effort to share this.
Have a wonderful day.
Wowzer Catherine, I am in awe of all the work you put into this and your absolutely wonderful tutorial on how to make it!!!! I totally love this beautiful creation!!
WOW!! I just received my order from Power Poppy and this set was in it, WOO HOO!!
I love how you colored this sweet little village and I love how you combined markers and pencils, just so beautiful.
And that little doggie jumping over the moon is totally adorable.
You put so much love and care into making this amazing card and I thank you for sharing how you did it.
Hugs.
Maria Rodriguez.
gorgeous!
Post a Comment