Showing posts with label Short Stacks. Show all posts

Monday

Inspire Me Monday: Creating with Brusho

Hello Power Poppy Fans!  Welcome to another edition of Inspire Me Monday.  I’m Allison Cope and I’m your hostess today.

Today we’re going to explore the coloring medium of Brusho Crystal Colour.  What’s that you ask. it’s a one-of-a-kind water-based paint medium. It's super-highly-pigmented, unpredictable and it's loads of fun to paint with!

I chose the large and luscious “Tiger Lily XL” stamp set to create with today so grab something to sip and join me in my crafty space…


So here is our end creation.  It’s super vivid and rich with interest.  I chose a sentiment from the “Short Stacks” stamp set as my sentiment.


I chose to die cut the sentiment semi-circle from the card front and adhere the piece to the inside of my card panel...


If you are interested in printing out my Brusho chart, click the image below to download for FREE.  I printed mine out on watercolour paper so it would be printed out on a paper that I would be using with my medium.

A Challenge for Allison:

For my May episode of Inspire Me Monday, I want YOU to leave me a challenge.  So leave a comment below indicating what you would like to see me create with… maybe a certain stamp set… maybe a specific medium… maybe just create something with a certain theme.  I want to hear from YOU!  
Can’t wait to see what you challenge me with!


Thanks for joining me today!  I hope I’ve inspired you.  So now it’s your turn… go and grab your favorite medium and CREATE!

~ Ally ~


supplies:
stamps: Power Poppy (Tiger Lily XL, Short Stacks)
inks: Simon Says Stamp (Fog), Brusho Crystal Colour (Yellow, Vermillion, Orange, Prussian Blue), Versafine (Onyx Black)

cardstock: Strathmore (140# Watercolour Paper)
dies:  My Favorite Things (Stitched Arch STAX)
tools: Malotow (Art Masking Liquid Pen)

embossing powder: Stampendous! (Clear)

Inspire Me Monday: Pop Up Box Tutorial

Howdy all!  Welcome to the Power Poppy blog!  I'm your hostess, Allison Cope, for today's edition of Inspire Me Monday.
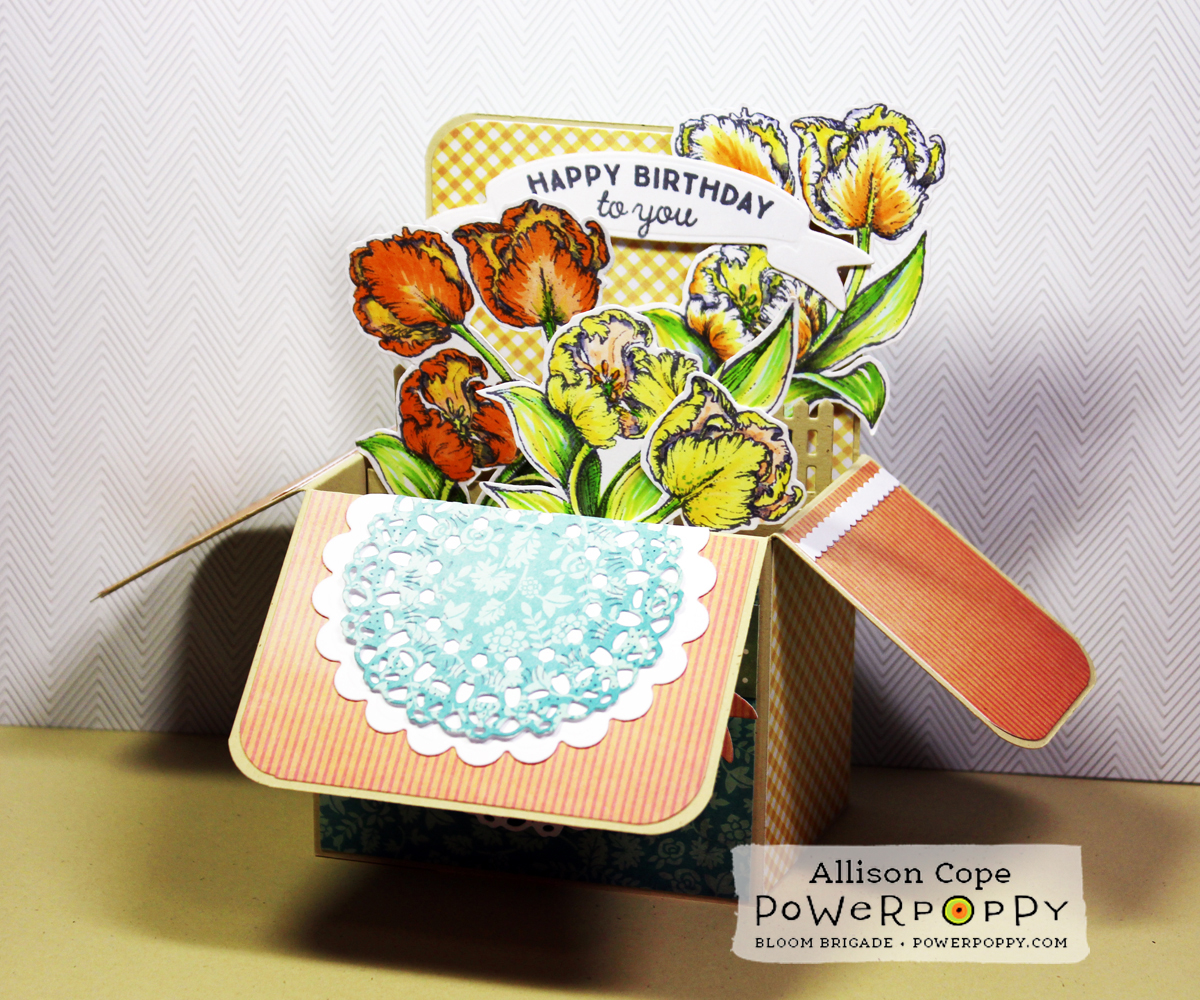
Today I’m going to share with you how to make a fun and relatively simple “Pop Up Box” card.

Grab a cup of your favorite beverage and join me at my scrappy desk...


Click HERE to download the card base, braces and decorative panel dimensions.

Here’s a few quick looks at my two Pop Up Box cards today...
Copics: BV23, BV31, BG10, BG11, Y000, Y00, Y11, Y13, YG23, YR000, YR00, YR12 

Copics: C0, C1, C2, C4, R0000, R000, R00, Y0000, YR0000, YR000

Thanks for stopping by today!  I hope you enjoyed my creative journey today! 

~ Ally ~


Supplies:
Tulip Birthday
stamps: Power Poppy (Dynamic Duos: Peonies & Tulips, Short Stacks, My English Rose)
cardstock:  Recollections #110 White Cardstock, Bazzill (Sawdust)
patterned paper: Penny Black (Painted Blooms)
ink: Memento (Grey Flannel), Copic Markers, Sakura (Glaze Pen)
die: MFT (Stitched Ovals), Spellbinders (Scalloped Circles, Ribbon Banners), Cheery Lynn Designs (Polynesian Sails Mini, Expandable Tiny Borders), Pretty Pink Posh (Picket Fence)
corner rounder:  EKSuccess.


Love Roses
stamps: Power Poppy (My English Rose, Azalea)
cardstock:  Recollections #110 White Cardstock, Bazzill (Marshmallow), Vellum
patterned paper: Penny Black (Gentle Whisper)
ink: Memento (Grey Flannel), Simon Says Stamp (Twirling Tutu), Copic Markers, Versamark, Sakura (Glaze Pen)
die: MFT (Stitched Circles, Stitched Ovals), Cheery Lynn Designs (Polynesian Sails Mini, Expandable Tiny Borders), Pretty Pink Posh (Picket Fence)

embossing powder:  Micheal's (clear)
corner rounder:  EKSuccess.

Make Your Own A2 Designer Paper Envelopes


Hello! It’s me, Leslie, and today I’m here to share a quick and easy way to make your own A2 designer paper envelopes to match your lovely Power Poppy cards! No special tools are required; just score, snip, fold, and glue. The stamp set pictured here is the very cute Short Stacks.


Let’s get started with the easy instructions. I’m showing the inside of the envelope in the photos below so you can more easily see the score lines.


The finished product can be sealed with your adhesive of choice. Wouldn’t these be pretty in a gift set?


That’s all there is to it! Easy, right? I didn’t want to stop so I made two more cards with matching envelopes.


The outside of the envelope can be dressed up prettily for hand delivery, if desired. In the photo below I layered some fun die cut flowers.


I hope you’ll enjoy dressing up your own card presentations with some pretty matching envelopes. Thanks for joining me today!

Inspire Me Monday: Read All about It!

Hi everyone!  It's Allison here for Inspire Me Monday!  I hope you all had a wonderful Mother's Day yesterday and were blessed with lovely gifts from your children.

Today I'm going to share with you a quick and easy project using your stamps.  This project would be a great project to do with your kids... maybe as a gift for that book lover in your family!

All you're going to need is:
  • some fun stamps!
  • ink
  • neutral colored cardstock
  • something to color with
  • some patterned papers
  • thin magnets (like fridge magnets)
  • optional: rectangle dies
Let's get started!!!

Step One:
First we are going to make our bookmark base.  I took a piece of cardstock and folding it in half.  I'm using a scalloped rectangle die to cut a little bit more of a fancy edged bookmark but you can just use your folded piece of paper without the die cuts if you don't have a die like mine.

I positioned the die so that the top edge of the die was hanging beyond the folded part of the paper.  I secured it with some washi tape and then ran it through my die cutting machine.

Step Two:
Next I took some Memento "Tuxedo Black" ink and inked up the stacked book, cake plate and blooms image from the "Short Stacks" stamp set and positioned it towards the top of the bookmark.  I chose this image because the that sweet little book on the bottom... awwww! Then I stamped the simple sentiment form the "Good Thinking: Renewal" stamp set underneath.

Step Three:
Then I pulled out my Copic Markers and colored in my image and sentiment...

Here's a peek at the colors I used:

Step Four:
Then I die cut 3 pieces of patterned paper.  Two for the inside of my bookmark and one for the back side.  You could skip this step if you wanted too but I thought adding some fun paper might be cute!

Step Five:
Before adhering my patterned paper pieces to my bookmark I wanted to apply my magnets.  This way the magnets can't be seen and are hidden under the paper.

I used an adhesive backed thin magnet product from BasicGrey specifically designed for card making and paper projects.

A) I peeled off the magnet's paper backing off the negative side of the magnet and stuck it down to one end of the bookmark.  TIP:  Try using some old thin fridge magnets or magnetic photo paper in place of the thin magnetic discs.

B) Then I allowed the positive side of the magnet to stick itself to the negative side.

C) I peeled the paper backing off the positive side of the magnet pair and then closed the flap of the bookmark.   This ensures that the magnets are exactly opposite to one another underneath the papers.

D) I adhered all 3 of the paper panels to the inside and back of the bookmark.

And VOILA.... a bookmark is born!

This would make a great project as part of a teacher's gift!!  And... a fun bookmark is an easy gift to slip into a normal sized card along with maybe a gift card for your local book store!

I hope you've enjoyed this very simple tutorial today.  I hope it will inspire you to create and use your stamps in other ways.

Make sure to subscribe to our newsletter!  Marcella sends out the most amazing email blasts featuring not only our Bloom Brigade and Instant Gardner projects but she also shares customer works of art and much, much more!  Over the weekend she even send out information about a special sale!!!!   Click here for more information.

Happy creating everyone!

~ Allison Cope ~

Inspire Me: Bring on Spring!

Howdy everyone!  And Happy Monday!  I'm Allison Cope and I'm here to share with you for Inspire Me Monday!

I have a sweet couple, Brenda and Keith, that live next to me here on the lake in Alberta.  It was Brenda's 75th birthday on Saturday so I wanted to make a birthday card to send along to her to wish her a happiest of birthdays.  So I was wracking my brain as to some inspiration for her card so I thought I would pay a visit to Pinterest.  Why not right?  Since Spring is only a few weeks away I thought I would search for a Spring piece of inspiration.  This is the photo that caught my eye...

https://www.pinterest.com/pin/528047125031604315/
Click the image for the source.
I just loved the gorgeous bouquet and the colors that had been pulled out of it!  It said "Spring" right away to me.

I love interactive cards!  They always make for the most interesting cards to give special people in your life so I chose to make a fun shaker card for Brenda's birthday card.  And here's how I made it...

Step One:
I created a very simple card base with some patterned papers and stitching. 

Then I die cut an oval with an oval die cut from the inside too to create a frame.  Next I die cut a piece of acetate (the tissue is still on it!) that was wider than the frame's hole and less than the diameter of the outside of the oval frame.

For my focal image, I die cut a piece of watercolor paper and then gold heat embossed the stunning (and rather Springy looking!) bouquet from the Countryside Bouquet Deluxe clear stamp set.  I used some watercolor pencils to add color and then used a waterbrush to soften and spread the color throughout the image.

Step Two:
I flipped the frame to the back side and added ring of strong adhesive to the back.  Then I removed the adhesive backing and laid the acetate over top of the hole in the frame.

Step Three:
Next I added an endless ring of foam adhesive to the back of the frame.  You need an endless barrier to prevent any of the contents of your shaker from falling out.  I gathered some sequins and gold microbeads to place inside my shaker.
I cut the foam only part of the way across to allow it to bend around the oval and remain one solid surface on the inside of the oval..

Step Four:
Then I carefully added all of the contents of the shaker inside the foam barrier.

Step Five:
I carefully placed the colored image face down over top of the exposed foam adhesive; matching the ovals up and pressing firmly.  Voila... you now have a simple shaker element to add to a card! 

Here is the completed card which includes a birthday sentiment from the new "Short Stacks" clear stamp set.


The greeting matches the gold embossing of the bouquet...

So the next time you are in search of some inspiration for a creation, don't forget about Pinterest!

Thanks for joining me today!  I hope you are inspired by my card today and try this simple and easy shaker element for your next gift.

Happy creating!

 ~ Ally ~


Supplies:
Stamps:  Power Poppy (Countryside Bouquet Deluxe, Short Stacks)
Patterned Papers:  My Mind's Eye (Market Street)
Dies:  My Favorite Things (Stitched Ovals), Avery Elle (Gift Tags Set)
Cardstock:  Recollections Cream Cardstock, Stampin' Up! (Baked Brown Sugar)
Sequins:  Pretty Pink Posh (Sparkling Clear),  CraftMedley
Ink: Versamark, Kimberly Watercolor Pencils
Embossing Powder:  PKGlitz (Gold) 
Microbeads:  Recollections
 Misc.: twine, thread.

Thursday

Stacks are Fun!

When I look around the room, I see stacks. Stacks and piles and heaps. The stacks are typically composed of cute things like teacups and dishes, books with interesting spines, pieces of nature, and spools of ribbon. Actually, I find most of my stacks decorative and quite fun to look at. If I may quote one of my mentors:

“I like to have everything out where I can see it.”
Mary Engelbreit


When it’s time to dust, my stacks, piles, and heaps are not nearly as fun. They are kind of a pain. Here’s a small corner of our dining room hutch to help illustrate the point. (I had to blur the picture a little bit so you can’t make out the dust as easily. Thanks, Photoshop!)

So, one of the convenient things about being an artist is that you can design stacks of cute decorative objects and they do not have to be dusted. Not ever! Want to see an example of this fantastic concept? For Day 3 of our release preview, herrrrrre’s Short Stacks!

http://powerpoppy.com/products/short-stacks-stamp-set

I hereby hypothesize that you will find many, many, many uses for Short Stacks. It’s got birthday sentiments, words to give a friendly hello, and some straight-out words to live by (“But First, Coffee.”). And then three stacked-up images that are a hoot to color!

Want to see how much of a hoot? Look what a good time the Bloom Brigade is having with this set — everyone is in on the act. ROLL CALL:


I would just love to see you back here tomorrow, as we have a very cool set to share with you — one that reflects my inner scribbler, inner renegade, and the inner voice that told me to try something a bit different.

xoxo!