Showing posts with label Poinsettia. Show all posts

Monday

Inspire Me Monday: Poinsettias Eight Ways

Hello, my Power Poppy Friends! It is my turn once again to share some inspiration with you. 

I am sorry to say that I did not have any time to create a new project for you today, so I decided to share eight past projects...showing how you can use the Power Poppy digital Poinsettia images in various ways! (See the list of stamp sets below.)
This is the Ultimate Poinsettia digital stamp set colored with Prismacolor colored pencils in fairly traditional and vintage-leaning colors. I love when poinsettias are mixed with other flowers, and this bouquet is one of my favorites! 
This is the Poinsettia and Pomegranates digital stamp set. I colored this one with a combination of Prismacolor colored pencils and Copic markers. This is a very different color scheme, but if you like non-traditional colors, this style may be for you!
Here is the same image, rotated and colored with traditional colors using Copic markers. Those reds make me swoon!
This is the Poinsettia XL digital stamp set. This sample is colored with Prismacolor colored pencils onto kraft cardstock for yet another look. It is much more fun to color white flowers onto the kraft paper! This project is a more vintage take on clean and simple, which works perfectly with that HUGE white bloom!
Here is another traditional color scheme using the Joy to the World Bouquet digital stamp set colored with Copic markers. This is a deeply saturated coloring project! I always love the traditional red and green combination the most! This project is a larger scale, suitable for an 8x10 picture frame.
This "Santa's boots" image is from the Garden of Gratitude: Boot Bouquet digital stamp set. I colored it with Copic markers in a traditional color scheme, but chose greens that are more trendy. This is another great example of  the poinsettia mixed with other Christmas flowers. 
For this scene I used Season's Greenings: Wheelbarrow and Season's Greenings: Planta Claus. Again, I used Copics to color the scene and stuck to traditional colors, but here the poinsettias are NOT the stars of the show! But, the punch of the reds is perfect for this snowy scene!
For this slimline card I used the Winter Flora digital stamp set, colored with Copics. I used some digital wizardry to create this slimline layout showcasing those poinsettias very well. The addition of the blue, silver, and gold Christmas ornaments really makes that red pop! This style is also more modern...no printed paper, just clean and simple!

Power Poppy Digital Stamp Sets with Poinsettias

Thanks for stopping by today! I wish you and yours a very Merry Christmas and a Blessed New Year!

Inspire Me Monday - No-line Coloring with Clear and Digital Stamps

Hello and good morning! I hope you have been enjoying Part I of the Quiet Christmas Release! It is high time we were all coloring up our images for Christmas cards...because time is rolling along! Soon we will be too late to get our cards in the mail...and by "we" I mean ME!


I wanted to share with you how to create some cards using a technique that is commonly called "no-line" coloring, but which is in reality "gray-line" coloring! Essentially you are creating a stamped image with pale line art, so that when you color the image the line art seems to disappear or fade into the background. This can give you a softer colored image or even mimic a painting.

You can try this technique with BOTH clear stamps and with digital stamps!

To use your clear stamps you will need ink that is pale in color, for example gray or tan. You can also use other ink colors if they make sense for your project. I have even used a pale pink!


You will also need to make sure that your ink and your paper are compatible with your coloring medium. Since I wanted to color with Copic markers, I chose an ink and a white cardstock that both work well with Copics. 


I stamped this cute stocking from the Poinsettia stamp set onto white cardstock using Memento London Fog ink.


You simply color your image in the same manner that you would use with black line art! It's that simple! I know that it seems scary to color over very pale lines, especially with dark markers. You can always start by using a darker gray ink, going paler as you gain more confidence.


Another option is to use colored pencils or watercolors, which can be a bit more forgiving than Copic markers. I did add some colored pencil details here, but the image was colored with Copics first.
 

I used some white gouache paint to make the dots on the stocking and on the background. The background is also laid down with Copic markers.

Use your image to create a card for your Christmas card stash!

If you would rather try this technique with digital images, that is easy to do as well.


Many of the Power Poppy digital stamp sets (such as this Garden Stocking image) come with a "no-line" version which prints out in grayscale. Check your digital files for a "no-line version included" message. You just print these images normally.

However, if you have a digital stamp set that does not include a no-line version, you can convert it in a program such as Photoshop Elements. Follow these steps:


1. Click on FILE, NEW, BLANK and make sure that the Background Contents selection is set to TRANSPARENT. Set your other settings in the box and click OK.


2. Click on FILE, PLACE and choose the image file you wish to use. It will "pop" onto your new transparent background. Size the image as desired. Here you can see that I placed the regular black line image onto my transparent background.


3. Select the image, then click on the MAGIC WAND tool, and select the white background of the image. Press DELETE. (You may have to simplify the Smart Layer first, but just say OK and press DELETE a second time.)

The white background will be erased, which allows you to now change the opacity of the image, meaning you can change the black line art to gray!

4. Click SELECT and then DESELECT. (For some reason, if I skip this step, I have some issues, so I just do this out of habit.)


5. With the Select tool, select the image (click on it) and then select the OPACITY slider in the right toolbar. Change the OPACITY to about 30%. Then print as normal. 

The image on the print screen above is a pale gray rather than black! You can experiment with various opacity settings to get the look you desire.


I printed the grayscale image onto Copic friendly cardstock and colored it. The only thing to note is that you need to make sure your printer ink is compatible with your coloring medium. Not all printers are friendly with Copic markers! I use an Epson Eco Tank (ET-3700) and it works perfectly with Copics.


The soft gray line art gives this stocking image a soft, vintage feel. I created the background with
Distress Inks to match the soft look I was going for.


I hope you feel inspired to try a gray line coloring project! And look at me...TWO more cards for my stash! 

Thanks for stopping by! 
Gloria 

For more details on supplies used for these projects, please click HERE.


Wednesday

Christmas Remix begins today!


Welcome, friends, to Power Poppy’s holiday party. We’re doing things a little differently this year, and hope you find it just as exciting as ever. 

We are giving some love to the classics, the favorites, the time-tested stamp designs that helped make us a company you turn to for Christmas card making. They are offered at sale prices, so if you still need these sets, time to scoop ’em up. There will be new images, too, and a few surprises along the way.

Today’s kick-off has to be one of the top sets on our list, an exuberant Poinsettia with pine sprays and baby pomegranates...


This one still gets me in the feels after all these years. I remember walking through the Missouri Botanical Garden and spying potted pomegranates with tiny fizzy flowers sprouting at the ends, and I thought to myself... I need to draw those darling things! Special details like this help make our designs a little different from everyone else... based in a love of botany, art, and the joy of living.


Here’s what’s extra fun about our Christmas Remix release.... we have several new designers showing off what can be done with these stamps, along with some of our founding team members revisiting them — and the results are going to blow you away!


You can grab these sets on sale during our Christmas Remix — check ’em out in the Power Poppy shop.

Let’s check in with everybody and see what they’ve created for our hop — everyone has been working sooooo hard to create exciting cards, be sure to leave a note to let the designers know you’re enjoying their cool creations.


Thank you to everyone — and we are looooooving reading all of your comments on yesterday’s blog post and the Facebook post — thanks for reminding us why we do what we do, because you guys are so totally filled with good vibes and you make us feel good!


Thursday

You've been asking for it... Poinsettia now in DIGITAL

Here we are, all married and official: Lulu, Finn, Marcy, Sylvia, Doug, and Clara | Photo by Lisa Fioretti

Hello my dear friends!!

We have soooooo much to catch up on — and I can’t wait to do just that. Truly, I have been humbled by all of the loving notes of congratulations for my wedding to Doug (as the kids said at the ceremony, “FINALLY!”). Thank you so much for your thoughtful notes, my sweet Peeps. I’m still reeling from the outpouring of love and the beautiful wishes — and some of you even sent me a card! And can you BELIEVE the blog hop that the Bloomies and Instant Gardeners put on — just for us? My heart was about to explode (in the good way). Feelings of gratitude are swirling around me 24/7, and I just want to say thank you, all. I continue to know that I don’t deserve all this extra love, but it sure does feel good to have it rain down on us. Big squishy hugs from Doug, me, and our four children wrapping around all of you! xoxoxo

Today I have some splashy news. An illustration that has been one of our most popular ever ever everrrrrr — Poinsettia — is finally available as a digital stamp set. Say what?! The one I’ve been asking about for three years, you say? OH YEAH!! It’s here and it’s as timelessly beautiful as ever, I’m pleased to report. Introducing... Poinsettia and Pomegranates.


With undulating leaves (did you know that the colorful “petals” of the Poinsettia plants are actually leaves? The flowers are the tiny bud-looking things in the center. The more you know, I tell ya!) — surrounded by a swirl of pine needles and the most fun part of this drawing to my mind... sprays of baby pomegranates on the vine.

This Poinsettia and Pomegranates image is identical to the one you’ll find in the Poinsettia clear stamp set — only with this set, you can BLOW IT UP, flip it, flop it, and do whatever you want to it, because it’s a digital jpg file that you can manipulate on the computer. AND you get two brand new sentiments to choose from. What’s not to love?


Let’s go in depth to see what some of our talented Instant Gardeners have dreamed up for today’s big release. These ladies take our images and finesse them into the most beautifully done creations — they take my breath away each and every time! Get inspired and then get this new digital set for yourself...


And friends... I know you’re starting to see Christmas stamps pop up in online shops .... but here at Power Poppy, we’re preparing for a Harvest + Holiday release that you’ll want to save a little space for on your craft table. I promise it’s going to be a GOOD ONE!!! 


COMING IN OCTOBER... 
• Sparkling, fun-to-color winter florals
• Sweetest Santa Claus
• Cool Snowman for snow-kissed smiles
• Cozy and colorful vignettes
• Holiday village reminiscent of ’40s dimestore offerings
• AND MORE!!
PLUS a few unique Fall sets that will carry you through ’til the snow starts (Unless you are up near our Allison Cope in Alberta, Canada, where they just had a giant snowfall this week!).

Back to the drawing table.... I’m almost finished!! teehee!


Monday

Pick a Piece of Patterned Paper Please!

Power Poppy paper piecing tutorial Poinsettia

Hello everyone!  Welcome to another fun and fabulous Inspire Me Monday!  I'm Allison Cope and I'll be your hostess today.

Have you had a chance to check out all of our amazing new Happiest Holiday stamp sets yet?  Well if you haven't, take a gander at these!  Four amazing new holiday inspired stamp sets all waiting to be added to crafty stash, for you to begin the process of creating your holiday cards.

Now don't get me wrong, I LOVE colouring with my Copic Markers but sometimes I like to shake it up a bit.  Sometimes I like to pull out some fun patterned paper, from both past and present, and just have fun cutting and playing with them.  Fussy cutting is my therapy.  These patterned papers aren't just for behind all your gorgeous stamped images... oh no!  Why not use these beautiful patterns to accompany your stamps!  Yup... this technique is called PAPER PIECING and that's the process I'm going to share with you today!

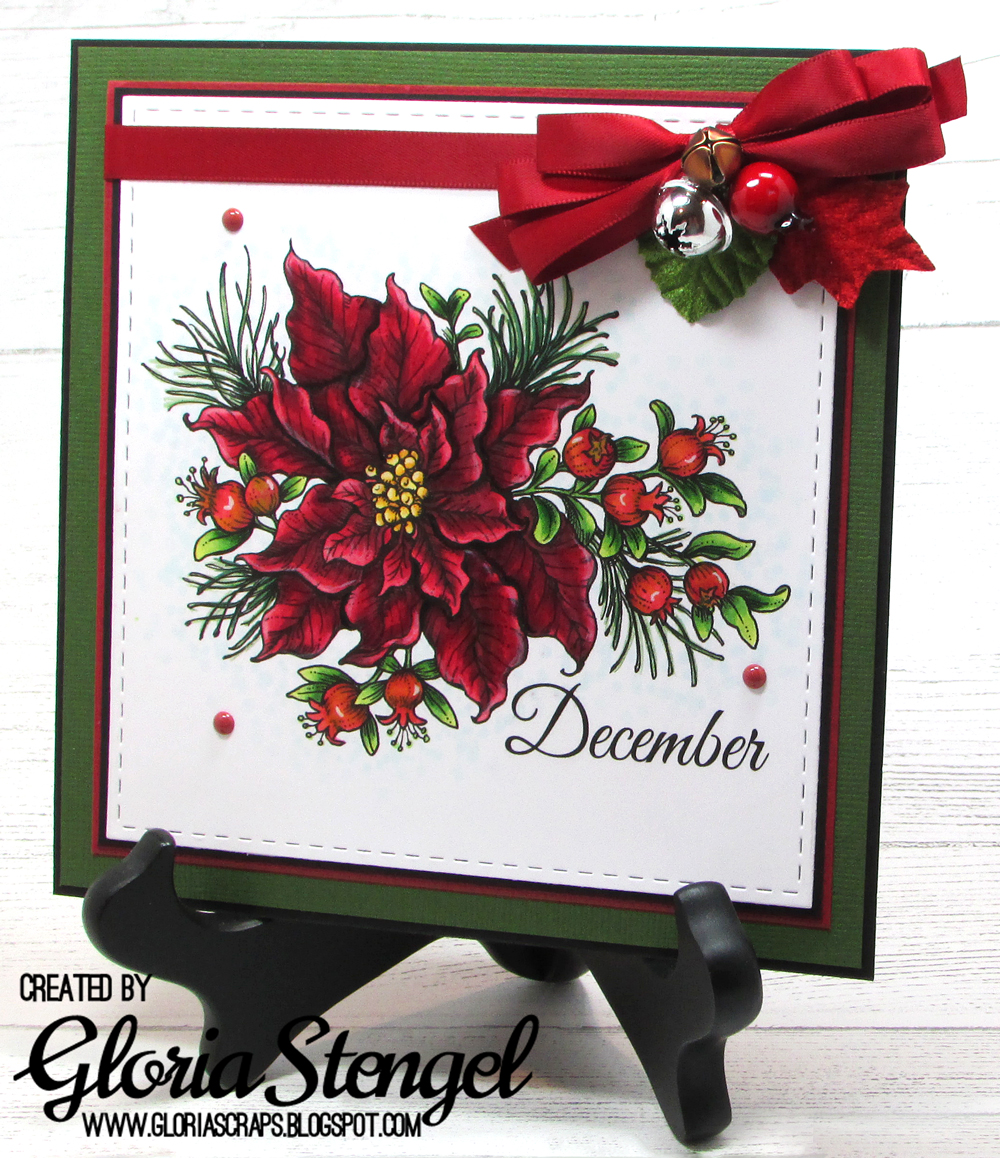
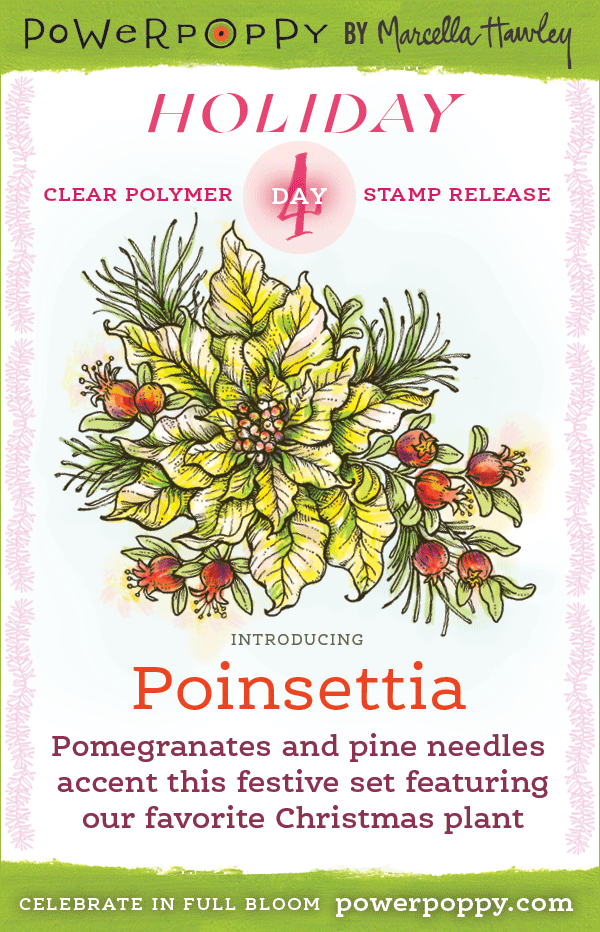
I couldn't resist pulling out the brand new "Poinsettia" stamp set and getting started!  This stamp set is PERFECT for this technique.

1.)  The first step was to stamp the whole entire image onto some cardstock.  I chose to stamp it on a rustic cream cardstock that has all kinds of cool unbleached paper fibers showing throughout it.
Power Poppy paper piecing tutorial Poinsettia

2.)  Next I chose to colour in the tiny pomegranates and the pine boughs with Copic Markers.  (I know, I know... I used some markers! :) Told ya I loved to use them!)  I thought it might be easier to colour them instead of paper piecing these guys.
Power Poppy paper piecing tutorial Poinsettia

3.)  Next I stamped my image onto some teal and cream almost checkered paper.  I accidentally didn't get all of the image to stamp properly but that's okay, it'll still work because the area that's not quite clear will be covered by other patterned paper pieces.  I carefully cut out my poinsettia. 
Power Poppy paper piecing tutorial Poinsettia

Notice the leaf at about the 10 o'clock position?  It's not entirely cut out on it's lines because I'm going to put more paper over it.

4.)  Then I grabbed another pattern and stamped my image on it.  This was a paper with snowflakes all over it.  I fussy cut or hand cut out less leaves around the outside of the flower this time.
Power Poppy paper piecing tutorial Poinsettia

5. )  I grabbed another kind of patterned paper again, a solid teal paper, stamped and then fussy cut out more towards the center, only the smaller leaves of the poinsettia this time.
Power Poppy paper piecing tutorial Poinsettia

6. )  And finally, I grabbed some of the same cardstock as my base poinsettia, stamped, fussy cut and coloured the center of the bloom with a yellow marker.
Power Poppy paper piecing tutorial Poinsettia

Once the center was glued on, I backed it with a die cut stitched circle and put it on my card base.
Power Poppy paper piecing tutorial Poinsettia
 Supplies:  Stamps, Power Poppy (Poinsettia);  Patterned Papers, (BasicGrey (Aspen Frost, 25th & Pine), KaiserCraft (Christmas Carol);  Cardstock, Stampin' Up!, Flourishes, Papertrey Ink;  Ink, Memento (Olive Grove), Copic Markers (BG72, R02, R11, R12, Y15, YG93, YG95);  Lace, Stampin' Up!;  Die Cut, MFT (Stitched Circles);  Other, thread.

The patterns are subtle but it make that poinsettia unique and beautiful... especially in it's teal blue shades!

If you like the poinsettia paper pieced from the "Poinsettia" stamp set, well then you'll love the stocking too!  Check out my paper pieced stocking card right here.

Thanks for joining me today!  Happy Thanksgiving to all of my Canadian stamping friends out there today!  Happy stamping, cutting and pasting everyone!

~  Allison Cope ~

Tuesday

And now for something completely different

Welcome back to our final episode of Marcella Hawley: Behind the Stamp Sets!

He he he!

By now I think you all know that when I conjure up a drawing—just like when decorating a room or throwing a birthday party—I get a kick out of including something unexpected and unique. Whether it’s the subject matter itself (we giggled about tucking strawberry stems into the bouquet of the Arranging Roses set), a quirky color (try the purple cauliflower!), or rustic printer’s type paired with a breezy image for a logo design (hey, it worked)—having something a bit different is important to my work, and personally I find it a rewarding challenge. 

For my debut Happiest Holiday Collection, I knew I wanted to draw something natural, botanical, and a real knockout.

Here are the ingredients to make that happen, which you can find all wrapped up on one fun new set: Poinsettia!


First, we have the very festive, beloved Poinsettia. Did you know Poinsettias are a member of the Euphorbia plant family (commonly called “spurge”, such a strange name for a genus that’s so spectacular!)? Originally found growing in the warm sunny climate in Mexico, they were introduced to America by botanist and physician Joel Roberts Poinsett, who was the United States’ first ambassador to Mexico. And now they are a Christmas classic!!

I tell ya, the more you know.


Next, I’ve added some whirly, swirly pine needles such as these above, which I admired at the Missouri Botanical Garden earlier this summer, photographed, and thought, “I need to get those into a stamp set—STAT.”


And, the pièce de resistance: baby pomegranates! The globular shape with the crownlike top and fringe-y looking stamens are just too cool to pass up. The colors are too delicious. And don’t we all love to grab a few pomegranates at the market over the holidays? I’ll include a few in a mantel or tabletop display, let them dry to their gorgeous wine-red tones—or we carefully slice into them and the kids and I marvel at their bejeweled centers before we gobble ’em all up! Pomegranates had to go into the new set, especially now that I’d discovered they come in a petite variety. And so, I present:

powerpoppy.com/collections/products/poinsettia

Poinsettia is a clear polymer stamp set with two bold images (there’s a sweet stocking in addition to the spray of botanical bounty), and plenty of lovely holiday sentiments. Plus a Merry Christmas I handlettered with my trusty pen, inspired by a vintage napkin embroidery. 

I think you’ll be using this one for years to come, and I hope you’ll color it LOTS of different ways... the baby pomegranates can be ANY COLOR YOU IMAGINE! Let them be berries of any variety your mind can conjure. Let’s see what “something different and unique” YOU will do with this set, shall we?

For now, let’s go see what the Bloomies have done!

POINSETTIAS GONE WILD ... BLOOM BRIGADE STYLE!


Tomorrow --- EVERYTHING WILL BE AVAILABLE at POWERPOPPY.COM! Plus: A big ole blog hop. See you then!!