
Hello folks — If you are looking for our Daily Marker 30 Day Coloring Challenge + Giveaway post, please CLICK HERE.
Be sure to come back and read this OUTSTANDING tutorial on digital image and sentiment manipulation by the Bloom Brigade’s Tosha Leyendekker.... FILLED with information and step-by-step screen shots! xoxox, ~marcella
Hello creative peeps!! Welcome to this week's Power Poppy Inspire Me Monday!!! Tosh here, and I'm going to share with you how I manipulate digital sentiments, using Photoshop, to fit with the layouts I design with Power Poppy's incredible digital images. For my first card, I used the new digital set Cherries and Berries.

This is a long post, so I hope you bear with me. I have a second card to share at the end too, in which I used a VERY NEW digital image called Merriest of Berries, along with the sentiment from Power Poppy's Hollyberries Digital set.
So, lets get right to it. I Loved Marcella's new cherry clusters and thought it would be fun to combine both sentiments that come with the digital set Cherries and Berries. So here's how I got started:

First, open all the images you want to use for your project. I chose the cherries, and the two sentiments. I then click on the middle yellow dot at the top left of the image, to bring them to the bottom of my screen and get them out of the way, leaving only the cherries on the board.
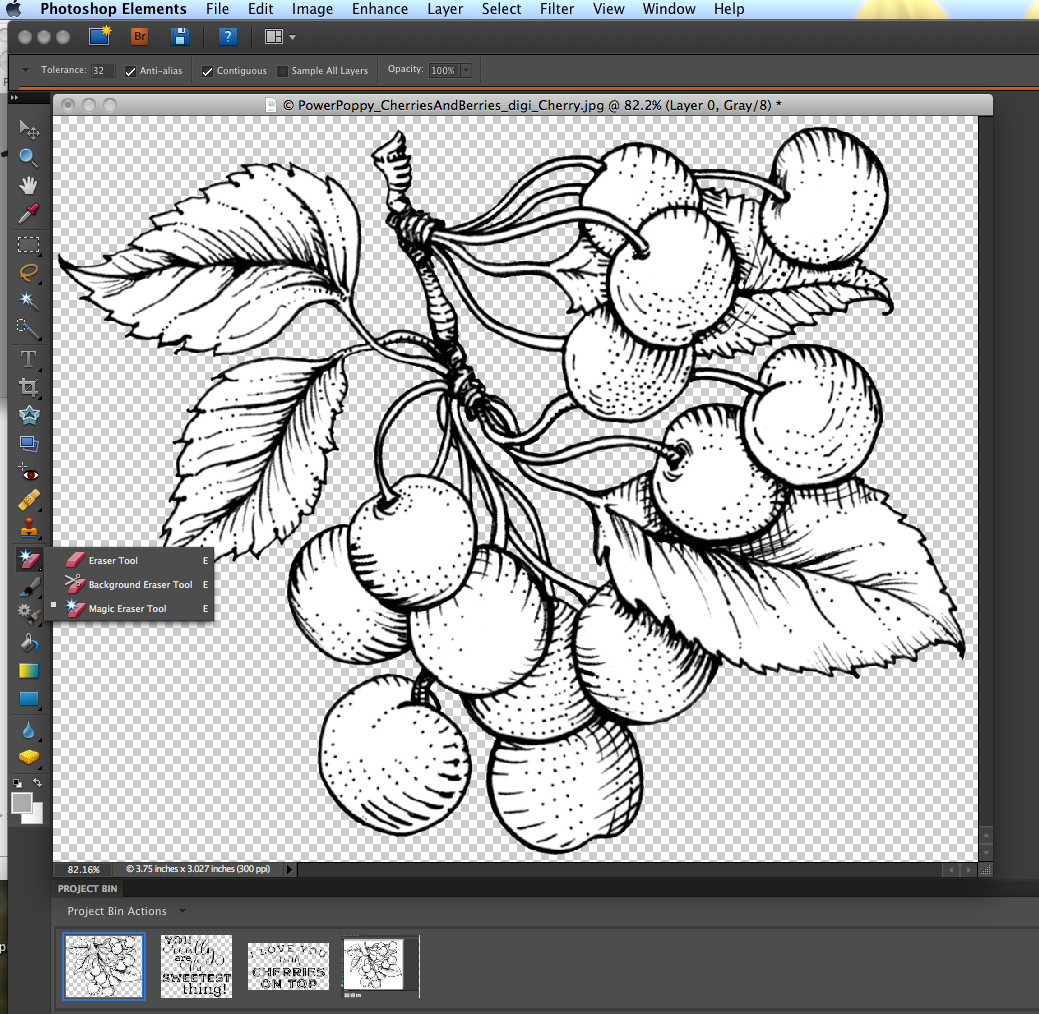
See that little pink eraser on the left? Right click on the image and then click on the Magic Eraser Tool at the bottom of the pop-up screen. Now, lets have some fun erasing!! Just click on all the white space around your cherries that you want to be erased. You'll need to click on the small areas too. That way the only part that shows up when you create your design is the image itself. No background noise. Do this with each of your sentiments also.

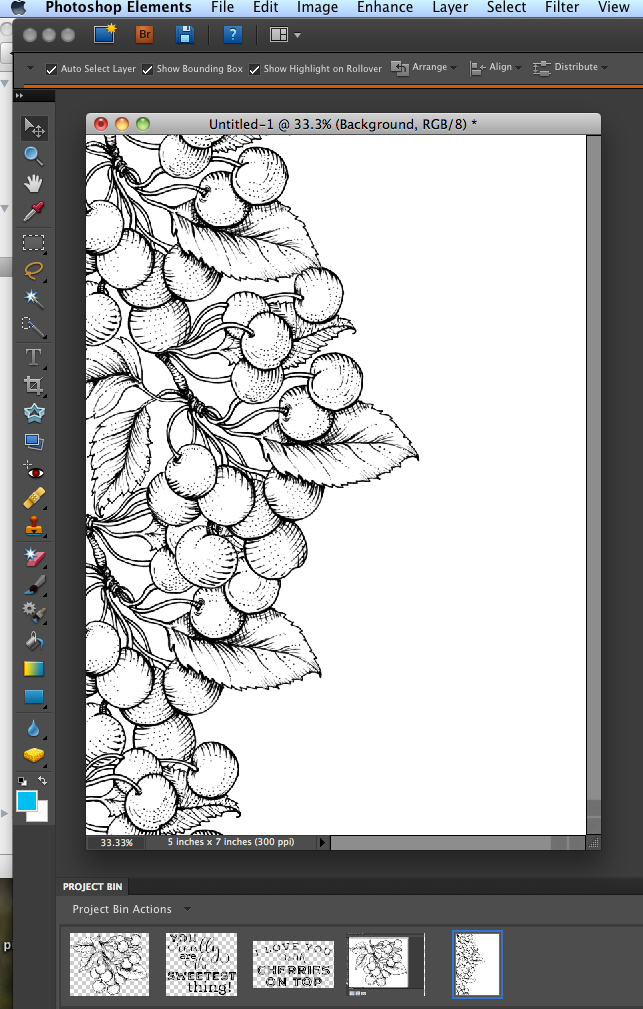
Now, you're going to want to create the base for your image. Start by clicking on File at the top, then "New", then "Blank File".

I want my card front to be a vertical rectangle so I'm making my base rectangular. I chose 5" for my width, and 7" for my height. My next card is square, so I just made the dimensions 5"x 5". It's easier when getting ready to print it out.

I brought my image into the my blank base by clicking on the cherries at the bottom of the screen and dragging them into the frame. Now, you can rotate, enlarge or shrink them by first clicking on the square arrows on the upper left hand side. I've darkened the area by clicking on it and you can see a solid arrow pointing to it.
See the boxes around the image? By hovering over one of them with your mouse, you can rotate it any direction. You can also shrink or enlarge it. I like to only use the corner boxes to shrink or enlarge because it doesn't distort the image. Just hover over it until the arrows show, click and drag larger or smaller until you get the size you want. I kept the cherries in their original size and just rotated and each time I wanted to add a cluster, I clicked on the cherries at the bottom of my screen and drug them up into the frame, and, once again, rotated them until I got the look I wanted.
There are times when you may want one image in front of the other, and it may automatically go behind. That's easy to fix. Just right-click on the image you want to manipulate and click "bring forward" or "send back".
Here's a look at my final cherry arrangement. Once I was happy with how they were arranged, I moved on to the sentiments. Now we're finally getting to what this tutorial is really about.

I started by bringing up the first sentiment to the main screen by "double-clicking" the one I want. I then made 4 duplicates by clicking on File at the top left, and then duplicate. You're going to need 4 duplicates because you are going to be doing a lot of erasing.

Back to our eraser. Right-Click on it and click on "eraser tool" at the top of the "drop-down" menu. Next you will want to decide the size of your eraser. We want to cover fairly large areas at a time, so I would suggest making the eraser a bit larger. But small enough to fit in the tight areas. If you are uncomfortable using a larger eraser in the smaller areas, you can always resize your eraser at any time. Look at the top left of the screen. See the brush stroke? Just go to the right of that and choose the size of the stroke you want. Mine was set at 99 because I was erasing the entire bottom portion of the image, leaving only the word "You".

Then, using the highlighted crop tool on the left, crop your sentiment as close to the edge as possible. It just makes it easier to lay out.
Do this with each panel of your sentiment. Leaving only one section, or word, on each one. I separated "You", "really are the", "sweetest" and "thing" so I needed 4 duplicates. I then went on to do the same to the other sentiment.

It looks like this before you crop them. Once again, I click on all the yellow dots, and take them off of my main screen so I just have my cherry base up. Click and drag up each part of your sentiment one at a time.

Now I can play around with each section of sentiment...enlarging,
shrinking, rotating...whatever you want to do to fit your layout. (use the square arrows, at the top left of the vertical strip, again) I
enlarged the word "you", and shrunk some others. I also rotated the
word "with". Just have some fun.
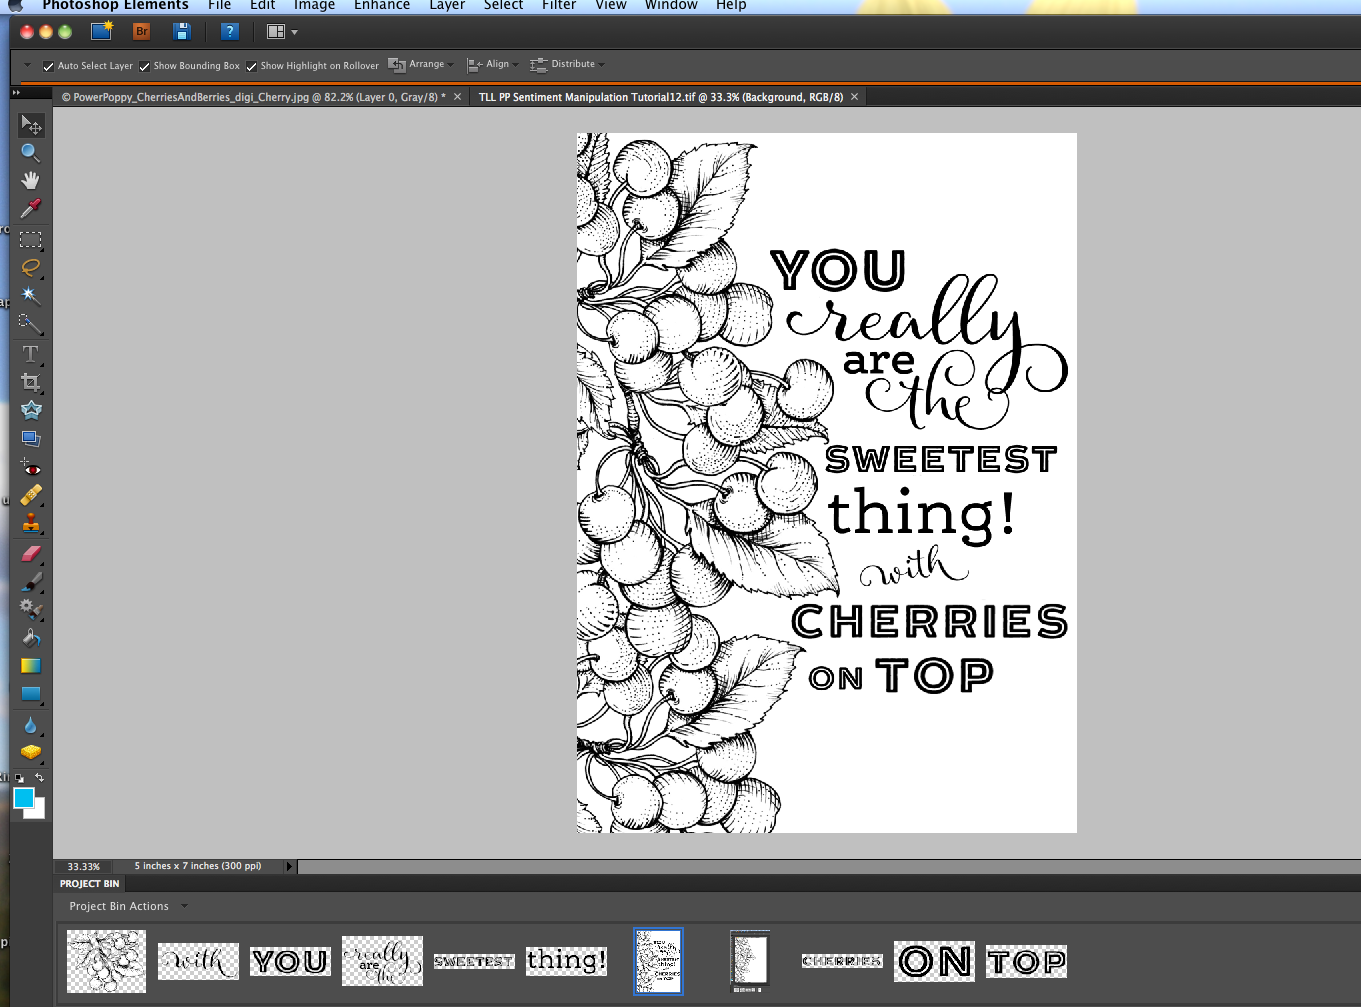
Once I get my sentiment layout the way I want it, I save it and insert it into a new Word document. I can resize the entire panel there the way I want it.
That's finally it for the tutorial portion. Here is a look at the final result once again. I loved the look of the black/white with the bold red cherries standing out on their own, so I decided not to color the leaves or any of the sentiment. Marcy does such an incredible job with her designs, that they are gorgeous even without coloring!


Click on "Enhance" at the top, scroll down to"Adjust Color", then to "Color Variations". I made sure the "Midtone" button was highlighted on the left, and just clicked "lighter" about 6 times. I then created a New Blank File, and drug the image up into it. You can then lighten or darken it even more by clicking on "Adjust Color", then "Adjust Hue/Saturation. Slide the "lightness" bar according to how saturated you want the image.

Here's a close-up:

Whew, that's it. I hope I've explained it all clear enough, and that you get an opportunity to try manipulating some digital sentiments of your own. Thanks for sticking with me!
Happy Stamping!

16 comments:
What an awesome tutorial Tosh! I will definitely have to try this. I love the way you arranged the sentiment around those beautifully colored cherries. :)
Thank you for a great tutorial. Now if I could just get the Photoshop element screen to look like yours. I just downloaded the program and the handy tool icons referenced in the tutorial are not on mine.
Hi Joan! I didn't even think about how Photoshop could have changed over the years. Mine is super old. I have Photshop Elements 8. I had no idea they were all the way up to 15. Yikes!! I bet if you click on the Help icon at the top right, and type in "erase tool", or "edit tools" it might help you with your tool bar.
Loving your cherries card. Pure inspiration and fabulous color palette.
Love how you've arranged the berries. So pretty. Love your coloring. Thank you for the tutorial.
Love the pop of red on the black/white card.
I'm not very 'puter-literate so I probably
won't be using these ideas, but thanks
for posting them for other.
Love your cards. I'm familiar with the technique - but like to have my memory jogged as a reminder to use it more often.
thanks for the reply. Thought I was losing my touch. Usually fairly computer savvy. Will keep working at it.
Both beautiful cards. I love the "layered" the cherries image and placement of the sentiment. Gotta try this!
I always wanted to know how to do this with the digital stamps so you cam imagine how excited I was when I saw your blog post this morning, I read it over twice then I thought I would try it and go back to your post if I had a question BUT I can't even find Photoshop on my computer anywhere? Can anyone help with that, where do I find it? any help would be greatly appreciated !! Thanks for the great blog post today and for any help from someone on my question. Tracey Magner
Tracey, Photoshop is a program you have to purchase. You can either purchase it in disc form or download it from the Adobe Photoshop website. Elements 15 is the newest version.
Tosha, Thank you for your reply. Wow do I feel stupid, I had no idea you had to purchase it, I have hundreds of digital stamps and have looked for photoshop for a long time on my computer. Thanks for helping me and not making me feel so stupid, I can do that myself, lol. Tracey Magner.
Please do not feel bad Tracey. Believe me, I am continually learning new tech things. In fact, digital stamp images intimidated the bajeebees out of me when I first started working with them. But once you get the hang of whatever program you decide to work with, their possibilities are endless!!
Thank you! Thank you! for taking the time to do this tutorial. I'm just getting into "digitals" and never dreamed you could do all this! Can't wait to give it a try!
Such fantastic tips, I need to get my digital images I have bought from here printed, next I need to figure out what paper will work in my printer, the paper loads from the bottom turns and shoots out the front and the thicker paper I like to color on always gets jammed :(
Tosh, what an amazing tutorial, Tosh, and I LOVE your cards! Totally love how you've arranged the sentiment with the cherries...just perfection! I am going to have to think more out of the box with this too. It's amazing what we can do with digis!! Sky's the limit! Hugs!
Post a Comment