Showing posts with label Abundant Petals. Show all posts

Tuesday

Creative Confetti: "Pop" goes the flower


It's Happy Tuesday, Hello all! I bet you are wondering what this title means. "Pop" goes the flower? Well, that's what this week's challenge is all about! I have learned that if you want your image to stand out, you need shading to push it out front by coloring the background in a darker shade to... make it pop!


HOW TO PLAY: Stamp your image for your project, color it up and then color the background too.  Make sure that it is a dark color and that will make your image "pop".  If you are hesitant to color the background, you can just start with dark card stock, or you can cut out your image and adhere it to a dark card base.  Whatever you decide, just go for it. It will be fun. Remember that everyone has a chance to win a $25 gift code to the Power Poppy Shop.

On to my creation!


I will be honest with you, I made this card and when it turned out OK, I wrote this post.  Sorry that I have no in-process pictures.  I promise that next time I will do better. I do have a surprise later, so stay tuned. For this card, I used the stamp set called Abundant Petals by Power Poppy.  After stamping it with Versamark and a champagne embossing power, I colored it with Copic markers. The flower is colored with YR68, YR21, Y17, and Y38. The leaves are colored with YG03, YG17, YG21, and YG67. And, my background is B24.

Here is the surprise that I mentioned before. I am adding this card that I made after taking Amy Schulke's class. It is another example of that dark background that makes everything "Pop".


This card uses the stamp from Power Poppy called Take a Deep Breath. This background has Distress ink in Chipped Sapphire and Mermaid Lagoon sponged on using the masking technique. 

Now it is your turn!  Roll up our sleeves and start coloring up those images.  I can't wait to see what you do to make your flowers POP! Remember you can win a $25 gift code if you enter, so don't forget to link up your creation using the linky below! 

Before I let you go, we do need to draw the winner from our fabulous July entries! 

Random.org threw all the names in a pot and drew this lucky card maker as our winner....


CONGRATS TO LUCY E.!

Lucy created this lovely card from last week's Make It Your Way Challenge. Her birth month is May and her initials, L & E, which means she had to use a flower and use the colors pink and green. I think she nailed the challenge with this beauty of a card!


Lucy, to claim your prize, all you need to do is email Marcella at bloom@powerpoppy.com and she will get your $25 winning code right to you so that you can make a fun stop to the Power Poppy Shop! 

Can't wait to see what you all create this week! 

Until next time!
~Barbara


You are invited to the Inlinkz link party!

Click here to enter

Creative Confetti: Frame It Up!

Happy Tuesday friends! I hope your week is off to a beautiful start. It's time for another fun-filled challenge to kick start a little creativity! This week's challenge is one that you could take in so many different directions. And, it all involves putting your main image in the spotlight... with a frame!

Check it out...


HOW TO PLAY: This challenge is as simple as putting a frame on your card. Yes, just that easy! I mentioned the main image but you could frame up the sentiment as well. Up to you!

On to my creation


I was going through some of my pre-stamped images and found these little die cut flowers from the Abundant Petals stamp set, using the coordinating Die Set as well.  And, after I "auditioned" them together, I decided that I had just the right combination to create a bit of color in a card corner. So, I colored it up using Copic markers - R81, R83, RV00, and RV0000 for the petals and YG00, YG23, and YG25 for the leaves. 

I took some decorative paper and created a frame by lining up two stitched rectangle dies and, using a Post-It Note, situated and tacked them down on the paper before running them through my die cut machine. 

After I cut out the frame, I cut another panel using only the largest die out of this cream and green graph style paper so that it would layer up perfectly. I used the 'Thank You' sentiment from the set and heat embossed it with gold detail powder. 


After I was done with my card, I wondered if it looked a little too plain? So, I did dig into my sequin stash and added a little bit of bling. Not sure which one I like better. What do YOU think?


Like I said, if you leave a comment, let me know which version you like better -- clean or with a little extra bling!

Now it's your turn Creative Confetti fans!  Let's see how you frame up your image to create a design splash! After you're done creating, don't forget to link up your creation using the linky below. Everyone who plays along gets a shot at our monthly random drawing for a $25 gift code to the Power Poppy Shop! So, get those fingers inky! We'd love it if YOU won!


Until next time!
Julie


You are invited to the Inlinkz link party!
Click here to enter

Monday

Inspire Me Monday: Assembly Line Creating!


Hi all and welcome to another edition of Inspire Me Monday! Today, I am going to give you some tips and pointers on mass producing cards. I will admit, this is not something I am great at! I tend to get lost in the details and instead of sticking to a game plan, go off script. So, something that is designed to be easy and pretty and fun, becomes cumbersome and, well, not fun! ;-) I wanted to change that!

So, I used some basic principles to get me started!

1. Find a card or layout that inspires! I chose THIS card from a SU kit that I wanted to recreate using Power Poppy supplies! (It's the one on the lower left corner)

2. Pick a paper pack with color coordinated papers to keep things easy and pleasing to the eye...


3. Grab the supplies you need to recreate your inspiration card. I used the Abundant Petals Stamp Set & Abundant Petals Dies along with the "Thanks" sentiment from Vibrant Thanks! I also chose some stitched dies and a banner die as well. 


4. Treat it like an assembly line, cutting each element needed, one at a time until you have the number needed to mass produce. I created six cards at a time.


5. Assemble everything but the colored pieces. If you want, you can leave these card bases and take your time coloring, adding these elements as you go. 


Want to see how I did it? Click on the video below to see the steps! 


And here's a peek at the finished product!


Hope these little tips helped! I will say that I was able to create 6 cards in a little more than an hour using this method. Now, I have 6 thank you cards ready to send in a jiffy, which means folks won't have to wait months for me to create one just for them! ;-)

Happy Monday everyone & thanks for stopping by! 

~Julie 


Tuesday

Creative Confetti: Merci Bouquet!


Hello my happy stampers! Okay, show of hands. Who is ready for spring? (Yes, I am raising my hand!) And, who feels like they are stuck in "Sprinter" -- the season where it should be spring but it still is winter. (Yes, I am still raising my hand!) I am not sure where it is like where you live but this week in Montana, we've had below zero temps and snow, lots of it. Today the high was -1! Yay! It's a day where I really needed a little bit of flower power in my life! So, that's why for this week's Creative Confetti Challenge, I thought I'd throw this little bit of inspiration up. Bouquets! Yes! Beautiful, lush bouquets! Check it out sweet peeps! 


HOW TO PLAY: Simply use a Power Poppy image that has a collection of different flowers. There are so many to choose from that it will be super fun this week to see which blossoms you choose! Just in case you need a little bit of inspiration, click HERE to see just some of the wonderful offerings from Power Poppy that could help you show off a bouquet of blossoms! I honestly started to link up all the sets and then after 20 I decided listing them ALL would create quite the list! ;-) The good news is, there are so many options in both clear and digital stamp sets that you should be able to find something -- even in an instant! ;-)

To serve as a wee bit of inspiration, I decided to pull some creations that would fit the blossom-filled bill for this challenge!


Don't have a bouquet set? Why not create one yourself with some fussy or die cutting and a floral set like Power Poppy's Abundant Petals? 


Artistic Bouquet is the epitome of a lush, beautiful bouquet. This card above might be one of my favorites of all time. I took Amy Shulke's online class on coloring up this beauty and am still amazed at how her tips really helped me create something with so much depth -- more so than I have created on my own in the past. Thanks Amy!


Sunset Sway is one of those easy breezy bouquets that doesn't take a ton of time to color up! And, who doesn't love that little fluttering butterfly? 

And last, but not least, this one above is more of a spray of flowers but it still fits the bill! I adore this image from Power Poppy's So Grateful set because of the range of colors you can use to bring it to life!

So, there you have it my friends! A bounty of bouquet options and my samples really only scratched the surface of possibilities! So pick your petals, get those fingers inky and link up your creation below! Every single entry is one entry into our monthly random drawing for a $25 gift code to the Power Poppy Shop! YIPPPEEEEE!

Thanks for stopping by! We can't wait to see what YOU create!

~Julie
Creative Confetti Thrower


Creative Confetti: Let's Go Half & Half!

Hello sweet peeps! Today we're throwing up another handful of sparkly fun and Creative Confetti to see just how it inspires you in your craftsy spaces! This one is a fun one because I really think this challenge will turn into some amazing, beautiful and bold cards! Can't wait to see your take on this challenge! So, here we go!


HOW TO PLAY: Just as simple as above. Split your card front -- any which way you like -- into at least two colors (you can split it more if you like!) and let the main image float between the colors. You might have to use an embossing powder or another medium to help that image to show up on the darker portion of your card or maybe you want to color the two sides differently? This is ALL up to your creative interpretation!

On to my card!


I have to tell you, I had no idea where I was going when I started this card and, honestly, I am still not sure I got there! ;-) Do you ever have card making sessions like that? Man, anymore these days, that's all I have!

To start, I grabbed my MISTI, and lined up the paper to know where that large, lush, and beautiful flower from Power Poppy's set Abundant Petals might fall. Instead of making both halves in black ink, I decided to make the bottom half more soft and subtle so I stamped using Memento Rosebud ink. The top is Memento Tuxedo Black. After I was done stamping, I stenciled a bit of Baby Pink Memento on top using a Tim Holtz die -- Dot Fade and then I used the stencil and Worn Lipstick Distress ink on the bottom.

Here's a closeup for you!


You can see I added a little sparkle to the lines of the Thank You sentiment with a bit of glitter pen. Gotta have just a smidge of sparkle -- no matter what! I should say that I colored up the flower using Copic markers and reached for R32, R35, R43 and RVOOOO. I highlighted around the flower using BG0000, BG10 and BG11. Add a few little doo-dads with the help of a white embossed sentiment strip (all sentiments are from the same Abundant Petals set) and some pennant flag stickers and... done!

If you need a little more inspiration... 
Ally Cope crafted an Inspire Me Monday which kind of touches on this concept. She called it "Yin and Yang!" She divided her card into more than just two halves. You could too if you like and be inspired by her tutorial HERE!  It's a fun one so click the link, grab a cup of your favorite beverage and enjoy!

And that, my friends, is it! Did you play along with us last week and show us a little smidge of Father Time or did you vow to start all things new and try a creation with a nod to Baby New Year? Have no idea what on earth I'm talking about? Click HERE to travel back to last week's challenge! All four challenges of the month are open until the close of January meaning any time during the month you can try all four -- giving you extra chances to win a $25 gift code to the Power Poppy Shop! Woohooo!! Let's see what you've got my sweet stamping friends! ;-)

So, try last week's challenge or go "Half & Half" and cue up this week's Creative Confetti Challenge. No matter which one you choose, don't forget to link up your creation so we can 1. see it and 2. get you in the running for some Power Poppy goodness! 

Until next week!
~Julie 
Creative Confetti Thrower


Monday

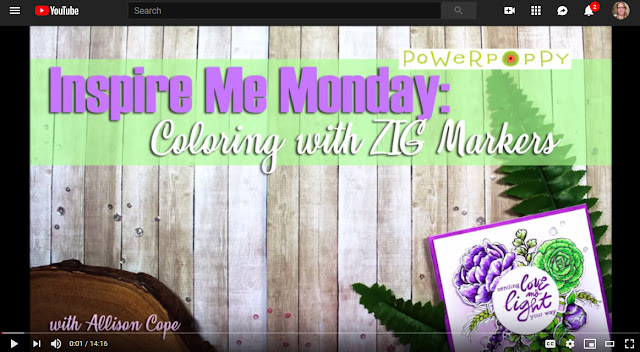
Inspire Me Monday: Coloring with ZIGs


Welcome to Inspire Me Monday!  I’m Allison Cope. Today I’ve gathered a variety of floral and other images stamps and were going to make a simple square card.  We’re going to be coloring in our images with ZIG Clean Color Real Brush Markers.

Come and join me at my desk and join along in the fun!

https://www.youtube.com/watch?v=d1L55v4SgB0&feature=youtu.be


The gorgeous stamp sets that I used today included “Abundant Petals” (Maidenhair fern), “O Hoppy Day” (Wheat), “Succulent Singles” (2 Succulents), “Peony Muse” (Peony bloom & bud) and the “Cabbage and Kale” stamp set.


And here's a close up of all the different layers...


Thanks for joining me today!  I hope you enjoyed my card making process.  I'd love to hear what you think in the comment section below.

Happy crafting!

~ Ally ~


stamps: Power Poppy (Abundant Petals, O Hoppy DaySucculent Singles, Peony MuseCabbage and Kale)

dies: Power Poppy (Abundant Petals Dies, Succulent Singles Dies,  Peony Muse Dies, Cabbage & Kale Dies), Catherine Pooler (Circle Dies
inks: Kraftin’ Kimmie Stamps (Wicked Black), Catherine Pooler (Flirty Fuchsia, Sweet Sixteen), ZIG Clean Color Real Brush Markers 
sequins: Pretty Pink Posh (Sparkling Clear)
cardstock: Recollections (110# White)
other: Stickles (Star Dust)

Inspire Me Monday: Copic Shading & Shadows

Happy Monday everyone!  Welcome to another edition of Inspire Me Monday here at Power Poppy with yours truly, Allison Cope. I hope you all had an amazing and hopefully creative weekend.

Today I’m sharing some tips and tricks when it comes to adding shading to your Copic coloring. Come and join me at my crafty desk … don’t forget that refreshing drink…  this one’s a little longer than usual!

Today I’m featuring one of the blooms form the new release, the Abundant Petals stamp set.


Here are the links to the two coloring sheets I designed.  Please feel free to download them to your own computer and use them.

Here’s another close up of the images and Copic Markers I chose to use today.


I’d love to see what you do with this little shading challenge.  Share a link to your own creations in the comment section below.

Have a great week everyone!  Hope you’re enjoying some nice sunny summer weather your way!

~ Ally ~


stamps:  Power Poppy (Abundant Petals)
cardstock:  Copic X-Press It ( White)
inks:  Copic Markers, Memento (Tuxedo Black)

Friday

Go Ahead.... Inspire Me!

Happy July Power Poppy Peeps! Boy, do we have a super fun challenge for you this month. Okay, I am a bit biased though. I decided on this challenge and I can't wait to see how you take this Power & Spark to the next explosive level! ;-)

Are you ready? Let's see what's in store!


HOW TO PLAY: Every Monday here on the Power Poppy blog we invite the best of the best creative minds to share a little bit of their creative process. The hope is that they will "inspire" and spark a crafty revolution! Each Inspire Me Monday feature offers either a coloring lesson, a technique or maybe even a fun little digital "how to!" You can find all of our Inspire Me Monday features HERE on this link. Once you scroll through all these fun and informative posts, to take on this challenge, all you need to do is pick one as your source of inspiration and give that coloring lesson, technique or tutorial a try! Just that simple!

On to my creation! Goodness, this was a tough one. I literally went through every Inspire Me Monday. Did you know we've had this feature on the blog since April of 2014? WOW! That's a lot of inspiration waiting in the wings! So, after going through and revisiting a ton of fun posts, I chose THIS post by Ally Cope -- Fun With Masks! I had just bought some masking sheets and wanted an "excuse" to rip them out of the package and give them a try! 

First up, here's a peek at one of Ally's cards so you get the gist of what I did when I followed in her creative footsteps! 


And here's a look at my version using Power Poppy's Abundant Petals stamp set along with the coordinating die set! After I lifted the masks, added a stitched scallop frame die and the sentiment that I embossed in white from the M-Powering Words stamp set.   


All in all, this was a super easy card to create and a fun technique that I am pretty sure I'll give a try again soon! If you want to know more about the particulars of this creation -- just click HERE or on my name in the link list down further in this post.  Now it's YOUR TURN to take one of these Inspire Me Mondays for a spin! When you do, don't forget to link up your creation below! 


THE OFFICIAL RULES:


  • Use Power Poppy stamps if you have them. If not, it is a great way to win some!
  • Link your creation below using our Linky (please use the exact URL from your post instead of a generic blog address.)
  • Please mention Power Poppy in YOUR blog or gallery post with a link back to THIS challenge
  • The winner will receive a $50 SHOPPING SPREE TO THE POWER POPPY SHOP
  • Enter as many cards as you’d like, as long as they fit the theme of the challenge
  • Deadline to enter is June 30 @ 8:00 PM EST. At that point, we’ll draw the winner randomly and make the announcement right here on the first Friday in August! 
    -------------------------------------

    With the new challenge, we are super excited to share the lucky card maker randomly chosen for June's Round and Round Power & Spark Challenge hosted by Stacy Morgan! (Be sure to click the link to see all the amazing entries this past month!) So, after we threw all the names in the virtual hat, here's the number that random.org drew...


  • The lucky number is 8, which means the winner is....

    ***CAT ARENZANA *** 

    Congrats Cat! You've won a $50 Shopping Spree to the Power Poppy Shop! Contact us at bloom@powerpoppy.com and we will send your shopping code.

    We do have to take a minute to share Cat's card, which is just a true breath of summer! 💗


    Cat used Power Poppy's stamp set Tea in the Garden and I just adore the peppy color scheme she chose for her card layout -- just too happy, don't you think? The end result is just sweet and delish looking! Thanks Cat for sharing your talents with us this month! We can't wait to see what you nab with that shopping spree so you can come back and inspire us all in future Power & Spark Challenges! ;-) 


    Before you go, you can't leave without hitting up these links below and seeing what some of our fabulous members of the Bloom Brigade have to share! Get ready, as always, to be WOWED! 


    Speaking of being wowed, Ally Cope will be in the house for the next Inspire Me Monday and I personally cannot wait to see what fabulousness she cooks up! Until then, enjoy your weekend my sweet stamping friends! 
    ~Julie


    Good Vibes... speed style!


    Hello happy stampers! Ready. Set. GO! I am about to call this little edition of Good Vibes 5 -- Good Vibes on Speed! Wait, that didn't sound right. Speedy Good Vibes? Good Vibes in 60 seconds? Okay, I think you get the gist! Since there's sunshine to be captured, (which should be a good vibe in and of itself) and a holiday weekend to plan for (at least here in the States), let's get right to the action.

    Get in on our sale to snap up the newest designs at a discount...


    This is one vibe that you are going to want to cash in on because the clock is ticking my fine friends! This fabulous 10% off sale ends at the stroke of midnight CST Saturday, March 26th! So, if your fingers have been itching to get inky with these new stamps -- now is the time to hit the Power Poppy Shop! Use code IAMCURIOUS at checkout.


    Have you been following Marcy's “mushlyfe” vibe lately? It started when she made the trip to Washington and traipsed around Whidbey Island on a mushroom hunting excursion. Since then, she's whipped up delights in the kitchen decked out with morels, she's hunted them on her morning walks with Mr. Tibbs, she's drawn them and then, above, she's created spore prints. Huh? Yes, that's what I said too... spore prints??!??? It's when you place the mushroom cap down on paper and this organic print just pops up thanks to the deposit of spores. Since it makes our fearless leader so happy and abuzz with excitement, we think it's a good vibe. And, we happen to love her illustrations in our newest release -- Wild Mushrooms -- inspired by her own nature walks!


    I know I have probably said this before but I really wish I had as much talent as Ally Cope has in her pinky finger. I'd be happy with just that! Why? That girl is CA-RAZ-ZEEE talented and this week's Inspire Me Monday proves it when she shares her video on adding gilded stitches to your cards or creations. Click HERE. Watch it. You won't be sad you did!


    I just had to make this photo above a good vibe because of, well, a few things. First up, don't you just love how with some ink, Power Poppy's M-Powering Words stamp set and a Misti Stamping Tool, you can create this unique, organic look that says SO much in a small space? I do!! I love the message too. "You are enough! It's unbelievable how ENOUGH you are!" Love. That is all.


    Okay, this next good vibe just makes my heart melt a wee bit. Check out this amazing card by Ms. Cindy Lawrence -- can you even? I can't. I can't even. So sweet! It features Power Poppy's new baby set -- Precious Baby! But, what's even sweeter is the fact that this card is very personal since she's expecting her second granddaughter in less than a month! I know. I know. She isn't old enough to have a granddaughter, let alone two, but hey, she's an amazing grandmother, so she just deserves to revel in those pint size little loves!


    This last vibe is a sight to behold to me personally. This customer creation was done by Kathy a.k.a. @mrsefs on Instagram. I am wowed because I took this class by Amy Shulke of Vanilla Arts last weekend and while I am kind of proud with my results, I didn't capture the look NEARLY as well as this fine wonder above. She nailed it! So dreamy! The class uses Power Poppy's digital stamp Hyacinth Bulb in Glass.  The good news is, if you are a clear stamp lover, it has just been released in photopolymer in a set called Hellebore and Hyacinth!  Well done Kathy! 

    Well, I think that was a little bit longer than 60 seconds and, guess what, there's an encore brewing! More good vibes? Yes, my friends, MORE good vibes!


    Check out these lovelies and the fabulous works of art that they have to share.


    Be sure to swing back by on Monday. Jessie Banks will be in the house and will be showing off another way to use one of her favorite mediums. Any guess what that might be??? :-)


    Well, I just gave you a major hint! ;-)


    Come hang out with us next weekend, June 2, for a massive blog hop celebrating the 10th episode of Kathy Racoosin’s Coloring Challenge — there will be giveaways and inspiration galore from a bunch of wonderful papercrafting companies, including Power Poppy. We hope you’ll join in, it is ALWAYS fulfilling and fun, and on a day with so many folks participating, it’s gonna be a bonanza!

    Thanks folks for stopping by and sharing a little bit of your day with us. If you live here in the states, we hope you take some time to honor and remember our servicemen and women lost in action this Memorial Day Weekend! We deeply appreciate all those who wear the uniform and do so bravely in order that we may all be free. 

    Take care sweet peeps and we will see you back here real soon! 

    ~Julie