Showing posts with label Follow Your Heart. Show all posts

Monday

Artist’s Notebook: Don’t Be Afraid of Oversized Coloring Projects

Want to improve your Copic Marker or colored pencil coloring? Power Poppy’s guest author Amy Shulke from VanillaArts.com talks about the courage to color oversized artistic coloring projects with Copic Markers or colored pencil. | VanillaArts.com | #realistic #howtocolor #copic

I love to color big projects using Copic Markers and colored pencils. To work at 8.5" x 11” or larger, I expand the size of my digital stamps to just barely fit on the largest paper my printer can handle. An oversized project allows me space to color the same way I would paint, with lots of detail and realism.

This is what I call Artistic Coloring and it’s extremely rewarding.

But what I notice when I first introduce students to oversized projects is oversized nervousness.

“Oh my, it’s gigantic! How am I supposed to color all that space? This will take forever!”

Relax, artistic coloring does require more time than quick and easy card fronts.

But that’s not a bad thing!


Want to improve your Copic Marker or colored pencil coloring? Power Poppy’s guest author Amy Shulke from VanillaArts.com talks about the courage to color oversized artistic coloring projects with Copic Markers or colored pencil. | VanillaArts.com | #realistic #howtocolor #copic

Hello, my name is Amy Shulke and I’m the illustrator and art instructor over at VanillaArts.com. Today I’d like to give you a few tips to make large size projects feel less intimidating.

In the past few months, we’ve explored how Artistic Coloring differs from traditional coloring for cards and how to take the first step to adding artistry to your projects.

But there’s still a time hurdle that discourages people from using their Power Poppy digital stamps for large scale realistic & artistic marker paintings.

Let’s eliminate the fear of time.

Because often, it’s not the size of the project that’s scaring you away, it’s your mental misconceptions about Artistic Coloring.


Want to improve your Copic Marker or colored pencil coloring? Power Poppy’s guest author Amy Shulke from VanillaArts.com talks about the courage to color oversized artistic coloring projects with Copic Markers or colored pencil. | VanillaArts.com | #realistic #howtocolor #copic

1. Working slow is good for your soul

We live in a world of overnight shipping, pocket internet, and instant texts.

Fast, fast, fast.

And because most colorers come to coloring from the card making world, you’re used to cranking out a handful of handmade cards on a Saturday afternoon.

C’mon, you know you’re a sucker for tuts marked Quick & Easy, Simple, and One Layer.

But there is joy in deeper coloring.

Coloring becomes less a hobby and more of personal journey when you take your time. When you explore your coloring images deeper, you also start to explore the depths of your heart and mind. Artistic coloring is introspective, soothing, and even zen. It’s yoga for your hands and restorative for your brain.

Discovery and self exploration are what’s missing from Tuesday Tut-a-thons and the lack of meaning is why most colorers quit coloring when a new crafty fad hits.

If you never dig deeper into the coloring process, you’re going to find yourself tying macrame’ or tole painting pepper shakers this time next year. Think back and count the crafts you did before you found your way to stamp coloring. It’s a lot, right? You must have something more valuable than trio-blending a pink piglet in a party hat to keep you coloring long term.

Speed techniques and 20 minute cards burn you out quickly.

Slow coloring feeds you for a lifetime.


Want to improve your Copic Marker or colored pencil coloring? Power Poppy’s guest author Amy Shulke from VanillaArts.com talks about the courage to color oversized artistic coloring projects with Copic Markers or colored pencil. | VanillaArts.com | #realistic #howtocolor #copic

2. The joy of detail

One of the reasons why I love working with Power Poppy is the same reason why you’re a fan of Power Poppy too:

We love detail.

Power Poppy florals are chock-full of petals, leaves, berries, birds, butterflies, and little hidden details that make us smile. We’re definitely not the kind of people that refuse to color any stamp with more than three shapes in it.

But let’s be honest: far too often you stamp in black and let Marcella handle all the pesky bits for you.

Maybe you put a pretty watercolor wash behind the petals. Or you hit only the important items with a pop of color. But most of the time, if someone were to erase the black stamp lines leaving just your color on the page, it would look like a wonky color blob.

Which is strange to me, because the joy you get from letting your eye wander across a beautifully detailed stamp is less than a tenth of the pride you feel when you color all of those details yourself.

“I did that!” is an amazing feeling!

For my Annabella’s Heart online artistic coloring class, we use the new expansion pack for the Follow Your Heart set. There are now three new heart challenges to choose from and each one is perfect for detail coloring.

Marcella draws shapes clearly and then gives you tons of little clues for texture and shadow within the shapes. Power Poppy stamps are an easy, stress-free way to savor the detail coloring process.

But you won't have room for the magical details if you don't print the digital stamps larger than card size and we won't see your details unless you print the digi in pale gray.

Trust yourself.

Some people don’t have the patience for small detail but for those of us who love little bugs on little leaves… we were born to color long and slow!


Want to improve your Copic Marker or colored pencil coloring? Power Poppy’s guest author Amy Shulke from VanillaArts.com talks about the courage to color oversized artistic coloring projects with Copic Markers or colored pencil. | VanillaArts.com | #realistic #howtocolor #copic

3. Complex doesn’t have to be hard

Okay, I’ll admit that I lost count somewhere after the 50th petal. There are a lot of petals here to color.

But as I said in the last point, we’re here at Power Poppy because we love this kind of complex stamp. Most people would take one look at it and bleep. “I can’t do that!”

That’s where you’re wrong. This is NOT an advanced project.

One petal.

If you can color one petal, you can color this stamp. It’s the same petal over and over and over and over and over and…

There’s a difference between complex and difficult.

When something is difficult, you physically have problems completing the task. You can’t perform at the level demanded; you’re unable to complete the project.

That’s different than a job with lots of simple little things to do.

Don’t let your first impression of a stamp turn you off. Don’t let the petal count dissuade you from trying something that’s actually a ton of fun.

Lots of easy looks complicated but it’s never hard.


Want to improve your Copic Marker or colored pencil coloring? Power Poppy’s guest author Amy Shulke from VanillaArts.com talks about the courage to color oversized artistic coloring projects with Copic Markers or colored pencil. | VanillaArts.com | #realistic #howtocolor #copic

4. Watch your style evolve

We’ve been marking our kid’s height inside a kitchen doorway since they were old enough to stand upright without tumbling over. My 6 foot tall son doesn’t remember being short, but we have proof.

Long slow projects like this hydrangea heart are growth charts. I’m not the same artist I was when I started and I can see that here.

I started coloring at the point of the heart. I worked my way counterclockwise around the outside edge. I did the interior large florets last.

And there’s an obvious difference between my first petal and my last.

As you color big images, you get more efficient. You also discover things that look great, you stop repeating mistakes, and you learn to color better and better.

Repetitive images are strangely addicting. It’s fun to make your way back to the beginning and see how your coloring has evolved, grown, and improved.

I don’t remember being clumsy but I was.

Long slow coloring images are practice exercises but they’re far more rewarding than a page full of practice strokes. Don’t ask me to blend a row of squares and then shade a row of circles; I’d quit after two of each.

But I could color flower petals for years and still find new things to explore.


Want to improve your Copic Marker or colored pencil coloring? Power Poppy’s guest author Amy Shulke from VanillaArts.com talks about the courage to color oversized artistic coloring projects with Copic Markers or colored pencil. | VanillaArts.com | #realistic #howtocolor #copic

5. It’s okay to get bored

A lot of people look at large coloring images or the ones with lots of fiddly components and think: “how am I supposed to get that done this afternoon?”

Whoa. Back up there, lil' doggie.

Who says you’re supposed start and finish today?

I worked on Annabelle’s Heart over five days. The background in one sitting, shadows in another session. Then the florets over the next four days. A little bit here, a little bit there. Do some now, come back later…

Otherwise, I’d go nuts.

I know the romantic version of an artist is someone locked in their Paris flat painting for six days straight.

But seriously, that’s crazy. Marathons are for runners, not artists. There’s no prize for finishing it all in one sitting.

Take your time, take breaks, go do something else, live your life!

When your mind starts to wander, that’s natures little way of encouraging you to take a walk, grab lunch, and go be normal for a while.

It’s natural to get bored after the 10th petal. It’s good to stop and come back later.

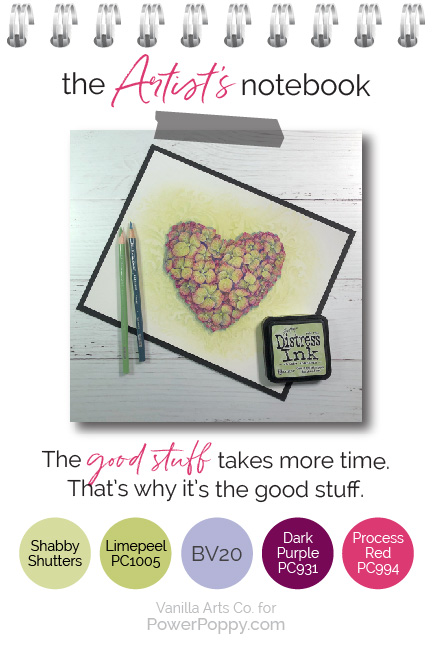
The good stuff? It takes more time to color. That’s how it gets good.


Want to improve your Copic Marker or colored pencil coloring? Power Poppy’s guest author Amy Shulke from VanillaArts.com talks about the courage to color oversized artistic coloring projects with Copic Markers or colored pencil. | VanillaArts.com | #realistic #howtocolor #copic

So here’s my Artist’s Notebook challenge for you this month...


Want to improve your Copic Marker or colored pencil coloring? Power Poppy’s guest author Amy Shulke from VanillaArts.com talks about the courage to color oversized artistic coloring projects with Copic Markers or colored pencil. | VanillaArts.com | #realistic #howtocolor #copicTry coloring a Power Poppy stamp that has previously scared you.

Maybe it’s a complex stamp with six different kinds of flowers in it.

Or maybe it’s one of the simpler, single blossom images but you’ve always wanted to try it larger and color the details yourself.

Long slow coloring is a great way to learn and grow PLUS expanded length projects also feed your spirit and allow you to express your unique self.

Set aside the artificial deadlines and stop talking yourself out of big projects.

You can do this!


Want to improve your Copic Marker or colored pencil coloring? Power Poppy’s guest author Amy Shulke from VanillaArts.com talks about the courage to color oversized artistic coloring projects with Copic Markers or colored pencil. | VanillaArts.com | #realistic #howtocolor #copic

Want to color Power Poppy’s Follow Your Heart with me? 

Remember, this Hydrangea version is part of the new update to the original stamp pack, don't miss it!

My Annabelle’s Heart class is part of the Vanilla Livestream series for intermediate to advanced Copic colorers. This lesson covers the visual planes concept and shows you how to maximize dimension on three different levels using just our beginner level Push & Pull technique.

You can find out more about Vanilla Livestream classes here.

And I’ll see you back here next month for another glance into my Artist’s Notebook!


Previous Artist's Notebook articles:

What is Artistic Coloring?
Add Realistic Texture

Follow Your Heart to our newest digi!

Hello there, friends! While we may have just introduced you to the new Everything’s Rosy set last week, we’ve got one more up our sleeve for January. Introducing a perfectly plump heart of roses that will make classically sweet Valentine’s cards! Check out my remixed illustration, just added to the Power Poppy Shop today! Pierced with an arrow and accompanied by a retro/modern sentiment, this one simply asks you to Follow Your Heart.

http://powerpoppy.com/products/follow-your-heart

Our talented designers have made lovely cards with this new digital stamp set, and I hope you’ll go take a look!

Check out Stacy Morgan and Barb Walker’s cool creations, and if you’d like to see what Christine Okken has made, just scroll down to see her awesome Inspire Me Monday post! They all have me feeling that love is in the air!

Thank you all and have a wonderful day, peeps!

Inspire Me Monday: Showcasing Vellum


Hi Power Poppy friends!  Today it’s Christine bringing you a little fun for your Monday.  We’re going to do a whirlwind tour through the possibilities that using vellum brings for your card making. I’ve got five cards to show you with different applications.  Let’s jump in!


Vellum is such a perfect material for so many effects.  It adds that slightly-opaque yet slightly-transparent layer, which in turn gives you a dreamy or softened effect that’s really pretty.  There are so many ways to use it!

1.  Colouring on Vellum


A gorgeous effect that works on vellum is colouring.  Because it has a bit of a slick coating on it, it’s very different from colouring on regular paper.  One way I like to use it is to emboss an image on the front of the vellum, and then colour on the back.  There’s two reasons for this, one - Copics shouldn’t touch embossing lines as it will clog your nibs, and two because it blends very differently than on regular paper so using that opaque nature of vellum allows you to disguise some of those marker lines by colouring on the back.   Here I’ve embossed the lovely peonies from Dynamic Duos: Peonies & Tulips with white embossing powder on vellum.  


Here you can see the back of my vellum from the card above where I’ve coloured.  The markers really do blend well on vellum, but you definitely get a stroky sort of look.  But once you turn the vellum over, that really gets muted and it still looks great.  So, there’s two benefits to this, one, you don’t have to be as particular about your blending and strokes, and two you get to use really bold colours and they’re muted slightly on the side of the vellum that is showing.  


Here you can see the difference in what the right-side-up side looks like.  


And here’s a close-up of the finished design with a lovely word die, sparkling ribbon and rhinestones. Always a lovely way to use vellum, and a great style to have in your creative toolbox.  

2.  Softening Coloured Images


I love bold colours, I can’t help myself.  I love colouring with bold colours too!  But, there are times when you want to create a mood or tone that’s softer.  A layer of vellum is the perfect touch.  I knew I wanted to make these gorgeous Ranunculus flowers into a card that could be used for a sympathy or thinking of you theme.  Well, bold orange really doesn’t work for that does it?   


Just layering vellum over the design shows how it softens and mutes the boldness of the colouring that’s perfect for the theme of the card I’m creating.  

Here’s the finished card design with the added sentiment and framing. It’s like we’ve gone from shouting to whispering.  


Perfectly peaceful.  

3.  Layering Vellum 


Another neat way to use vellum is to layer it to make a great statement.  Here I’ve used Power Poppy’s Sassy Succulents set and heat embossed three layers of the hen and chicks image.  Then I carefully cut out progressively smaller areas of the image so that I could stack them together and create dimension.  The one thing that’s important to note about vellum is that because of it’s transparent nature, you have to watch how you adhere it.  Whatever you use will often show through. So you can tell that I’ve disguised the pop dots between the layers with some enamel dots.  With vellum you have to be a bit creative on how to adhere it in a way that doesn’t show.  


That dimension is so great, and the transparency of the vellum still shows through some of the green of the cardstock.  

4.  Vellum Accents


Vellum is perfect for those little touches to accent a card.  Here I’ve created a design with two Power Poppy sets, Good Thinking:  Love Notes, and a brand NEW digi releasing today called Follow Your Heart.  I gave this one a bit of a scrappy-collage feel with embossing paste hearts, words and images and then that pretty vellum mini-envelope and heart.  


Vellum accents could be any little elements that add that extra interest.  Think die cut leaves, hearts or flowers etc.  

5.  Vellum Sentiments


Lastly, I have a very Clean and Simple design that demonstrates how vellum is perfect for adding soft sentiments to your designs.  On this Valentiney card I’ve embossed Big Scripts onto vellum and made a sentiment panel.  It serves another purpose because it also softens that section of the designer paper - just like it would a coloured image underneath.  I’ve sewn the vellum on to hold it in place, but also added little bits of adhesive underneath my accents so it won’t be seen.  


One thing that’s very important to note about embossing on vellum is that because it’s such a staticky material, I always use my embossing buddy on the vellum before I emboss.  It prevents the embossing powder from sticking where it shouldn’t.  I consider it a must working with embossing on vellum.  

Oh, there’s just so many ways you could use vellum on your cards!  I’ve only covered a few, but I hope you play with this lovely style of paper and see for yourself how versatile it is!  Thanks for joining me today!  

Christine