Hello all and welcome to another edition of Inspire Me Monday! Since I love working with and fiddling with digital stamps, today I thought I'd share a few 10-minute cards that involve -- no coloring! That's right, no coloring! That is, unless you want to! Today, we'll be dabbling in a little "digital ink!"
I love bright, bold colors on my cards and this technique lets your printer do all the work so that you could make a bright and cheery card in a jiffy!
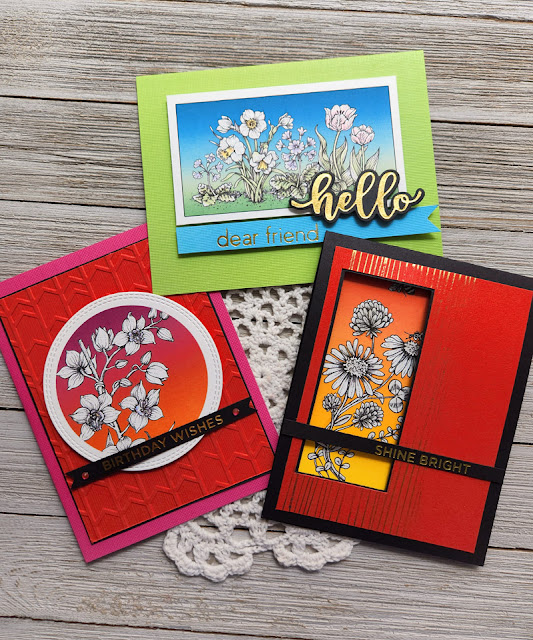
Let's take a peek at what we'll be making today!
I used these digital stamps: Orchid Cascade, Spring Border One and Asters Abuzz.
So, how did I do this? Well, you'll need photo editing software that allows you to add some effects. My tutorial today will share tips using Photoshop Elements. It's a budget version of Photoshop and I really love it for digital stamps!
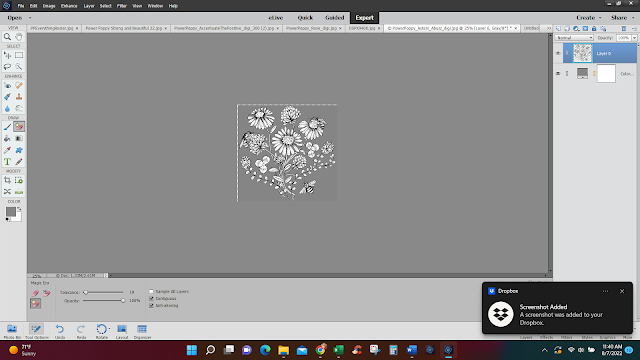
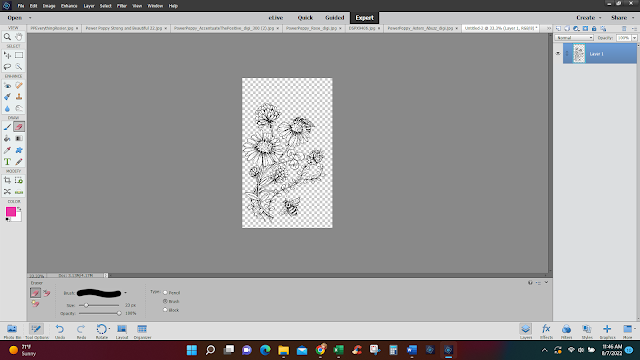
I started by opening up the digital stamp Aster's Abuzz and erasing the background behind the image. I used the Magic Eraser tool and just clicked around until the background was gone.
I also cropped the bee out and then, by dragging and dropping, managed to arrange him more at the top of the image instead.
Now it's time for our digital ink! I created a canvas that was the same size as a card front. Using the rectangle marquee tool, I created by rectangle, clicked on "layer" and then clicked on "new fill layer" and "gradient." I chose this red to orange gradient to serve as the backdrop for my aster cluster!
From here, I just dragged the rectangle over to my aster image and situated it right behind.
And, here's a look at how this card shaped up! I created a little window because I wanted the inside to be a kind of "surprise!" You can see that I also added a bit of sparkle thanks to some foil accents and a foiled sentiment. TIP: When you print your image, make sure that you are on "best detail" for printing. I know every printer has this type of version. It just ensures that the color is laid down on the paper in the highest saturation.
And, you can see that I did try to create a little razzle-dazzle by coloring the image with Wink of Stella clear glitter brush pen. It really sparkles in real life - just adding that little bit of interest!
See that bit of sparkle?
For this image, I created the rectangle and then used the "stoke" accent around my gradient box just for a little extra pop. I also splashed some color on the flowers and stems. This is still a 10-minute creation because I literally scribbled on the color, for just a soft effect. The sentiment was created by some of my foil dies.
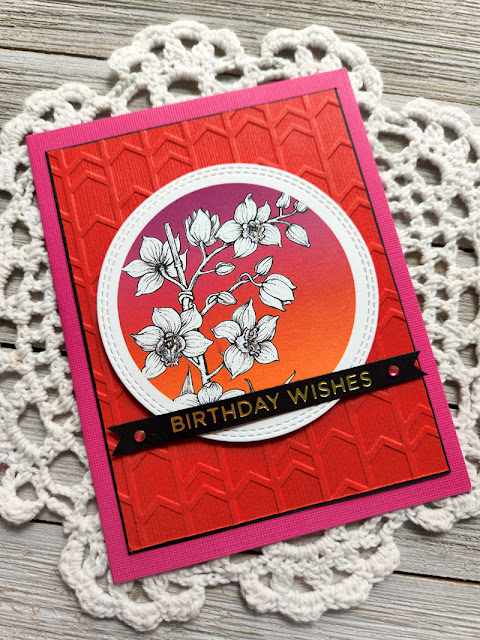
For my last card, I did want to explain how I got my image in a circular shape. You simply open up the image, remove the background and then, using the circular marquee tool, you can cut out a portion of the digital stamp in a circular shape. From there, I created a circle using my marquee tool and then using the same steps as the rectangle shape I created, I added a new fill layer in gradient color.
And here's a look at how my finished card ended up!
For this creation, I added some pizazz with an embossed background, some rhinestones, a foiled sentiment and then, I added some stickles to portions of my orchid just to make it pop a bit! See?
And, here's one last look at all three cards together!
I hope you enjoyed today's tutorial and maybe learn a new technique that you hadn't even considered before -- digital ink! Learning little tips and tricks like this sure helps to give your digital stamps a little more longevity. You never really get bored of them! Why? Because they can be used in so many different ways, they can evolve to serve so many different "styles!"
Thanks, everyone for stopping by! I hope you have a fabulous and creative week!






6 comments:
Fun projects! Thanks for sharing.
Marianne x
Fabulous cards and colors. Thanks for the lovely tutorial, Julie :)
Thanks for 'talking us through' this editing process. The stamps are delightful, but your added color background makes it all delightful!
What a great idea! You always come up with the best techniques to share!!! The finished cards are stunning!
Stunning cards Julie, love the bright colours.
And an awesome technique, I have to try this soometime.
I almost mist this great post, since a month I don't get
any mail notification that there is a new blog post.
I don't know why, perhaps you can help?
Thank you so much for sharing, stay safe and have a wonderful day.
Henriette, I am so sorry but I have no idea why you might not get a notification. Just know that we have Inspire Me Monday each Monday! Just check in for new and fun things each Monday!😊
Post a Comment