

Welcome to our second The Blossom Challenge from Power Poppy! We had such a great time perusing your beautiful challenge entries from last month’s The Blossom Challenge of April Showers Bring May Flowers. Last month’s winner will be at the end of the post!
I’m your host Christine and this month we’ve got a fun theme called Glassy-Eyed! We invite you to use an image that is in glass or under glass on your design. So dig into your Copics, Pencils or watercolour, and any Power Poppy image with glass. You could even be totally artsy and use a Power Poppy image and draw your own glass vase, snowglobe or cloche!
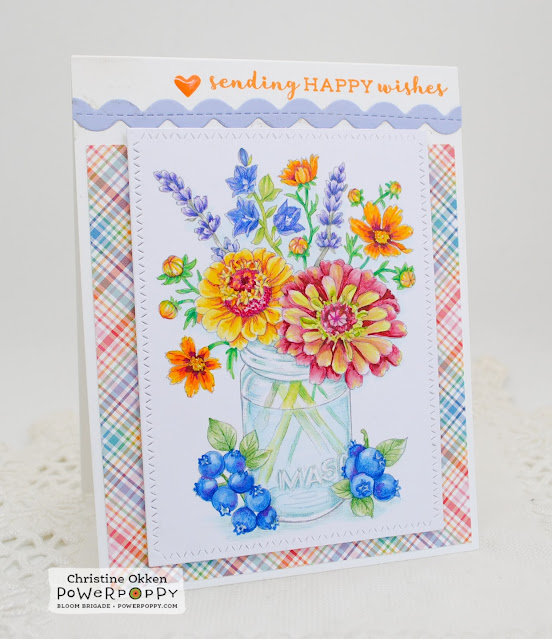
Accentuate the Positive
Cuppa Cupcake
Cuppa Buttercups
Hellebores
Hyacinth Bulb in Glass
Nest is Best
Seaside Sweetness
Single Orchid
Snowglobe Greetings
Sweet & Sugary Snowglobe
Tabletop Tree
Tiny Treasures
Volumes of Beauty
Well Hello Dahlia
Wildflower Mini

Today I’m using the NEW image from Power Poppy called Accentuate the Positive. What a gorgeous array of flowers and fruit around this pretty mason jar! I printed the image quite lightly for colouring and then used Copics and Prismacolour Pencils to brighten up the blooms. One of my favourite varieties of Zinnia is Queen Red Lime, they have such a nice fade between lime and rosy red, so I tried to give the flower on the lower right that treatment in my colouring.
I have a short tutorial on my blog on what I think are important features of colouring glass HERE.
Things I like to consider when colouring something in or under glass.
- Where the light is reflecting on the glass
- The width of the glass for colouring, and the bottom edges (if in a vase)
- Will the glass be coloured or clear
- Will there be a water level be and will you define it
- How stems refract and colour fades in water
Cuppa Cupcake
Cuppa Buttercups
Hellebores
Hyacinth Bulb in Glass
Nest is Best
Seaside Sweetness
Single Orchid
Snowglobe Greetings
Sweet & Sugary Snowglobe
Tabletop Tree
Tiny Treasures
Volumes of Beauty
Well Hello Dahlia
Wildflower Mini
Zinnia Parade
Challenge Details: We hope you can join us for the challenge this month and create something in or under glass with Power Poppy images! You could win a $20 Gift Code to the Power Poppy store! Link up your creation BELOW!
Remember: You MUST use a Power Poppy image somewhere on your design to be included in the Glassy-Eyed challenge. Entries close on July 16th at NOON.
Last month’s The Blossom Challenge May Flowers RANDOMLY DRAWN WINNER IS.....Liz Williams with her beautiful Pure Prairie Bouquet! Congratulations Liz. Contact Marcy at bloom@powerpoppy.com for your prize code!


