Take it away Amy!
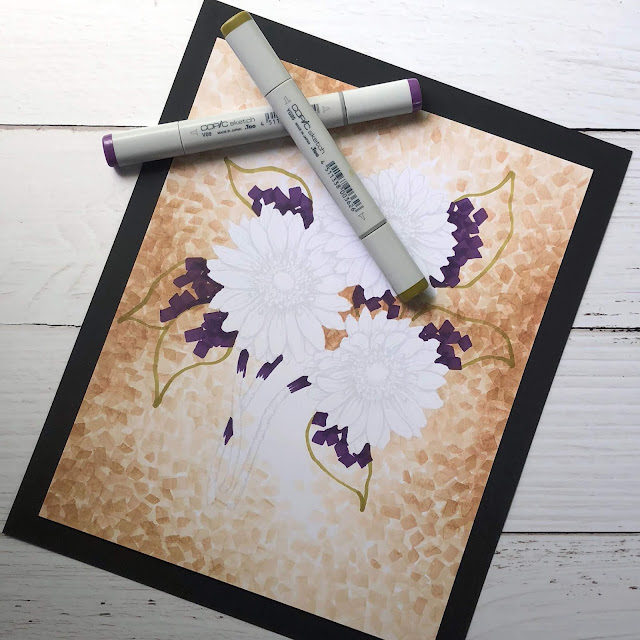
 TIP #2: Just because I'm using loose confetti type strokes doesn't mean I don't need accurate shade values. This dark purple will push the hand-drawn leaves deeper into the bouquet.
TIP #3: Coloring smaller areas with a chisel nib? I can get three distinct stroke shapes from the same nib using the broad side, the narrow side or just the corner. Narrow strokes and corner strokes fill the button shapes nicely.
TIP #4: A cast shadow always adds a sense of spatial depth and reality, even if most viewers never notice it.
TIP #5: I put off the yellow until last because I wasn't quite sure how deep of a yellow was necessary. By waiting until everything else was complete, I was able to make an educated decision rather than a random guess. I had set aside a darker group of yellows which turned out to be too similar to the background. Glad I waited!
TIP #6: My pencil strokes either match the shape and size of the marker strokes or they're super soft and barely there. Accent the marker work, don't hide it.
Thanks so much for sharing Amy! I absolutely love the results and can't wait to create my own confetti background and chisel nib creation! For those that joined us today -- do you want to give this technique a whirl? Be sure to leave a link in the comments section if you do give it a try!
If you think you might need a little extra help pulling off this look, you're in luck! This Friday -- September 14 -- at 11 AM EST, you can join Amy for a LIVE lesson on how to control your chisel nib markers and discover what chisel nibs do best -- allow your inner artistic voice to shine!
Can't make the class, don't worry! Amy offers a recording immediately after the live broadcast ends and you can watch as many times as you want until March 1st, 2019! Want to know more? Just CLICK HERE for all the deets!
Thanks for stopping by! Happy Monday everyone!


16 comments:
Oh, Amy, I absolutely LOVE how you've used the nibs of the markers (the "neglected" end of our markers - ha!) and created such an amazing image. The background is fabulous, and I look forward to the class this Friday. I've learned so much and still have much to learn (and lots of practice too). Thanks for sharing a great Inspire Me Monday! Hugs!
Awesome! Thanks for sharing.
WOW! Amy, this is remarkable and you are an amazingly talented artist. I am so impressed with the beauty of the card. I look forward to the class!
Love love LOVE this technique! Thanks so much for the inspiration today, Julie! BEAUTIFUL! Like a dancing mosaic!
Wow this is stunning. I often use the chisel end of my Promarkers for stippling backgrounds and colouring skies, but not for the image!
Simply stunning!!!!
WOWZERS this is amazing awesome use of chisel ends!
Amy, this is like an impressionist painting. Thanks for sharing!
This is so gorgeous. I’m definitely interested in learning more. I can’t catch Amy life but will be checking out her recording. Thanks for sharing!
Wow! This is great! I have been known to open the chisel side and contemplate using it only to recap it without a single stroke. Now i have some inspiration!
wow what a clever way of using this nib - very creative:)
Just beautiful, such and fun and creative way to make the background!
I have never seen this before, and it perked me right up. It's incredible and I will be trying it out just as soon as I'm done typing this comment. Thank you so much for sharing your techniques and beautiful work!
What a fabulous idea for the chisel nib that we never know what to do with! Thank you so much for sharing
Wow I am so going to have to give this ago. Looking forward to the new stamps coming out. Hopefully you will also be doing a digi version for those of us not in the USA and don't order stamps due to postage costs x
That makes for a beautiful background!
Post a Comment