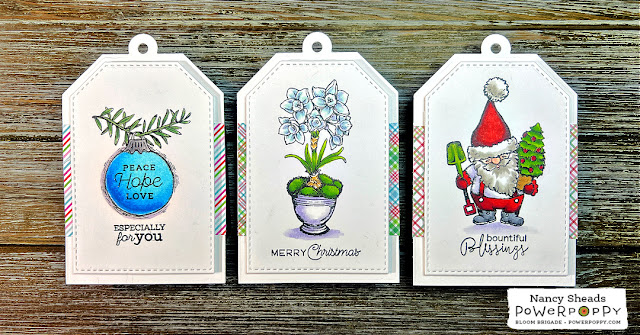
Hey friends! Welcome to another addition of Inspire Me Monday! The theme of this month's challenge is Christmas in July so I thought that I'd get a jump start on holiday gift tags. I love making tags because they are quick projects that I can pull together when I’m short on crafting time. And if you make too many, you can always use them as a focal point on a holiday card or just save them until next year. They never go out of style!
LET'S TAKE A LOOK AT TODAY'S PROJECT!
The basic design of all the tags is the same starting with the Easy Layer Tag Die by Avery Elle. I like using this die set for tags because which creates two layers -- a top layer for the image and a bottom layer for a background design. If you use Copic markers, this will nicely cover the bleed through on the back of the image layer and the base is large enough to add a greeting on the back.
TAG 1 - SIMPLE JOYS
For this tag, I used the ornament image from the Simple Joys stamp set. The image was colored with the following Copic markers:
- Ornament: B000, B00, B02, B05
- Ornament Cap: C1, C3, C5
- Sprig: G24, G46
TAG 2 - MOSSY POTS WITH PAPERWHITES
For this tag, I used the single Paperwhites image from the Mossy Pots with Paperwhites Stamp Set. The image is also available as Mossy Pots with Paperwhites: Accent Pieces Digital Stamp Set. The image was colored with the following Copic markers:
- Flowers: BV000, B000, BG10
- Moss & Foliage: YG03, YG17, YG67
- Bulb: E31, E33
- Bowl: BV0000, BV000, BV00
- Shadow: BV0000, BV000

TAG 3 - SEASON'S GREENINGS
For this tag, I use an image from the Season's Greenings stamp set. This image is also available as Season's Greenings: Planta Claus Digital Stamp Set. The image was colored with the following Copic markers:
- Skin: E00, R20
- Beard: W1, W3
- Hat, gloves & pants: R14, R24, R46, R59
- Shirt: BV0000, BV000
- Boots: N3, N5
- Tree: R46, YG03, YG17, YG67, E35
- Shovel: R46, YG03, YG67

FINISHING THE TAGS
Once the coloring was complete, I stamped the sentiments using a black pigment ink. For each tag, I cut a piece of design paper to 2.25" x 3.25" (the width of the tag) and adhered it to the bottom tag layer. I applied foam tape to the back of the image layer and assembled as shown.
Hope you enjoyed today's project! Thanks for stopping by!
Nancy


2 comments:
These are so sweet, Nancy!
These are beautiful Nancy!
What a great idea to use two layers with on the first one
the little peep of design paper. I have to remember that for my own makes.
Sorry that I'm late with commenting but I didn't receive a mailing that
there was a new post and always forget to look on Monday's.
Thank you so much for sharing, stay safe and have a wonderful day.
Post a Comment