Howdy fellow stamp lovers! Welcome to another fabulous
Inspire Me Monday here at
Power Poppy!
I have been procrastinating on making my Secret Santa a gift for a few weeks now. (
And I know, how much later I am I gunna leave it since Christmas is only weeks away PLUS I have to send it across the border too!?! OY!) So I finally got my behind in gear and set out to make my pal something for all year round instead of just something for the holidays.
So I went trolling through my alterable stash of goodies and came across this simple round
papier-mâché box that I had hidden away.
Perfect! Super simple shape to deal with and super easy to use the fabulous new
Winter Pick-Me-Up digital stamp set on!
So I thought I'd share with you my creative process from start to finish!
Digi to box!
Step One:
I opened up my Photoshop CS3 program in my computer and opened up my
Winter Pick-Me-Up digital stamp and a new 8.5"x11" document (
the same size as a regular sheet of paper so it's easy to print!)
Step Two:
Then I measured the diameter of my box’s top. For my particular box, the lid was 5 7/8" in diameter. You'll have to measure your project to determine the size of top element you will need to recreate this project.
I then drew a circle with that same 5 7/8" diameter and filled it with pink so it was easily seen on my document.
Step Three:
Next I dragged the beautiful
Winter Pick-Me-Up bouquet of snowdrops, pussy-willow branches and croci over top of the pink circle. I also got rid of the white that wrapped around the digital stamp so I could enlarge and position it correctly within the diameter of the circle. You'll notice when I erased this outer white, it also erased some of the white within the pussy-willow buds and the odd snowdrop petal...
nothing worry about!
Step Four:
I duplicated my image again and rotated it to fit upside down but within the boundaries of the pink circle (
my box top limits) on the opposite side of my circle. I wasn't too worried about having the single bud fall outside of that boundary because I had most of my image inside the circle.
Step Five:
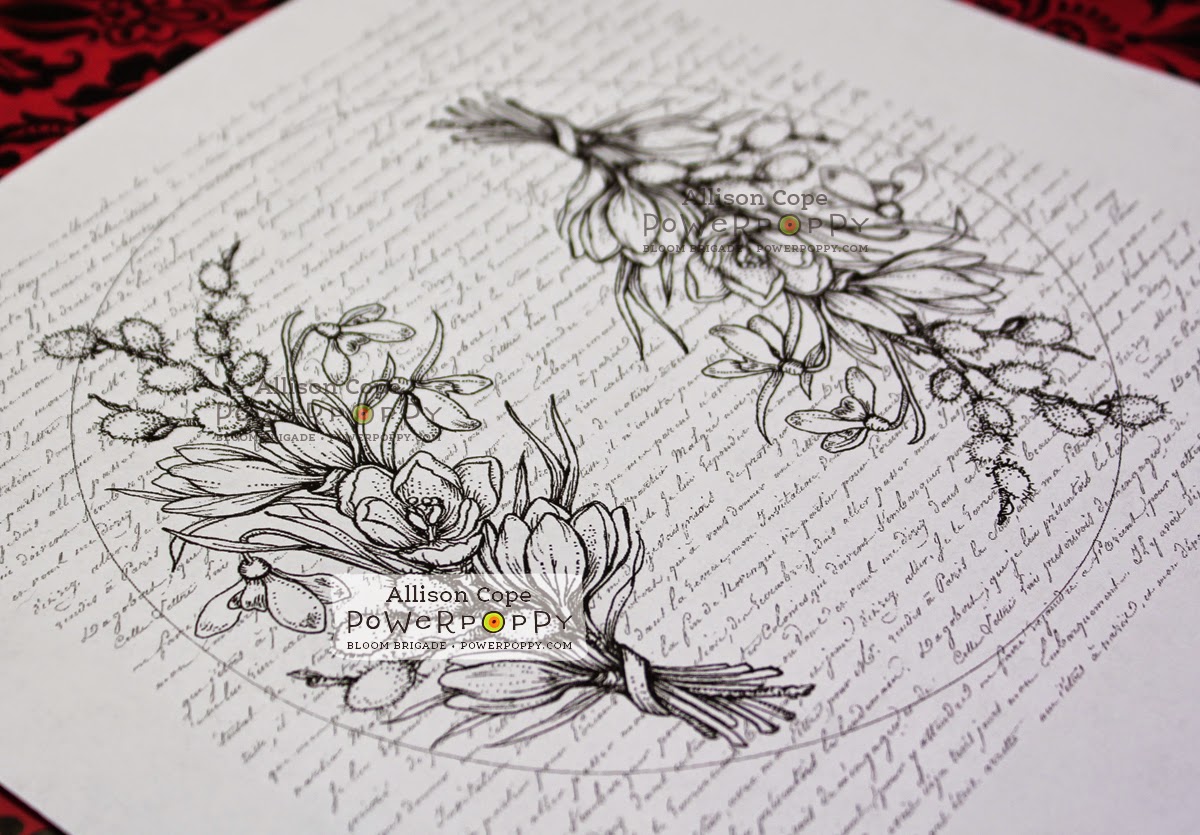
Next I wanted to add some script back ground to my bouquets (
a fav back drop for me!) so I pulled a 12x12 sheet of digital script paper in, resized it suit the feel of my project and layered it between the images and the pink circle.
Step Six:
Next I played with the opacity of the script paper (
how see-through it is). I wanted it to be there but not stand out too much against the beautiful bouquets. Just a subtle script...
Step Seven:
As you can see below, since some of my pussy-willow buds are transparent and you could see the script inside them, I had to fix that.
I took my eraser tool and made it relatively small; small enough to fit inside the buds. I erased all of the script layer showing through the transparent buds and petals. Since I erased this back ground, you can now see the pink circle more clearly through the erased holes!
Not to worry... that circle is just a guide and won't be pink for our finished project!
Here is what my almost completed box topper looks like!
Step Eight:
Next I filled my circle with white and added a stroke of 1 pixel to the outside of my circle so I could still make out my basic guideline.
NOW... in hind sight, I would have forgone this step and just simply erased the circle all together! Live and learn from your mistakes right! Next time...
Step Nine:
I then saved my document with all the layers present and showing. Then I saved it again with all the visible layers merged together and in jpeg format. I printed it out on normal copy paper...
yup... normal good ol' copy paper using my laser printer! My inkjet printer would have worked too but my laser printer ink costs less per page.
TIP: Always test your ink before colouring your image!
And here it is...
Step Ten:
Next, some colour was in order! I pulled out my Copic air brush system and gave it a light spray of Copic R83 and then continued to colour up all the remainder of my bouquets with my Copic Markers. Since I air brushed the back ground I had to use my Copic Blender Pen to remove some of the pink mist from my Snowdrop blooms. (
You'll have to excuse my wild pink & black damask mat in the photos!)
Step Eleven:
Once I was happy with my colouring, I applied some Glossy Accents to the top of my raw box top and used a paint brush to smooth it out and apply it to all of the box top surface.
I carefully laid my printed and coloured box top paper to the wet adhesive. I used a clean, dry brayer to smooth any bubbles from the surface.
Now this is where I wish I had gotten rid of the circle's outline... it turned out that I didn't get the circle exactly centered within the confines of the lid, and it's
REALLY hard to move once it's on there, so my circle outline wasn't centered!
Drat! I did find a happy solution though...
stay tuned!
Step Twelve:
Next I took some scissors and cut the excess paper that wasn't attached to the lid into 1/2" tabs all around the edge of the lid. I used some MONO Tombo adhesive to stick all the tabs down to the edge of the lid.
Step Thirteen:
And this is where my creative brain came in and solved the problem of that pesky circle outline! I just simple applied some white acrylic paint to the edges of the top of the lid. I started in the place where I had to paint out into the lid the most and then continued painting around the edge at that same distance in. I didn't want a uniformly painted edge so I just left the brush strokes as they came!
Step Fourteen:
For the finishing touches, I covered the round box base with the same script paper, air brushed with the same Copic Marker as the lid.
I then sprayed the lid and the outside of the box base with some Krylon Acrylic Crystal Clear Gloss for a waterproof finish to the box. Then I added some silver trims to the edges of the box's lid.
And here it is! One little decorative box, made especially for my American Secret Santa! I sure hope she likes it. I think I will fill it with all kinds of fun scrapbooking items before I send it off!
What do you think? Will she like it?
Thanks for joining me on my creative journey today! I hope my tutorial inspires you to give the
Power Poppy digital stamps a try! You can have them in
minutes from the
Power Poppy Shop. Click
HERE to browse all the gorgeous digital blooms and their corresponding sentiments!
Have a great Monday everyone!
~ Allison ~
Supplies:
Digital Stamps: Power Poppy (Winter Pick-Me-Up)
Silver Trims: Cosmo Cricket
Inks: Copic Markers, Copic Blender Solution
Acyrlic Paint: DecoArt
Adhesives: Glossy Accents, Mono Tombo Glue
Box: Dollarama