Showing posts with label Kathy Jones. Show all posts

Friday

Power & Spark: Be Thankful!

Hello sweet peeps and happy Friday! This one is extra special because being the first Friday of a brand spanking new month, it means we have a brand new Power & Spark Challenge coming your way. This one is being ushered in all the way from the Land Down Under! That's right.... Ms. Kathy Jones is our hostess with the mostess and she has the most perfect of challenges for us all!


HOW TO PLAY: Here in the United States, November is a month full of thanksgiving, so Kathy is challenging us to funnel all of that gratitude into our next creative pursuit! Here's what Ms. Kathy had to say about the challenge!

“Hello Everyone!!  I'm excited to be bringing you this month's Power and Spark Challenge which is a Thankful Challenge!  As you know I'm an Aussie, which means that we don't have Thanksgiving here as that is a uniquely North American holiday, but that doesn't mean we don't have things to be thankful for! I am and will always be thankful for my dear hubby and gorgeous children, my parents who have always been there for me and my bestie who has been through the highs and lows beside me for the last 30 years.  November also brings the 97th Birthday of my Grandmother, a very, very special lady in my life, who I will always adore and be truly thankful and blessed to have in my life.  On the world calendar, November 11, 2018 brings the 100th Anniversary of Armistice Day — a time to reflect and be thankful for all those who have and are still serving for our country. So what are you thankful for? Play along with us and make a Thank You or Thanksgiving themed project and link up below!”

On to my creation...


I'm also thankful that here Down Under, it is Spring!  So I've reached for Flower Bomb and made it very large, added the sentiment at the top and printed it out and coloured it with a range of Copics. It really doesn't need much embellishing at all as those beautiful blooms are taking center stage, so I've matted it with some cream card, added a pink base with a border punch bottom and a few enamel dots to accent."

Thanks Ms. Kathy for sharing that showstopper full of gratitude! With that kind of inspiration at the forefront, don't you just want to run to your craft rooms to create a card full of thanksgiving? I know I do! So, all you need to do is create a card with a thankful theme and then link up your creation below. Just that simple folks! And then, at the end of the month, we'll pick one random and lucky winner from the challenge and thank them for playing along with a $50 gift code to the Power Poppy Shop!

THE OFFICIAL RULES:


  • Use Power Poppy stamps if you have them. If not, it is a great way to win some.
  • Link your creation below using our Linky (please use the exact URL from your post instead of a generic blog address.)
  • Please mention Power Poppy in YOUR blog or gallery post with a direct link back to this challenge
  • The winner will receive a $50 SHOPPING SPREE TO THE POWER POPPY SHOP
  • Enter as many cards as you’d like, as long as they fit the theme of the challenge
  • Deadline to enter is November 30 @ 8:00 PM EST. At that point, we’ll draw the winner randomly and make the announcement right here on the first Friday in December!
    .....................................................................

    Moving on! Last month, Ms. Tosh challenged us all to celebrate our birth month with the "It's Your Birthday Challenge!" Did you play along? Well, if you did, pay attention sweet folks because we are about to draw the winning entry for a $50 Shopping Spree to the Power Poppy Shop! Are you ready to find out who our lucky winner is? Before I draw, be sure to click HERE  if you missed out on the fun and want to check out all the amazing entries!

    So Random.org stirred it all up and drew...

  • That means the winner of our October Challenge is.....

    *** CHAR OF GLITTER IN MY KITCHEN! ***

    If you wanted to check out Char's beauty of a project, don't worry, we're going to share! She used just a part of Power Poppy's Everything's Rosy digital stamp set to whip up this creation that is just downright happy — perfect for our birthday challenge, celebrating her birth month of May! I love the mix of patterns and all that happy color.


    Thanks to Char for playing along! You are the lucky winner of a $50 shopping spree to the Power Poppy Shop! Just email us at bloom@powerpoppy.com and we'll go ahead and send your winning code right to you!

    Now that's not where the fun ends! We have a handful of Bloomies who would love to share some eye candy with all of YOU!


    Stop by, say “hi” and give a little love to these wonderful ladies!
    Thanks all for stopping by and spending a little bit of your day with us! Be sure to check back in on Monday! That's when the oh-so-talented Elizabeth Zaffarano will be in the house to share some creative tidbits for our next Inspire Me Monday.

    See you then my friends!
    ~Julie  


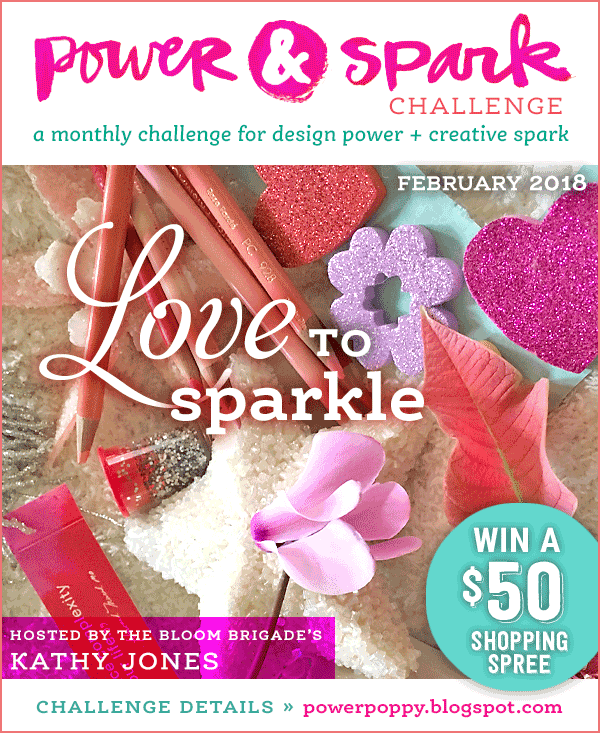
    February Power & Spark: Love to Sparkle!

    Hello everyone and welcome to a post that is just bursting with razzle and dazzle! It's the first Friday of February, which means it's time for a brand new Power and Spark Challenge! Can I get a woot-woot??? This month, our hostess with the mostess is the fabulous Kathy Jones. We all know that February is the 'Love' month with Valentine's Day in the middle - so she's decided to take it a bit further and challenge us all to......


    HOW TO PLAY: We'd love to see what you can make with either a Love theme or a Sparkle theme or combine them into a card that shows off BOTH!

    Need a little inspiration? Well Ms. Kathy doesn't disappoint! She used the brand new digi image Rose All Day and matched it up with a sentiment from Soothing Sympathy (How could she resist using a  sentiment that said 'Love and Light'?) and then she packed it full of sparkly goodness with glitter paper, rhinestones galore, some glitter deco tape and even touches of sparkly Spica pen on the bees wings!!

    Check it out!


    Isn't that creation divine? Well, now it's your turn to take Kathy up on this challenge and show us all how you sparkle with LOVE!

    THE OFFICIAL RULES:
    • Use Power Poppy stamps if you have them. If not, it is a great way to win some!
    • Link your creation below using our Linky (please use the exact URL from your post instead of a generic blog address.)
    • Please mention Power Poppy in YOUR blog or gallery post with a link back to THIS challenge!
    • The winner will receive a $50 SHOPPING SPREE TO THE POWER POPPY SHOP!
    • Enter as many cards as you’d like, as long as they fit the theme of the challenge!
    Deadline to enter is February 28th @ 8:00 PM EST. At that point, we’ll draw the winner randomly and make the announcement right here on the first Friday in March. 

    - - - - - - - - - - - - - - - - - - - - - - - - - - - - - - - - - - - - - - - - - - - -

    So, drum roll please, time now to draw that winning name from our January Power & Spark’s Grab A Map Challenge! If you missed this month's entries, you have to click HERE to see them for yourself... so MANY wonderful executions of the Page Maps designs. I absolutely loved seeing all the takes on the different sketches -- so much creativity and beauty! Thank you ALL for entering your cards with us.

    Now let's get to that winner, shall we? After random.org put all of the names in the virtual hat, the number drawn was....

    That means our winner is....  HEIDI FROM MY LITTLE STAMPING BLOG! 

    Heidi's creation was so vibrant and spunky, I just had to share! Don't you love that mod decorative paper and how she so fabulously incorporated those same cheery colors in her colored up budgie? I do! Just in case you wondered, Heidi used Power Poppy's Short Stacks stamp set!


    Now, if you want to see the project in full glory all you need to do is visit Heidi's blog HERE and check out the details! Thanks for playing along Heidi and CONGRATS! You've won a $50 Shopping Spree! Contact us at bloom@powerpoppy.com and we'll send you your shopping code!


    Well, fine friends, it's time to make the rounds to check in a few of our ab fab Bloomies! Pop by these blogs for a little inspiration and know that we just can't wait to see what YOU create with our challenge!!


    And when you do create that marvelous creation, don't forget to link it up below with your name and an exact link to your blog post! Thanks so much for stopping by and spending a little of your day with us. We hope you have a wonderful and crafty weekend ahead, and we’ll see you back on Monday with a brand new digital stamp introduction....

    Until next time!
    Julie 


    Saturday

    Day 9: Christmas Cracker & Place Card


    Hello Everyone! Kathy here today with Day 9 of our 12 Days of Christmas extravaganza! If you are just joining us, you have some catching up to do! We are already at Day 9, so there are eight inspiring projects made by the talented Bloom Brigade that you won't want to miss!

    In case you missed it.... If you play along with us during any one of the 12 days and try our project at hand, link up your creation HERE and you’ll be in the running for our Power & Spark 12 Days of Christmas Challenge. You read that right: you’ll have 12 ways to enter. Play along once or try all 12 days for more chances to win a $50 shopping spree to the Power Poppy ShopWon't that get you jingling this Christmas?!

    Now what would Christmas be without the traditional Christmas Cracker ---- or Christmas Bon Bon as they are often known by here in Australia!  Hands up who wears the goofy tissue paper crowns on Christmas Day......I know there are more of you out there!!  ;)  You can either buy the pre-cut Cracker or even cut one yourself using a template or a Silhouette download.  I found a kit at my local store (yes it comes with the goofy tissue paper crowns) with the snaps, glitter and even jokes - but hey you can always print your own and even add special gifts inside!


    Construct your cracker and then find some Christmas patterned paper and ribbon to tie the ends (with all your goodies inside).  Cut the paper to size and adhere to the middle of the cracker.


    Stamp your chosen image - I've used Under Glass: Christmas Traditions - and colour with your favourite colouring medium.  I've stamped this fabby tree in Memento Tuxedo Black onto Blending Card and coloured with Copic Markers and then fussy cut the tree.  I've also cut a piece of golden brown card using Lacy Ovals Nestabilities and popped the tree up on foam tape.


    I've then adhered the decorative panel to the middle of my cracker...


    Since I was getting all crafty, I figured why not make a quick, matching place card!  Simply take a piece of white card, punch the bottom with a border punch and fold in half.  Add a piece of red card and add some sparkle with Glitter Tape.  I've added a white oval die cut (to write the name on - I would have done that but my writing is AWFUL, so I spared you that!) and then stamp the tree from Under Glass: Christmas Traditions, colour with Copics, fussy cut and pop up on foam tape!

    Are you singing carols, dreaming of a white Christmas (or a hot beachy Christmas for those of us in the Southern Hemisphere), wearing holly in your hair and got itchy fingers and can't wait to play along with our 12 Days of Christmas Challenge........then get creating and link your creation up HERE!  Whether you make a Christmas Cracker / Bon Bon, Place Card or any of the amazing projects that the Bloomies have created over the last nine days you can play along and are in with a chance to WIN!

    I hope you've enjoyed these super easy and very quick Christmas projects and don't forget to pop back in tomorrow for the next gorgeous idea for your home!

    Merry Christmas!
    ~Kathy~

    Friday

    Sharing Nothing but GOOD Vibes!


    Hello peeps! Welcome to another fun-filled Friday here on the Power Poppy blog when we fill your basket of life with a handful of goodies for you to take in, ponder and hopefully let blossom somehow in your day! In today's Good Vibe 5, are you ready for a little trip? We head to the 'Great White North' for a little escapade with Bloomie Christine on our first stop! 

    GOOD VIBE 1 


    Goodness gracious, will you look at that canyon? What a picturesque gem in the heart of the Canadian Rockies! Now, that you've taken in that sight, you have to check out Christine Okken's  "people" on one of the bridges while on a hike through the Maligne Valley in Jasper National Park. Squint your eyes and you'll see those blond-headed beauties a.k.a. her three children! They are the only ones actually looking and posing for the camera! ;-) You might know this, you might not. But if you look at the Power Poppy team, most of us have been together in one form or another for going on 10 years. That means when I look at this picture and now see two legal adults and one that keeps growing? Oh, my! What wonderful human beings! Want to read more about this breathtaking view? Click HERE and maybe you'll be inspired to put YOUR hiking shoes on!

    GOOD VIBE 2


    I don't know about you but I would love to be a fly on the wall in Kathy Jones' stamping space to just watch her reach for colors and bring some of Power Poppy's images to life! That's why I love this image above. You get an up close and personal view of her in action! If you'd like to see how this beauty turned out using Power Poppy's digital stamp set Sunset Sway, I won't tease you any longer! 😀 All you need to do is click HERE!


    GOOD VIBE 3


    I am so sorry but I got the giggles when I found this post from Power Poppy fan Christina Dauven. It was filed under the caption, "How I feel every morning!" I'm with you, Christina. I am WITH YOU! I found my way to her IG when she hash-tagged Power Poppy on one of her projects. I thought this little photo above was the perfect reminder that IT IS FRIDAY FOLKS! Thanks Christina for the laugh!

    GOOD VIBE 4


    Okay, can I get a show of hands from all of you who remember when Twinkling H20s were ALL the rage? If you have absolutely no idea what I am talking about -- Twinks are those little shimmering paint pots that give a metallic edge to watercolored projects. I actually have a shoebox full! They literally last forever! And, thank goodness, because recently I was drooling over this project above by the absolutely fabulous Leslie Miller using Twinks and Power Poppy's stamp set My English Rose. Ahhhhhh! If you love to bring the bling then check out her post HERE and find ways to add a little sparkle in your own special way! 

    GOOD VIBE 5


    Can you even stand it -- the cute factor meter just broke with this photo above!! Meet Mr. Tibbs -- the official Power Puppy! I decided to make this little guy the Good Vibe #5 because studies show that taking a gander at darling puppy photos not only releases endorphins a.k.a. "happy feels" but actually helps your focus in your day. Yep. That's science folks, so by sharing this totes adorbs photo of Mr. Tibbs, I am just doing my duty to make you happy and smart! ;-)  By the way, if you wondered why Tibbsy has his little ears taped, I learned that these pups need a little help keeping their ears up as the cartilage hardens. As you can see by his "smile" -- he doesn't seem to mind a bit! 

    There you go folks, a touch of nature, a bit of color inspiration, a way to bring a bit of bling, a little bit of funny and a whole lot of cute = Good Vibe 5! 

    Now it's time to take this show on the road with a bit of a hop!


    Stop by and see these wonderful ladies and the creativity they whipped up this week just for you!


    Thanks for stopping by! Be sure to swing back by on Monday when Jessie Banks will be here for another Inspire Me Monday! She's going big and showcasing one of Power Poppy's larger than life images by taking it to a whole new color level!

    Have a great weekend!
    ~Julie

    Monday

    Cute Little Lunch Notes!


    Hello Everyone and welcome back to another Inspire Me Monday! If you've been browsing around Pinterest, you may have come across handmade Lunch Notes - little messages for your kids when they open their lunch boxes (or perhaps your hubby??).  Since I have 3 kids of my own and two still in Primary School (I've been told by the High Schooler, under NO circumstances am I to slip one of these in his lunch box) that I would have a go making these myself!

    I've grabbed the Sassy Succulents stamp set by Power Poppy, a Memento Ink Pad, X-press It Mask It and X-press It Blending Card.

    I wanted to overlay the images and Mask It is perfect for the task!  A great way to create a mask that you can use over and over is to stamp the image you want to mask onto X-press It Blending Card, then remove the backing sheet and place the Mask It over the top.

    While the Mask It is over the top, use a pair of sharp scissors to fussy cut very close to the edges.

    Next stamp the same image onto another piece of Blending Card and then peel off the Mask It shape and place it over the top.

    Ink up the other stamp you want to use and stamp it over the top of the Mask It covered image.

    Peel off the Mask It to reveal the images.

    Colour your image!  I've used a variety of colours......
    Large Cactus - G12, G24, G28
    Large Pot - E93, E95, E97, E99
    Small Cactus - YG21, YG93, YG97
    Small Pot - B00, B12, E93
    Pebbles - C1, C3, YG93, E93, 0

    Why not use the tips in my last tutorial about shadows and note how the pot in front has left a cast shadow on the one behind!

    Cut the card to size and either write a message to your sweetie or use a suitable sentiment stamp.  I really like this sentiment in the Sassy Succulents set and thought it would be perfect to remind a child that they are perfect the way they are!  You could simply mat this with a piece of coloured cardstock, but if you can frame it with a pretty diecut.....why not use it!


    I hope you've enjoyed today's tutorial! Why not surprise those you love and leave them a little message in their lunches - I bet you'll make their day!

    Have a great week!

    ~Kathy

    Let's Talk Shadows


    Hello Everyone!  Today I thought we'd have a look at shadows, in particular to to create cast shadows!  What are "cast  shadows?"  They are the crisp, non-blended shadows that occur when an object blocks the light source.  These shadows are like shape it comes from - for example, walk outside on a bright sunny day and look for your shadow.....this is your cast shadow!  These shadows are darkest near the object and lighten as it moves further away.

    Let's have a look at how to create them! Stamp any image that you like.  I have used Power Poppy's Lavender stamp set and stamped the bucket of lavender several times to make a sample sheet.


    First step before you start to colour is to decide on where your light source is coming from!  An easy way to do this is to draw some lines on a piece of acetate and lay it over your image.  Remember the angle doesn't have to be sharp or high.

    Once I've decided on where my light source is coming from I've coloured the first bucket.  For this image I've made the light source come from the front side and used Copic E93, E95, E97, E99, E19 to colour the bucket.

    Change the light source for each image and colour them all!

    Now imagine that if the light is coming from one side and the bucket is blocking the light to create a cast shadow, then the shadow will fall on the opposite side.  A lot of people like to colour images with a front/centre light source (see the first bucket), however you really won't see the shadow from that angle as it will fall directly behind and out of view of the reader.  Also note that if the shadow is high over head then the shadow will be shorter, if the light source is lower, you'll get a longer shadow.  Once again, think of walking outside, in the middle of the day your shadow is very close to your feet, later in the day it will stretch out in front or behind you.

    Colour all your shadows paying attention to your light source.


    I hope you've enjoyed today's tutorial and have some fun creating cast shadows on your own creative projects.  Why not leave a comment on this post with a link?  We'd love to see what you create!!

    Happy Colouring!Kathy  :)

    Colouring Water


    Hello Everyone and welcome back to another Inspire Me Monday Tutorial! These tidbits were shared over on the Copic Oz blog and colouring water is something that I thought everyone could use a little creative advice on. So, today that is what I'm focusing on using this pretty vase of Azaleas by Power Poppy.

    To start, I stamped the image using Memento Tuxedo Black onto X-press It Blending Card.


    Next I've laid down a base of Colourless Blender "0", which makes your next colour a bit softer and easier to blend because the paper is 'primed'.


    Then I've used B0000 to colour in the water.


    I've then flicked in B000 from each side.


    I've then used the Colourless Blender again to go over the middle to lighten it up a bit.


    To colour the rest of the vase, I've used C1 in the shaded areas at the top and the sides of the vase at the bottom. You can also add a little down the very edges of the vase to help give the illusion of the vase curving.


    I've then added C3 to the shading at the top of the vase and a little B0000 as reflected light at the bottom.

    To give that translucent effect to your image, add some clear glue over the top of the water!  It will be raised for a little bit until it dries.


    (I've only used the light colours on the stems and leaves in the vase and then lightly went over it with the Colourless Blender before adding the glue.)

    Colours used for the rest of the image are:
    Flowers - RV000, RV52, RV55, RV66
    Leaves - G20, G21, G24, G28, E21

    Hope you've enjoyed today's tutorial and if you are colouring some water, why not link up your creations in the comments below, we'd love to see what you create!

    Happy Colouring!

    ~ Kathy  :)