While I’ll get into the inspiration and how-to’s for my card today, I'm also going to share the strategies I’ve been using to tackle big coloring projects - like this big pile of poppies! So if you’ve ever needed to color a set of images over and over again—perhaps to make a set of note cards, place cards, bookmarks, or tags, but thought it’d be too difficult to keep track of colors, or would just take too long: this info is for you!
So, I had my inspiration. And I had the gorgeous Poppies stamp set in mind. But to make a poppy-covered wreath, I would need to color a whole bunch of blooms!
First, I devised a color scheme for my flowers. I wanted to recreate the iconic red Flanders poppies, so I found some images (right here on this blog! ), and saw that "red" poppies are actually shades of persimmon, with scarlet shadows and highlights of flame. I pulled enough markers from my collection to cover natural variations among the petals, and then I created a labeled sampler for reference. I usually stick it right to my coloring sheet, so it never gets lost.
I cut up some white card stock and used my MISTI to stamp at least ten of the larger poppy images from the set. I like to use a clipboard whenever I color because I find that I can hold and turn it to get the best angles for my strokes. As I chose three flowers per stamped image to color (so at least 30 flowers!), it was simpler to color first, then fussy cut. I could fit four stamped poppy clusters on the clipboard at a time.
To keep the cut cardstock pieces in place while I’m coloring, I have been using Tombow’s removable adhesive (in the green dispenser). It holds well enough and rubs off easily and completely when finished. I have used this for stamped/die-cut images too, as I prefer to color after die-cutting.
With four sets of flowers on my board, I was able to refer to earlier coloring choices as I completed sets of flowers. So I could choose to go darker, or lighter, or redder or more orange as I worked. In other words, a nice amount of “poppy” variation, but staying within the range of my palette.
A side benefit of this set-up -- I was able to try out different coloring approaches, and compare them side-by-side. For example, I colored a few flowers with an “under color” of YR000, then started in with my shadow colors (R59, R39). For other flowers, I started with my mid-tone red (R24), then went to shadows and then highlights. Other flowers got some final swipes of Y15 to pull out a brighter edge. Also, notice that my color palette now has more shades listed than when I started! I also ended up not using a couple of the colors I had originally chosen.
The centers of the flowers were filled with dark grey (BV29) and a few dots of black (110), and a bit of maroon (R89) and deep purple (V09) at the very center. I stippled colorless blender over top to add texture and keep the centers from looking like a shadowy mass. Then I topped it all off with a white colored pencil, to bring out the fine details.
As I finished coloring a flower cluster, I’d peel the card stock off of the clipboard, and then rub off the removable adhesive. Once I had made a stack of these colored panels, I grabbed some scissors and started fussy cutting. As I cut a batch of flowers, I used a Memento marker to finish off the edges.
I also took some scratch paper and started tracing some of my circle dies to get an idea of how big I wanted my poppy wreath to be. I arranged my first cut batch of flowers on the sketches so I could plan the layout for the rest of the wreath.
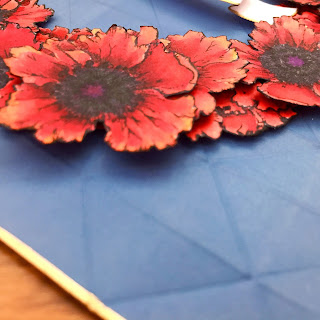
Then I cut a proper wreath base from some dark orange cardstock and adhered everything down. I used a few foam squares to add depth. Believe it or not, I only needed to cut apart two of the smaller blooms to fill in a few gaps. When I was satisfied, and everything was secure, I set the wreath aside and got to work on the remaining components of the card.
For the background, I wanted sharp edges and angles that would contrast with the organic shapes present in the wreath, something reminiscent of a medal display. I started with a 6" piece of white cardstock. Since the poppies are a such a vibrant red, I was looking for less saturated colors to use as the background. Turns out Distress Oxide ink in Faded Jeans, blended with a foam tool and very lightly spritzed with water, made the perfect matte blue to go behind my poppy wreath. I added some subtle texture by embossing the inked paper with a folder from WRMK. The repeated triangles in the design reminded me of folded flags. I trimmed the embossed square to 5 1/2”.
I used the Krylon pen again to add a gold edge. I attached the wreath to this background with glue dots and then used a tape runner to adhere the whole thing to an 110# card base.
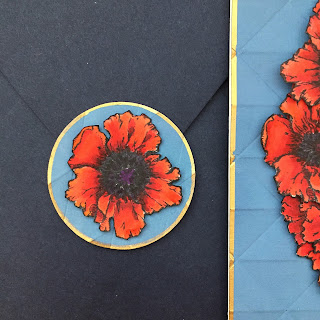
There was just one poppy bloom leftover, so I used it to make an envelope seal from a scrap of my background.
Whew! I hope you enjoyed reading today, and are feeling more ready than ever to tackle a big coloring project, or maybe you are inspired to make a patriotic card of your own, or even play around with a flower wreath. Please, feel free to ask questions in the comments!
Have a wonderful week!
Elizabeth
Supplies Used:
stamps: Power Poppy (Poppies)
markers: Copic sketch (BV29, R05, R14, R24, R29, R37, R39, R59, R89, Y15, YR000, YR07, V09, 110, 0), Memento (Tuxedo Black)
colored pencil: Faber-Castell Polychromos (white)
dies: Simon Says Stamp (Tilted Banner die)
ink: Ranger Distress Oxide Ink (Faded Jeans), Memento (Tuxedo Black), Krylon (18kt gold leafing pen)
card stock: Neenah Classic Crest (Solar White 80#, Solar White 110#), Paper Source (Persimmon 80# cover, Night 5.75" envelope)
embossing folder: WRMK (Next Level embossing folder - geometric)
tools: Minc mini, Minc foil (gold), MISTI, Tombow Removable adhesive, glue dots


