Showing posts with label 12 Days of Christmas 2020. Show all posts

Sunday

Giveaway Winners Announced

Hi friends, it’s Marcella.

First of all, THANK YOU from the bottom of our hearts from your WONDERFULLY THOUGHTFUL comments, your stops by the Power Poppy Shop, and your careful CASE's of our Bloomies. What a fun week, with some truly inspiring holiday cards.

I have some exciting news to announce: The winners of the 12 Days of Christmas, and I'm thrilled to award prized to 13 participants over $250 in giveaways. Here we go!

  • GRAND PRIZE: $100 SHOPPING SPREE - HenriĆ«tte Mulder
  • $5 e-Gift Card - Sarita Pyke 
  • $10 e-Gift Card - Mary Anne Fellows
  • $15 e-Gift Card - Sally Dold 
  • $20 e-Gift Card - Pamela Renfroe 
  • FREE US Shipping ($4.50 value) - Gina Linville 
  • FREE US Priority Shipping ($8 value) - Diane Burton 
  • FREE Digital Stamp Download ($6 value) - Cindy van Oorschot 
  • 2 FREE Digital Stamp Downloads (up to $12 value)Debbie A Smith
  • 3 FREE Digital Stamp Downloads (up to $18 value) - Heather Mills
  • FREE Clear Polymer Stamp Set (up to $24 value) - MaryannG / maryann-scrap
  • FREE US Shipping ($4.50 value) - Sue / Suesstampingstation
  • FREE US Priority Shipping ($8 value) - Teresa L Quinn

TO REDEEM PRIZES: Please contact me at bloom@powerpoppy.com and let me know you're a winner, and I will get your prize delivered to you or your email inbox right away!

Thank you each and every one, and Merry Christmas to you,

Saturday

Twelve Days of Christmas - Day 12: Mossy Pots with Paperwhites!

Hello Friends! Welcome to the 12 Days of Christmas December Challenge and here we are at Day 12! I'm Nancy Sheads and today I'm featuring an image from the Mossy Pots with Paperwhites: Accent Pieces Digital Stamp Set. This image is also available in the Mossy Pots with Paperwhites Clear Polymer Stamp Set

First - let's take a look at this beautiful digital stamp set! I love paperwhites and so this was a natural for me to color. As Marcella says - they are so dainty, fresh, white, and bright! So how could I resist?


Today's project features:


DIRECTIONS

  • Cut card base from from a heavy weight white cardstock to 4.25″ x 11″ and score at 5.5″ for a top fold card.
  • Cut pattern paper to 3.75" x 5"
  • Cut solid card stock to 3.25" x 4.5"
  • Print digital image on paper appropriate to your coloring medium. If you need help printing a digital image see Julie's blog post HERE or my YouTube video HERE.
  • Color image. I used Copic markers and my marker list is shown below.
  • Trim image layer to 3" x 4.25"
  • Adhere image layer to center of solid card stock.
  • Apply craft foam or foam strips to back of solid card stock.
  • Adhere to center of pattern paper.
  • Adhere card front to card base.
  • Add sentiment if desired.


  • Does it look like something is missing? Yeah - I didn't add a sentiment to the front of my card. I may add one at a later date when I send the card, but as it is now, it's suitable for any occasion - holidays, birthdays, anniversaries, etc. So by adding the sentiment later, I can tailor it to the recipient and occasion.

    I previously posted a project using the other image from this set. You can take a look at it HERE.

    If you missed any of the days of our fun little Power Poppy 12 Days of Christmas extravaganza, just click HERE to scroll through all the days and.... get ready to be inspired! 

    Thanks for stopping by!

    SUPPLIES

    Friday

    12 Days of Christmas - Day 11!


    Hello Everyone! 

    It's the penultimate day of our 12 Days of Christmas here at Power Poppy - DAY 11! Its me Jenny Colacicco and I'm thrilled to be joining you here on the blog today to share some more Christmassy goodness featuring the gorgeous and hilariously punny Season's Greenings stampset.  Ally already shared some beautiful inspiration using this set that comes in both clear and digital versions, (in case you missed it you can check it out here).


    I'm going to be watercoloring my card today and have a few behind the scenes process shots to give a little insight to my card creating.  This is a fully one layer card so great for mailing too!


    I first stamped my image using a watersoluble ink as I'm doing 'no-line' watercolor -  I want the outline to blend in with my coloring rather than being a stark outline.  I typically use Distress Ink for this.  There are other 'no-line' inks that are also great such as Amalgam from Gina K or Barely Beige from Simon Says Stamp, but Distress seems to be my constant go too. I use a stamp positioner to stamp - particularly when stamping on watercolor cardstock (I'm using Arches hotpress) which is textured -  the positioner lets me stamp a couple of times to get a clear impression.  Im using Old Paper Distress ink. 


    When I do no-line watercoloring on small detailed images I like to use small brushes - I'm using a 00 round (and I might go up to a 2 round for larger areas) which helps me control the paint and add my outlines where I want them.   I focus on each 'item' at a time, outlining the image with my brush where there would be shadow,  pulling out the coloring with a damp brush and then building up layers and shading. 


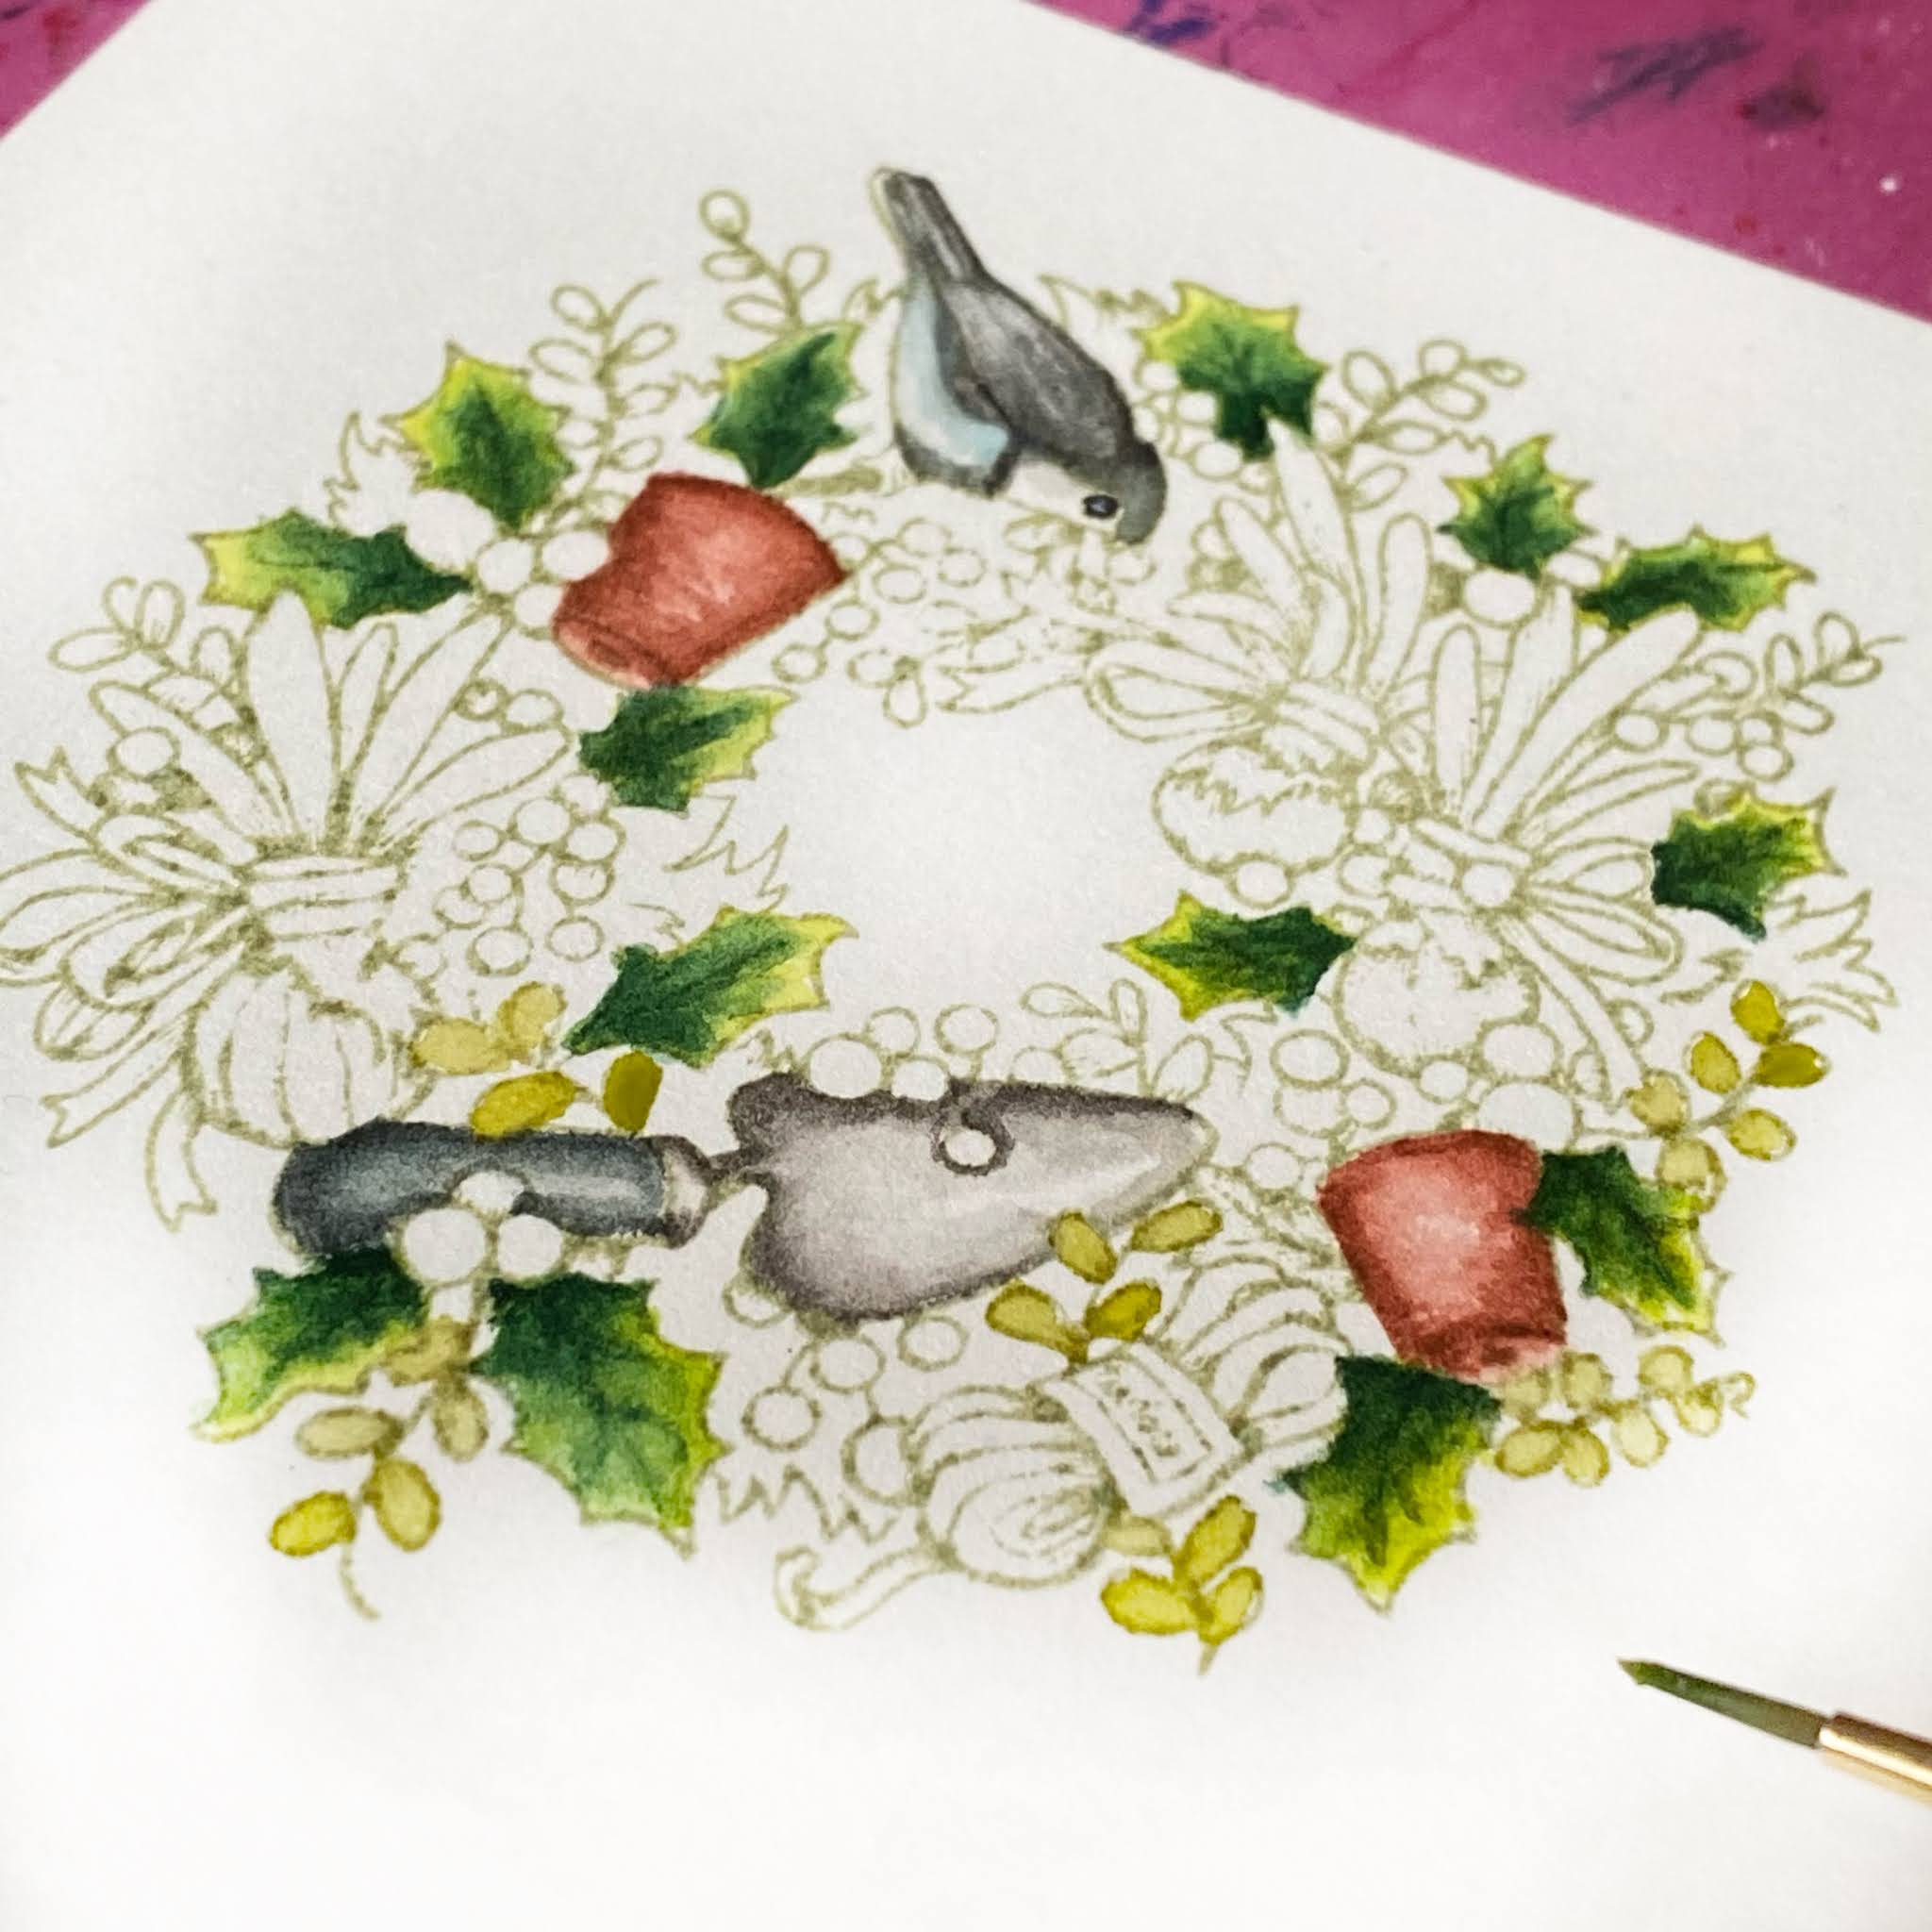
    I'm using pan watercolors from Altenew for my watercoloring.  I particularly like to have pans so I can stamp my image, set it on a clipboard and then sit down in front of the TV one evening to color!   Here's a close up of the wreath itself. I just love that little chickadee perched on the top of the wreath.  You'll see I free handed a hanging hook from the wreath up to the top of the panel too.   I wanted to give a sense of an outside door.


    I also stamped the bird from the set down at the bottom of the scene as if he was talking to the little guy on the wreath, and shaded in the background and ground loosely to ground the bird and the wreath.  


    I flicked white paint over the panel when dry for some snow in the scene.  To finish, I heat embossed the sentiment in Metallic Copper embossing powder (from WOW! Embossing).  It's a little hard to see in the photo but I added a few clear Nuvo Crystal Drops to the berries for a little dimension.


    And don't forget...!


    ALL DIGITAL STAMPS 20% OFF — NO CODE NEEDED 

    and

    10% OFF CLEAR STAMPS — USE CODE 12DAYS

    - - - - - - - -

    Wanna WIN some amazing prizes?  


    Be sure to head to the Day 1 post on the Power Poppy Blog, HERE for more details on the 12 Days of Christmas fun and frolics!   Stay tuned for the final day tomorrow and enjoy!  Stay safe and happy holidays everyone!

    Jenny 

    Thursday

    12 Days of Christmas Day ~ 10


    Good morning and welcome to day 10! Stacy here to share gift tags for the season. You can add a little extra something special to any gift with a homemade tag. It tells the person that you really want to show them how special they are and I believe they don't have to be elaborate to be sweet and thoughtful. So let's get started... 

    I am working with Mossy Pots with Paperwhites since I knew the balls and little flower in the set would be perfect for tags. The sentiment would be pretty easy for any gift and anyone really, so versatile I think. No need to fret if you have not gotten the stamp set yet. Marcy has two different Digi versions you can work with until then. 

    Mossy Pots with Paperwhites: Tureen


    Mossy Pots with Paperwhites: Accent Pieces

    First thing I always try to do is pick the colors and die shapes.  Let's work with the colors first. Using designer paper usually helps pick the color theme. You can go traditional or light and fresh. As you can see I choose light and fresh for both sets of tags. I picked two different papers but kept with similar colors so the ribbon would go with them all.  


    Next would be the die cut shapes that I wanted to use. They both use the similar die shapes but I switched up the designer paper and the solid for each one. Each one of these the little ball ornaments from the stamp set or digi version is colored with various Copic markers. I then delicately cut around them and added a dimensional to the back so they would pop up off the tags.

    These round ones have added flourished pearl accent to the one on the left, where as the right one has an embossed snowflake die and sparkle for texture. Tied the ribbon and button to the top and added sparkle all around. 


    Then my other two same thing but instead of the flourished pearls it is rhinestones. Same embossed snowflakes with sparkles to the left one. See they are all pretty simple but sweet and make a thoughtful addition to any gift. 


    Be sure to check back on Day 1 for details of our SALE, Case A Bloomie and all the PRIZES


    I hope you have a Merry Christmas and enjoy all the blessings of the season. 
    See you back here tomorrow as Jenny has a wonderful surprise for you. 
    Have a wonderful day! 

    Wednesday

    12 Days of Christmas - Day 9!

    Hello all! Hope these 12 days of Christmas the Power Poppy way are just making your heart bubble with holiday inspiration! I am popping on the Power Poppy Blog today for DAY 9 to share some clean and classy creations from Christine Okken. We all know that Christmas cards can prove challenging when it comes to layers and postage and just getting a larger creation in the mail. So, Christine is peeling the layers back, literally, to show us you can have a "WOW" creation without a ton of extras. And, to make it even easier, she used one stamp set --  Cuddle in the Cabin -- to create 4 different and beautiful cards.

    Let's first take a peek at this beautiful set! Its imagery is so serene with a retreat in the woods just sitting and waiting for you to enjoy! What's wonderful about this set is that there are so many interchangeable scenes that you can create with just this ONE set! 


    For those who love digital sets instead of clear, GOOD NEWS! These images are available in digital format as well HERE! 

    So, let's get right to the magic that Christine created! 

    CARD 1


    In this creation, Christine stamped the tree from the set multiple times using Rustic Wilderness Distress Ink on watercolor paper. Now, here's the fun part. She used a water brush to drag down the color from the ink to ground the images and give it so much depth. Brilliant! Add a little torn-edge on the paper, a wee bit of bling and you have a card that just screams classy! 

    CARD 2


    This creation is not only a breath of fresh air with those cool tones, it just underscores Christine's artistic talent. First, she stamped the sentiment from the set onto watercolor paper, added some color to the open block letters with some watercolor and then, added the watercolor pine branches to form a wreath by hand. I have never done this myself, but seeing how beautiful it is, I am tempted to try freehanding like she did! I am pretty sure I'd need to lightly trace a circle first before I started the handpainting. She used Daniel Smith Watercolor paints and then embossed the sequins to serve as the "berries" on the wreath from the Let it Glow stamp set. If you aren't brave enough to try hand painting, you could use the elements from the Enchanted Branches Nativity to try crafting a wreath with stamps! 

    CARD 3


    Well, it really doesn't get more simple than this beautiful creation above! Christine stamped the Be Still scene, colored with Copics and Prismacolor pencils and... ta-da! Fini! I love the visual effect she created by coloring in the sky to create that round effect above the mountainscape. 

    CARD 4


    I don't know about you, but I think there's something whimsical about stamping on dark papers and using light pencils or even bleach (as Christine did) to help create contrast. This card is the perfect example of that! Christine stamped and embossed the cabin from this set on navy card stock, painted bleach into the highlights and light sources for the moonlight and lamplight glow and then used white acrylic paint splatters to serve as her snow! She then used white ink for the sentiment (from the Let it Glow stamp set). The whole effect is soft and inviting! Christine did want to point out when using bleach, sometimes the bleach reacts differently with different papers. It's not a bad idea to test drive the bleach on a scrap before you begin. In this case, the effect is not white but more cream or light yellow, which is perfect for the glowing moon!

    I hope you've enjoyed these clean and classy and easy to replicate creations using, for the most part, just one stamp set! So creative and fun! 

    If you missed any of the days of our fun little Power Poppy 12 Days of Christmas extravaganza, just click HERE to scroll through all the days and.... get ready to be inspired! 

    Thanks for stopping by! 


    Tuesday

    12 Days of Christmas Challenge ~ Day 8: Joy to the World Bouquet


    Welcome to Day 8 of the 12 Days of Christmas December Challenge Event! It's Gloria with you today! 

    I am so lucky to be able to share the lovely Joy to the World Bouquet stamp set with you! This is my absolute favorite of the entire Quiet Christmas Release!
    For my release project I used the digital version of this set (See Below), but for today's project I decided to use the clear version. I don't stamp very often these days, so it was fun to actually get out some inks and have a play...and boy did I play!
    I had fully expected to color this image with Copic markers or with colored pencils. But, when I shared my original project with some folks, they all said, "That is very pretty, but I don't/can't color like that!" So I thought, maybe there are lots of folks who don't enjoy coloring or don't have the time to devote to coloring a complicated image like this one.
    I would like for everyone to feel that they can make this image shine! This image IS stunning colored with markers, pencils, or watercolor paints. But, I think it is just as stunning with a more simple inked background!
    I created a bunch of backgrounds FIRST, then allowed them to dry before stamping. For some of the backgrounds, I blended distress ink and other dye inks onto white cardstock panels with a blender brush
    For other panels, I used a wet technique. I smudged the distress into onto my craft mat, added water, then smooshed the paper around in the ink. I did several layers, drying in between color families.
    After allowing the ink to dry, I stamped onto the panels with various inks and embossed with various powders. Some of the examples turned out very well...others did not. But, that is the point of having a play! Sometimes it works, sometimes it doesn't.
    I chose a few panels that I thought looked the best, and decided to try to make some cards with them. I wanted to keep the cards pretty simple, and I wanted them to be mostly flat for easy mailing.
    I ended up making three cards, but I put the rest of the panels aside for further projects.
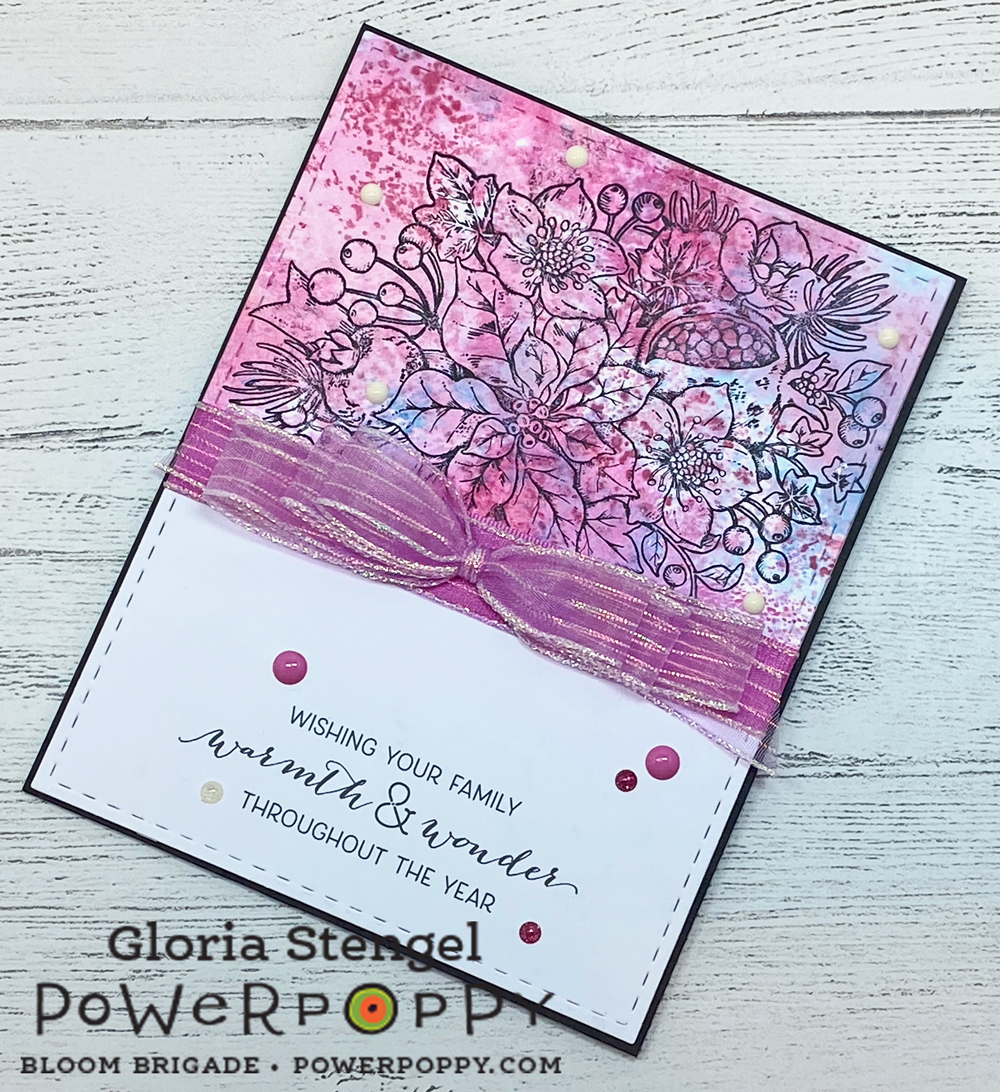
    This card is my favorite of all the cards I made! I used the "wet" ink technique to drag a white cardstock panel through different colors of pink ink. I allowed the ink to dry then repeated the process with blue ink and with a deep magenta ink.
    I love the speckled look of the paper! After the ink was dry, I stamped the image onto the panel with black permanent ink, which also needed to dry! (Watching ink dry is boring!)
    I printed the sentiment from the Forest Finds digital stamp set onto another piece of white cardstock. I used a die template to cut out the sentiment, making sure to line the die up with the bottom edge. 

    I then used the same die to cut my image panel to fit the top portion of the white panel. I added ribbon and a few enamel dots before attaching the finished panel to the black card base. I created a card base that is roughly 6" x 4 3/4", which is not a very standard size! I will have to make an envelope to fit! 

    The next two cards were made using the "dry" ink method.
    This version has a background of distress inks added to white cardstock using a blender brush. I layered on various pink and lavender inks and allowed them to dry.
    I stamped the image onto the panel with watermark ink, and then heat embossed with sparkly black embossing powder! I stamped the sentiment with black dye ink.
    You can see how the embossing powder sparkles. It is black powder with iridescent flecks in it. I flicked on some white paint to add some "snow," and the card is finished! This is a standard A2 card, and flat for easy mailing!
    I also wanted to try a blue and white version, so I repeated the process of using a blender brush to add various blue inks to a white panel. 
    I stamped with watermark ink and heat embossed with white embossing powder. This is a very detailed image, so you need to use a very fine embossing powder.
    I almost wish I had stamped the sentiment in a blue ink, rather than black. I created another A2 card, plus I added some sparkly enamel dots to the card front.

    You can print the digital version at any size you with. For my original project, I printed the image at just smaller than 10" X 8"!
    You can see how different the image looks at a larger size, and all colored in with markers and pencils. To see this version, click HERE.

    Remember, the 12 Days of Christmas December Challenge continues through December 12th!
    Don't forget to check out all the festive fun on our Day 1 post on the Power Poppy Blog, HERE.

    Merry Christmas!